
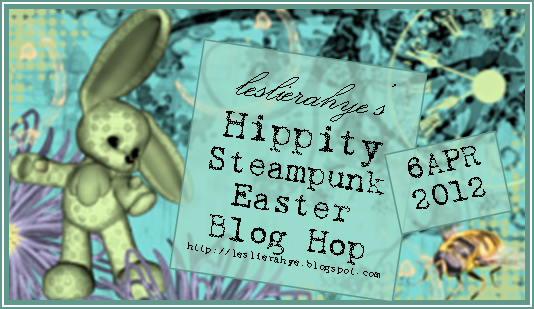
And the winner of the Hippity Steampunk Easter Blog Hop candy is ...
Jewels
Very cute bunny! I'd sure love to win! When we owned a home in Ohio I
spent hours going around Lowe's, etc..in an electric cart. Used to make
pot holders with copper tubing and wire...my, what they'd look like now!
This is quite cool! Thanks!
By Jewels on Welcome to Leslie Rahye's Hippity Steampunk Easter...on 4/6/12

I am so glad you stopped by. I made this Hippity Steampunk Easter Bunny for Leslie Rahye's blog hop this weekend. After spending some time (and money) at my local hardware store, I found some really neat things to add to this cute bunny. I had a blast shopping for the necessary pieces. Of course, I've always been a big fan of hardware stores.
I first covered a styrofoam egg with glue and multi-colored gold leaf. When dry, the fun began.
 I made bunny ears using two window screen latches, covered with pieces of adhesive-backed metal sheets that I had run through my Big Shot using Cuttlebug's Diamond Plate embossing folder. I felt the ears were not long enough for a rabbit, so I used Terri Sproul's technique for making her beautiful 3D Crystal Lacquer wings, but instead of wings, I made the bunny's ears. I first shaped copper tubing into ear shapes, then poured a mixture of powdered pearls and 3D Crystal Lacquer between the copper tubing shapes, and let it dry before attaching to the egg. I left the silver window screen latches in place as the bunny's inner ear.


I used four pegboard pliers holders for his paws, which I also covered with that same adhesive-backed metal sheet that I had embossed with the Diamond Plate embossing folder. I put two Tim Holtz swivel clasps together end to end, and wired alphabet beads together to spell "Happy Easter", which were added to the jump rings on either side of the swivel clasps, then placed in each of the bunny's front paws as though he his holding the sentiment.

I inserted a Silcock Key on his back to look like he needs to be wound up. Don't we all need that sometimes.


His little bunny tail was made from adhesive-backed metal that I adhered to gold cardstock which I die cut using Sizzix/Tim Holtz Mini Paper Rosettes die. I used both rosettes and stacked them for extra dimension. Had to add a sprocket gear and game spinner to his tail. I placed Tim Holtz sprocket gears along the side of the bunny's body, as shown. I also inserted copper brads all along his back side to look like rivets.
I have a little blog candy to give away to one lucky winner. All you have to do for a chance to win is post a comment on my blog, and become a follower. Due to postage costs, however, I can only send to U.S. addresses.

Thanks so much for visiting, and I hope you enjoy the hop.
steampunky cuteness!
ReplyDeleteBarbara, your bunnypunk is so cute - looks like your put alot of heart into him, the results are stunning. Well done!
ReplyDeleteBarbara, I love love love this steampunk bunny, hope one hops over and is in my Easter Basket. I am already a follower of your fabulous blog, you are just to talented. TFS http://pammejo-scrapbookflair.blogspot.com/
ReplyDeleteThat bunny is so stinking cute. He should be in a little animated steampunk Easter film with Susan's little chick as his side kick. You are incredibly creative. Love it and looking forward to your next project now that I am following.
ReplyDeleteKathyJo
What a great bunny! So cute, I too love the hardware stores ;)
ReplyDeleteWhat a GREAT STEAMPUNK BUNNY!! LOVE IT!!! What a lot of imagination went into this project! Thanks for sharing.
ReplyDeleteCute bunny :) I love hardware stores too!
ReplyDeleteVery cute bunny! I'd sure love to win! When we owned a home in Ohio I spent hours going around Lowe's, etc... in an electric cart. Used to make pot holders with copper tubing and wire...my, what they'd look like now! This is quite cool! Thanks!
ReplyDeleteoh my goodness this is precious!!! I LOVE him! Super job...I'm thinking I need to go check out what's in the garage today while the hubby's away! lol! Thank you for being a part of my hippity steampunk easter blog hop!
ReplyDeletevery cute! I love the wind-up key. what a great idea.
ReplyDeleteLove the tail, that is my favorite part!
ReplyDeleteI love this the colors and the different pieces of findlngs and yes I also love hardware stores so pretty great job
ReplyDeleteWOW you emptied the entire tool box! I think I like his tail the very best!
ReplyDeletesimply LOVE it! Great work Barb!
ReplyDeleteOh he is so fun! I like how you tied the steampunk theme in to easter. That is a lot of work. I think you had fun tho!!
ReplyDeletehttp://www.KristasPaperCafe.com/
Precious!!! You did an awesome job for this hippity hoppity bunny!
ReplyDeleteWhen I saw this it put a big smile on my face. Love it! TFS
ReplyDeleteNow that is the cutest Bunny I hjave seen this Easter. Adorable
ReplyDeleteGreat bunny I'm sorry I thought your card was part of the blog hop, great bunny ! X Fab
ReplyDeleteOh, this steampunk bunny is incredible! Warning! Warning! Will Robinson! Easter is steampunked!
ReplyDeleteOh my gosh...I would love to have a bunny like this for my shelf.
ReplyDeleteYou did an awesome job.
Fabulous bunny!!
ReplyDeleteGreat creation!
ReplyDeleteAdorable steampunk bunny .. so unique. Love all the parts and pieces you use, purchased at the hardware store. I would not have known he is Styrofoam .. looks totally metal!
ReplyDelete