
Hello everyone. Barbara here again, and I have a cute little brag book to share with you today, using those wonderful papers and embellishments from The Robin's Nest. My post is a bit lengthy today, but I am really excited about this little book because, while I was making it, so many possible uses came to mind, and I have so many points to make. So let's get to it.

After cutting all of your papers as shown in the diagram below, adhere double sided tape to the tabs.
 |
| Double sided adhesive to tabs |
On the cover piece (the one with only three thumb cutouts) you will add the closure flap for the front cover, as shown below. It attaches to the inside of the pocket page where there is no thumb hole.
 |
| Closure flap for front cover attached upper right |
Adhere the tabs to the pockets, as shown. NOTE: If you remove only a portion of the adhesive liner and let it hang outside the area to be taped, you can easily line up the paper edges and then pull the remaining liner away to finish adhering the pockets together.

Now you have two pocket pages. The outer pocket page has a wider spine so that you can adhere the inner pocket page inside, gluing both spines together. The picture below shows where I have placed a 1/8" strip of double sided adhesive down the spine on the inner pocket page. I found that I needed a bit more glue for sturdiness, so I also added some Helmar 450 Quick Dry Adhesive to the spine.

I also added a decorative spine cover that I cut out from some matching cardstock from my stash, and punched each long edge with a bracket punch.
 |
| Decorative spine cover |
Now for the closure. I found these chipboard shapes in my stash and wanted to use them on the cover. I embossed each with gold glitter embossing powder, then used the loop shape as part of the front closure. I remembered seeing a hitch fastener being used in a similar way, so after placing the chipboard loop on the front, I determined where I needed to add the hitch fastener to keep it closed.


Here is the result.

I further embellished the front with the key and a flower that did not match until I colored it with some picket fence (white) distress ink...
 |
| Left flower lightened with white distress ink |
Of course, it would not be complete without using my favorite embellishment, dew drops. In this case, the Mocha Trail dew drops fit the bill. I think it really adds to the piece. Simple tags were added to each pocket, and voila, you have the perfect little brag book to carry in your purse with your favorite photos of your children, grandchildren, pets, or in my case, my recent trip to Italy.
 |
| Center page with travel pictures |
 |
| Diagram |
 |
| Tag with gold glitter journal |
Robin's Nest Products Used: (with quick links below each image)
 |
| Mocha Trail Dew Drops |
 |
| Glitter Mocha Trail cardstock |

 |
| Glitter Gold Journaling |
 |
| Regency Clippies |
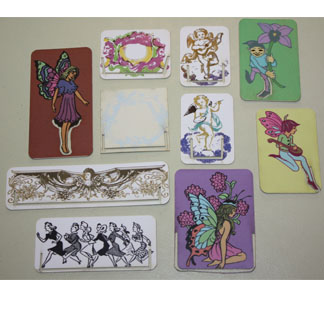 |
| Victorian Clippies |
This is such an easy book to make, and The Robin's Nest Papers and embellishments make it gorgeous. I am sure you will want to make more than one. How about a Christmas gift for grandma, a coupon holder, a note holder, a birthday reminder list, or even keep addresses and phone numbers in it, the sky is the limit.
Thanks so much for stopping by, please be sure to visit The Robin's Nest online store for more amazing products and inspiration.
Have a very creative week!
Barbara


