Saturday, April 27, 2013

Creative Paperclay® Design Team Announced


Hello everyone, and welcome back to my blog.  I have some amazing news to share with you today.  I am so excited to tell you that I am now on the Creative Paperclay® design team.  Creative Paperclay® is a wonderful product.  It is an air dry clay that is so very easy to use.

Creative Paperclay® is a non-toxic modeling material that can be sculpted, molded or shaped, and air dries (no baking!) to a hard finish that can be carved, or sanded - perfect for artists and crafters of all kinds! Learn more about us, plus tips and techniques for working with our products. 
I am so honored to be a part of this team, and I will endeavor to bring you the best creative ideas possible.  So, I hope you will check back often, and please be sure to visit the Creative Paperclay® website and blog regularly to see what the rest of the team is "cooking up" for you.  


Many thanks for all of your support and your time spent visiting my blog.  Here's wishing you many happy hours doing what you love, creating art.  


Barbara

Monday, April 22, 2013

Leslierahye's 2nd Annual Earth Day BLOG HOP

Hello everyone, and Happy Earth Day!  I'm so glad you stopped by today.  If you arrived here from Leslerahye's blog, then you are on track.  Otherwise, you might want to backtrack and start at her blog to follow along.  In any case, a complete list of blog participants is listed at the end of this post, so you won't miss a creative thing.  There are lots of giveaways, too, so be sure to leave your comments on each blog.

I am very happy to be able to be a part of Leslierayhe's 2nd Annual Earth Day blog hop.  The theme for this blog hop is upcycled crafts.  It can be anything we want to make, just so long as we renew, reuse, and recycle.

So, in keeping with the theme, I first had lunch.  I made some tuna salad, then I washed the tuna can.  Okay, just kidding. We are not going to go back that far.  I did have a clean tuna can that I thought would make a wonderful vintage looking pin cushion.  Here is a picture of my finished piece.  I think it is pretty vintage looking, don't you?


I covered the can with a pretty piece of scrapbook paper.  I found a pretty font on my computer and printed the word "Pincushion" onto a piece of Rub-Onz paper by Grafix.  Following the manufacturer's directions, I placed the rub-on in the center of the copper label.   Next, I lightly bent the label to fit around the can, attaching it at each end with brads.


 I balled up a piece of fiberfill to fit inside the can and covered it with a pretty pink satin fabric circle.


I did this my hand sewing a running stitch around the outer circle edge and pulling the thread to tighten the fabric around the fiberfill.  Adjust to fit inside the can opening and tie off the thread.  Glue the pincushion inside the can.


I found some large pearl ended hat pins at my local craft store, so I added more beads before inserting them into the pincushion.  These are merely decorative.  More beaded pins were either inserted through sew-in type snaps, or alone, for more decoration.  German scrap, flowers, and buttons were added, as desired.


Isn't this pretty?  I really do love how this turned out.  I  hope I have been able to inspire you to look around you and find something you can re-purpose to make a thing of beauty, or simply something you like and that makes you happy.  After all, isn't that what art is all about?

Please be sure to visit each of the blogs and leave a comment on each in order to be entered to win some blog candy.  Leslierahye has a nice giveaway, as do some of the other blog participants.  Your next stop is AlteredPages.com.  You can click on the link below.

As always, thanks so much for stopping by, and have a wonderful time hopping!

Barbara

Saturday, April 20, 2013

Daisy Days Blog Hop Winner


Hello everyone.  Today is special, because I have a fun announcement to make.  If you joined us last week for our Daisy Days Blog Hop, sponsored by The Robin's Nest, then you know there were lots of prizes to be given away.  Each blog was given a $15 Daisy Package by The Robin's Nest to give away to one, randomly chosen, lucky winner.  I am so pleased to announce that my blog winner is:

DEBI MINTER

Congratulations to Debi.  Here is what Debi had to say.

Debi MinterApril 12, 2013 at 11:16 AMOkay, I am properly blown away! Not only do I adore your project ( I love birds and bird houses more than just about anything else!) BUT, your instructions are beyond excellent! I feel like I could sit down and do this project easily...even though it looks complicated when you first see it!!!
I want to take this opportunity to thank each and every one of you who were so kind and left such wonderful comments.  Your support means so much to us and is very much appreciated.  I hope you will come back to visit often.  We have lots more in store for you.  I would also encourage you to stop by The Robin's Nest online store to see all the new products, as well as the monthly sale items.

Have a wonderful week, and happy creating!

Barbara

Thursday, April 18, 2013

Button Fairy Tutorial with Sin City Stamps


Hello Sin City Stamps fans, and welcome back to our blog.  Before we begin, I want to tell you about a fun blog hop coming up.  The Sin City Stamps design team is cooking up some neat things to share with you in the upcoming "Think Like a Pirate" blog hop on 8 June.  So mark your calendars for lots of fun and inspiration.  Aaaarrrrrgh me matey!

Today, I am going to show you how to make a button fairy.  I have to admit, I got this idea because I am participating in an online button fairy swap, and I have to say, Sin City Stamps has some fabulous images for button fairies.  Check out their latest stamp plates in their online store.  They are to die for.

If you are not familiar with button fairies, then you are in for a real treat.  Below is my finished button fairy.  I really love how this turned out.  I think I may have to make some more.  
1.  Stamp mannequin image onto a piece of manila paper using black ink.
2.  Color the image as desired.  I used colored pencils first, 

then applied wild honey distress ink over the entire image.
3.  Add various colors of pigment ink to the script butterfly stamp.  I used dauber duos, but you could also use a make up sponge or cat's eyes to apply your ink.  As you can see in the photo, I followed the outline of the image to apply my colors.
4.  Stamp image onto aqua card stock.  Some of the pictures look aqua, and some do not.  It really is aqua card stock, though.
5.  Add detail clear embossing powder.  I used detail powder so that my script image would appear more distinctly.
6.  As you can see from the photo below, the color is now much more intense after clear embossing.
7.  Cut out butterfly.   (Tip:  To make it easier to cut into the corners, I take a snip out of each corner.  This helps me get my scissor blade in without bending the card stock.)

Cut wings in half.
8.  Cut out mannequin image; adhere wings to back of mannequin using wet glue.  I find that wet glue adheres better when glueing regular paper to a heat embossed paper.


9.  Cut approximately 16" piece of 20 gauge wire, use pliers to make loop at top.  This will be used to hang your button fairy.  (Note:  If you do not have pliers, you can always use a pencil or paint brush handle to make your loop.)


10.  I like to thread my buttons onto my wire before I actually glue the wire to the back of my button fairy.  So, first, I mark the wire where my buttons will start.  Be sure to use a permanent marker, like a Sharpie pen, to make this mark so it will not rub off of the metal wire.
11.  Lay your  buttons out in the order you desire.

Thread buttons of varying size and interest to the bottom of the wire.  Make a tiny loop of wire on the back of the last button to keep it from falling off.  Again, if you do not have pliers, you can use a wood skewer or dowel, or something like that to make your small loop.
12.  Adhere wire to back of mannequin with three glue dots.


13.  To finish the back, I simply stamped the same mannequin image to the reverse side of a scrap of print paper, cut out, and adhered to reverse side.  This covers up where you attached the wire to the back.


14.  Stamp tiny butterfly with ripe persimmon distress ink, and "music) with black ink onto a piece of Mammarazzi² print paper.  
15.  Cut out both images.
16.  Adhere to front of mannequin, as shown.

Supplies Used:

Sin City Stamps Mannequin Tags 2
Sin City Stamps Love of Butterflies
Manila card stock
BoBunny Mamarazzi² 6x6 paper
DCWV Tattered Time 8x8 paper scrap
20 gauge gold wire
Distress ink (Ripe Persimmon, Black Soot)
Dauber Duos (pale blue, cool mint, lapis lazuli, winter green, royal blue, lavender, orchid) (Tsukineko)
Versafine Onyx Black ink (Tsukineko)
Buttons
Scotch Quick Dry Adhesive
Chain Nose Pliers
Round Nose Pliers

Isn't this a fun project?  Imagine adding some feathers, charms, beads, and any other embellishments you can think of.  I hope you have been inspired to gather all of those buttons you have been collecting and make a playful button fairy to grace your studio.  I must warn you, however, they can be very addicting.  So have fun and make button fairies!

Thanks so much for stopping by today, and please be sure to visit the Sin City Stamps online store to see all of the new stamp plates and accessories they have to offer.

Barbara

Monday, April 15, 2013

Spring Card with The Robin's Nest and Gel-รก-tins


Hello again, TRN fans, and welcome back to our blog.  I hope you are all beginning to see the signs of Spring wherever you live.  Here, in the mid-South, we had a fairly mild winter, so I fear we may have a HOT Summer awaiting us.  If you are needing a bit of Spring inspiration, however, I hope you will visit the Daisy Days blog hop, sponsored by The Robin's Nest.  There is still time to hop and leave a comment to enter the giveaways at each of the 18, yes, 18 blogs, and a grand prize from The Robin's Nest.    The odds are certainly in your favor to win, so I hope you will try to visit and have some fun with us.  All winners will be announced at The Chattering Robins blog on Sunday, April 21st.

There is still more news to tell you.  The Sorbet Glitter CS collection is still on sale this month at 20% off.  Also this month, we are teaming up with another wonderful company that I am sure your are familiar with, Gel-ร -tins.  All of their stamp sets come in these cute metal tins for storage.  They also carry their own brand of embossing powders, some of which are scented.  Here are the products I get to play with.
 This is a super duper easy card, and here is my finished piece.  I think this would make a wonderful Mother's Day card, don't you?  It is so Springy, and certainly feminine.


1.  Stamp and emboss one of the petals 7 times onto the reverse side Pink Crackle Glitter CS.  Cut out the petals and set aside.  (Tip:  When trimming embossed images, always leave a tiny bit of CS around the edge so that the embossing powder does not chip off.  If you do not like the edge showing, you can always ink the edge with a matching color.)

2.  Stamp and emboss the doodle circles "live", 'laugh", 'love" onto scrap vanilla CS.  Cut out each circle and set aside.

3.  Lay a piece of double-sided adhesive down, sticky side up.  I used a jumbo sized (1") glue dot for this.  Arrange your petals as you adhere them to the glue dot or adhesive.

4.  Add your word circle to the flower center with a large foam dot.  Add pink gumdrop tear shaped dew drops to each petal.  (See finished card photo above).
Foam dots give some dimension to the flower center.  (See photo below).

5.  Just as you made the flower petals, stamp three open petals onto the front side of kiwi sorbet cardstock using shabby shutters distress ink.  Cut out each and set aside.

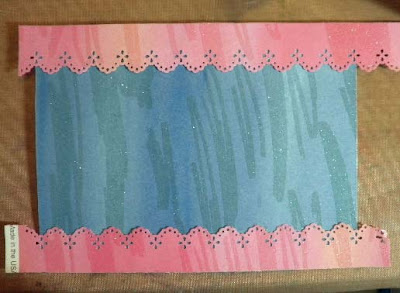
6.  Trim blue raspberry sorbet CS to 5" x 6-1/2", adhere to front of white card. (See photo below).

7.  Punch 1" x 7" strip of shocking pink CS with scallop eyelet edge punch, adhere to front of card, as shown.  Trim excess.  (Tip:  I like to cut my strips longer than I need so that I can center the decorative edge on the card.  I have also found that a wet glue works best when adhering paper to the glittery side of this cardstock.)
8.  Arrange large flower, leaves, and  word circles onto card front, as shown in finished card photo above.  Add tiny heart to "love" word circle.  Use glossy accents to adhere large clear circle dew drop.


Supplies Used:

The Robin's Nest Pink Crackle Glitter CS
The Robin's Nest Blue Raspberry Sorbet Glitter CS
The Robin's Nest Shocking Pink Sorbet Glitter CS
The Robin's Nest Kiwi Sorbet Glitter CS
The Robin's Nest Gum Drops Tear Dew Drops
The Robin's Nest Large Clears Dew Drops
5"x 6-1/2" White Card (Michaels)
Gel-ร -tins Stamp Set (Doodle Garden)
Gel-ร -tins Unscented Gelly-Powder (Pink of Me)
Stamp n' Stuff embossing powder (Sea Mist Pearls)
Colorbox Pigment Ink (Pink, Moss Green)
Distress ink (Shabby Shutters)
Martha Stewart edge punch (Scallop Eyelet)
Foam dots

I hope you have enjoyed my card project today, and will visit our blogs often for more fun and inspiration, as well as updates on new TRN products and monthly sales at The Robin's Nest online store.  Also, please check out the Gel-ร -tin's website, as well, to see their latest products.

Thanks again for stopping by, and have a very happy Spring and a wonderful week!

Barbara

Thursday, April 11, 2013

Daisy Days Blog Hop with The Robin's Nest


Hello everyone, and welcome to The Robin's Nest Daisy Days Blog Hop.  You will not only find a ton of inspiration from each of the designers, but there are also tons of prizes being given away this weekend.  The Robin's Nest is generously giving away a prize "Daisy Package" from each blog, valued at $15.00, which will include tear drops, paper, and embellishments.  In addition, The Robin's Nest blog will be giving away one Grand Prize worth $25.00 towards purchases from their online store.  All winners will be posted on The Robin's Nest blog on Sunday, April 21st.  In order to enter for a chance to win, you will need to leave a comment on each blog with a way to contact you, and like The Robin's Nest facebook page.  

Obviously, the theme for our blog hop is daisies.  Therefore, I decided to add a ton of daisies to my altered wooden birdhouse.  This is just a flat, laser cut, wooden shape that would make a wonderful Spring addition to your home decor.  


Below is a picture of the bare wooden shape.


1.  Paint edges of birdhouse with acrylic paint.  

2.  Trace, trim, and adhere Red Glitter Sorbet CS to cover the top portion of the birdhouse, as shown.  Ink edges with Festive Berries distress stain.

3.  Trace, trim, and adhere Kiwi Glitter Sorbet CS to cover the bottom portion of the birdhouse, as shown.  Ink edges with Shabby Shutters distress stain.


4.  Trace, trim, and adhere Blue Raspberry Glitter Sorbet CS to cover the birds on each side of the birdhouse, as shown. 


Round his little body at the bottom.  Ink edges with Faded Jeans distress ink.  (NOTE:  Turn bird house over, right side down, on top of reverse, unglittered side of CS.  That way, your pencil marks will not show.)  Add two mini dew drops from the Halloween collection for eyes.


 5.  Trim 1/2" strips of chipboard and glue to top edge of roof.  Miter the top corner.


 6.  Edge punch 1" strips of  Shocking Pink Glitter Sorbet CS.  Ink edges with Festive Berries distress stain (or ink).  Glue to chipboard strips.  Miter the top corner.


7.  My birds need a way into their home, so I found these wooden shapes at Michaels.  I believe this one is a thought bubble, but I saw it as a cute hole for my bird house.  All I had to do was trim away the excess with a craft knife.


8.  Ink the opening with Shabby Shutters distress ink and glue to center of bird house.


9.  Adhere yellow diamond drops from the Sunset collection to the roof, as shown.


10.  To make tiny wings for the birds, punch a scrap of Aquamarine Glitter Sorbet CS with a small oval punch.  Cut in half diagonally, trim one of the sharp corners.   


Adhere to each blue bird with a 3D glue dot or foam dot. 


 11.  Paint wooden bird on branch image with Distress inks in Faded Jeans, Shabby Shutters, Forest Moss, and Walnut Stain.  I used a small brush to paint the branch, leaves, beak, and feet.  


12.  Glue wooden bird to bird house opening. 


 13.  Die cut fence piece from chipboard. Paint with light ivory acrylic paint.  Distress with sanding block.  Adhere fence piece to bottom of bird house, as shown.


To make the daisies:

14.  Color a 12"x12" piece of Leopard Silver Glitter Print CS using multiple colors of distress ink, as shown.


15.  Die cut multiple sizes of daisies with the bloom nesting die.  Fold and manipulate each petal before layering each progressively smaller petal and offsetting the petals for more fullness.  


16.  Arrange flowers and leaves as desired.  Add amber and yellow dew drops from Halloween collection to flower centers.  I also added a black dew drop to the wooden bird's eye.


Supplies Used:

Light Ivory acrylic paint (Ceramcoat)
Distress Stains (Festive Berries, Shabby Shutters, Faded Jeans, Forest Moss, Walnut Stain)
Small oval punch (Stampin' Up)
Bloom Nesting Die (Lifestyle Crafts DC0074 )
On the Fence edge die (Sizzix-Tim Holtz)

I hope you are enjoying our blog hop and that you will take some time to visit each blog and leave a comment for your chance to win.  Also, please leave a comment at The Robin's Nest blog, The Chattering Robins, to enter to win the grand prize.  And while you are there, check out their fantastic products and sales items in their online store.  Sorbet glitter cardstock is a whopping 20% off this month.  

I want to thank you for stopping by today.  I would love for you to follow my blog, but it is not necessary to win.  A list of participating blogs is shown below, with a direct link to each.  Enjoy the rest of the hop, and good luck on the giveaway!

Barbara