Showing posts with label Sin City Stamps. Show all posts

Friday, September 11, 2015

Sin City Stamps ATC Blog Hop

Hi everyone.  So glad you decided to join us today because the Sin City Stamps design team have a fun blog hop for you to enjoy.  Please click here to see a link-up of all of the blog hop participants.  Just click on their thumbnail to be taken directly to their blog.

Our theme is ATCs, or Artist Trading Cards.  If you don't know what an ATC is, let me explain.


  1. Artist trading cards (or ATCs) are miniature works of art about the same size as modern trading cardsbaseball cards, or 2 1⁄2 by 3 1⁄2 inches (64 mm × 89 mm), small enough to fit inside standard card-collector pockets, sleeves or sheets.


Here's what you need to do to win!

Visit each blog and leave a comment.

Return to the Sin City Stamps blog and leave a comment there to enter to win your choice of ATC stamps.

Like both the Sin City Stamps Facebook page and Sin City Stamps YouTube Channel.

A random winner will be chosen on Monday, 14 September, and announced on the Facebook page.

Now, for my project today, I want to share a set of three ATCs, all made using some of my favorite Sin City Stamps.


ATC Fronts

ATC Backs

Directions:


ATC #1

Cut three pieces of white chipboard to 2-1/2" by 3-1/2", paint with Oatmeal chalk paint.

ATC #1:  Stamp dandelions  on the ATC and add dots of Cantaloupe and Platinum Pearl Paints, as shown.
Tear a strip of print paper from the 7Gypsies pad, ink edges and adhere along top edge.  Stamp two butterflies  onto print paper, fussy cut and adhere to ATC.
Stamp Weed or Wish? onto solid color paper from the 7Gypsies pad, cut out, ink edges, adhere to chipboard for dimension, then adhere to ATC.  Add three tiny metal square stickers, as shown.
ATC #2
ATC #2:  Emboss with Tropical Paisley embossing folder and sand the high spots to reveal the white chipboard.
Use a blending tool to color the high spots with Fired Brick distress ink.

Stamp bird twice onto scrap print paper from 7Gypsies pad with black archival ink, cut out one complete bird, and one wing.  Adhere wing to bird, and draw in an eye with a black marker and white gel pen.

Stamp creativity definition  onto solid color paper from 7Gypsies pad with black archival ink, cut around it and ink edges.  Glue to a piece of chipboard and adhere to ATC.

Stamp clock face with black archival ink onto print paper, punch out with 2" paper punch, and cut in half.
Add Fired Brick distress ink and adhere left half of clock face to left side of ATC.  Add Fired Brick distress ink to wood clock hand, stamp Wish with black archival ink.  Adhere to clock face.  Adhere bird with foam dots, so it looks like it is perched on the clock hand.
Add dots of Platinum pearl paint around clock face, and adhere tiny gold metal stickers to top and bottom of ATC, as shown.


ATC #3
ATC #3:  Emboss ATC with Diamonds in the Rough embossing folder and sand the high spots to reveal the white chipboard.
Use a blending tool to color the high spots with Vintage Photo distress ink.
Stamp music notes portion of the birds with nest onto a piece of Authentique print paper with Tree Branch archival ink.  Ink paper with Faded Jeans distress ink, tear bottom edge and adhere to top of ATC.

Ink the other half of the stamped clock face from ATC #2 above with Faded Jeans distress ink and adhere to right side of ATC. Add dots of Pearl Platinum Pearl paint around the edge.

Stamp Make A Wish with black archival ink and punch with a decorative punch.  Adhere to a piece of chipboard for dimension and then to top of ATC.  Add a dot on either side with Cantaloupe pearl paint.

Stamp Dream key onto same paper used to stamp the butterflies above with black archival ink.  Fussy cut and adhere with pop dots.

Add three tiny gold metal square stickers to the top and bottom corners, as shown.


Bonus ATC
Bonus ATC:  The birds with nest image was stamped onto the Authentique brick pattern paper with black archival ink.  I stamped around the image with the crackle stamp, also with black ink.  Using a blending tool, I added the four Distress inks to quickly color the background.
I used a water brush on the birds, nest, flowers, and leaves, to remove some of the distress inks color. This is a technique by Tim Holtz, since distress inks are reactive with water, you can "erase" some of the color.
I used various colored pencils to fill in the image, and added dots of Cantaloupe pearl paint to the flower centers.  

Stamp Wings of Love in black archival ink onto solid print paper, punch with decorative label punch. Adhere to chipboard and then to the ATC.  Add three square metal stickers to the top and bottom corners, as shown,

I used this ATC background stamp to finish off this ATC.  These stamps are perfect for adding just the right touch to the reverse side of all of your ATCs, allowing you to sign and date them, and also number them, as well as give them a theme if you are trading them.  

Bonus ATC Back

Supplies used:
Sin City Stamps:  Terri Sproul's Vintage Set (music background with birds and nest)
Terri Sproul's Wish set (dandelions, butterflies, creativity definition, Make A Wish, Weed or Wish?)
Birds and Clocks (clock face, bird)
Sin City Wings (Wings of Love, crackle background)
Steampunk'd (dream key)
Michelle Frae Cummings Steampunk ATC Card
Vintage Keys ATC Card
Chipboard
Manila card stock
Oatmeal chalk paint (Folk Art)
Papers:  Gypsy Market 6x6 pad (7Gypsies); Accomplished 6x6 pad (Authentique)
Embossing Folders: Diamonds in the Rough (Cuttlebug); Tropical Paisley (Sizzix)
Distress Ink Pads:  Vintage Photo, Fired Brick, Faded Jeans, Spiced Marmalade
Archival Ink Pads:  Jet Black, Tree Branch
Ranger Liquid Pearls: , Platinum, Platinum Pearl, Cantaloupe
Gold Metal Stickers (TPC Studio)
Foam dots


Thanks so much for stopping by today, and don't forget to leave comments on all the blogs, and Like both the Sin City Stamps Facebook page and the Sin City Stamps YouTube Channel for your chance to win!

Good luck, and have a wonderful weekend!

Barbara

Friday, July 24, 2015

Go Confidently Mixed Media Journal Page with Sin City Stamps

Hey everyone!  I hope you are enjoying your weekend.  Today, I am going to continue with adding pages to a mini album/journal I made last month.  You can see more about that with complete directions for making the album by clicking here.

I am loving learning more and more about combining my stamps from Sin City Stamps and mixed media, so I wanted to share with you my first page I am going to add to my album.  The pages are made from a nice, thick card stock that is printed on one side only.  So, I will be working on the print side of one and gluing it to the wrong (white) side of the previous page.


Supplies Used:

Sin City Stamps:  Terri Sproul's Wish stamp set; Sparkle Stencil by Terri Sproul
ColourArte:  Twinkling H20s - Sky Blue, Orange Peel, Sweet Lavender, Sunflower

Prima 12x12 Script Pad
Chocolate ink pad ((Ancient Page)
Texture Paste (Ranger)
Glue n Seal (Ranger)
Liquid Pearls: Platinum, Peacock (Ranger)

Directions:

Trim card stock to 4-1/2" by 8-1/4".  Cover with a very light coat of clear gesso and let dry.  This will help seal the card stock and allow the paint to work much better, but will not obliterate any of the printed images on it.  Round the corners on the left side of the page, because this will be adhered to the back of the inside page in the book.

Spread texture paste through the sparkle stencil, leaving the edges uneven.  Scrape tiny patches of texture paste with a spatula around page for a cool effect.  Let everything dry.


Stamp three butterflies and two sentiments onto a piece of deli paper with the Chocolate ink pad.
Prepare your Twinks by spritzing some water 2-3 times into each pot to activate the colors.  Add all four colors to the background, misting with water and allowing the colors to run and blend.  Let dry.

Tear deli paper close to each stamped image and adhere to the background with a good adhesive medium, like Glue N Seal.  The deli paper disappears into the background, and gives you crisp, stamped images even over the stenciled paste.
Stamp some dandelions in the open spaces at the bottom of the paper with the Chocolate ink pad.
Color the butterflies with the four Twinks colors, mixing them to your liking.
Make bodies for the butterflies with the Peacock Liquid Pearls.
Add dots of Platinum Liquid Pearls to the dandelions.
This is the book from my previous post.  The inside cover page is what you see extending past the zig zag chipboard cover.  I want to keep that page just as it is because it acts as part of the front of the book.
By working on the first page separately, I was able to keep the printed side of the inside cover page clean.  So, now that my page is completed, I can adhere the two pages together.  This will not only cover the blank white side of the papers, but strengthen the page.  I also rounded the outer corners.
Now that the two are glued together ...
I can punch the binding holes on the side.
Now it is ready to insert into my book.

I hope you enjoyed my mixed media journal page today, and that I have inspired you to make your own journals with your paper stash and these wonderful Sin City Stamp sets.  And this is the perfect time to buy because you can take advantage of this special deal!  Good until the end of the month.


Thanks so much for stopping by today, and have a wonderful and crafty weekend!


P.S.  This is my last post as a member of the Sin City Stamps design team.  Our term is nearing an end and I want to thank everyone for your friendship and support.  However, you may still see me every now and then with more projects to share.  So, until then, happy stamping, everyone!

Friday, July 10, 2015

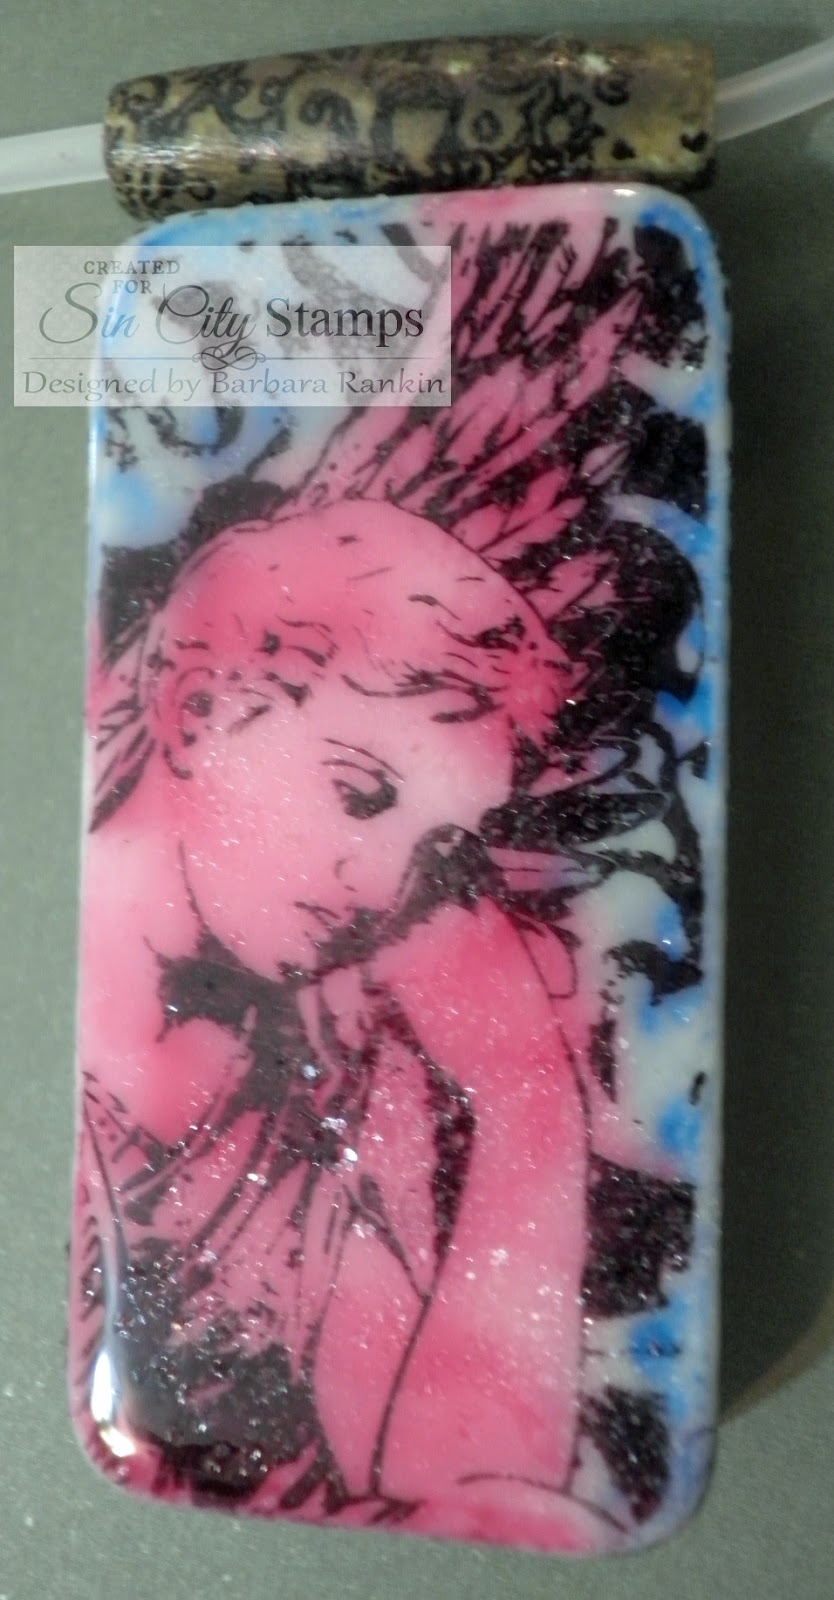
Stamping on Dominoes with Sin City Stamps and Faux Rust Technique

Hello everyone.  I hope you all are having a wonderful start to your weekend.  I was wracking my brain trying to figure out something new to share with you, but I was re-inspired by a domino project I saw on Pinterest.  Don't you just love Pinterest?  Most of the projects were using alcohol inks, but I am making mine with ColourArte's Radiant Rain Daubers, too.

Dominoes are a fun substrate to use in any of your mixed media work.  You can turn them into a piece of jewelry, you can use them as a focal image on a greeting card, or as a fun embellishment on  a mixed media canvas.


Faux Rust Technique

Here is is quick video tutorial for this fun little domino, which I turned into a necklace.  I will also show you a fun technique for turning it into a piece of faux rusted metal.  Again, the same techniques can be used for decorating your dominoes for any project.  So have fun with them and enjoy.


I also made a quick and easy matching card to give to someone special, along with the necklace.


I simply stamped the angel image onto a piece of print paper with black archival ink.
Then I used Caran d'ache Neocolor II water soluble crayons to partially color the image.
I used a straight edge ruler to tear around the image, leaving a bit of distress edging, which I highlight with a white pigment ink pad, for a shabby look.  Then I adhered the image to a blue card.  Simple!


Supplies used:

Sin City Stamps:  Dressforms; Wing It; Rosette Hearts
ColourArte Radiant Rain Daubers: Wine & Roses; Mediterranean Blue; Hot Cinnamon
Dominoes
White Horn Bead
Black Stazon Ink pad
Permanent Stamp Ink Cleaner
Ranger Clear Rock Candy Glitter
Adirondack Alcohol Inks - Eggplant, Sunset Orange, Gold Mixative
3D Crystal Lacquer
Beacon Quick Grip Glue
Blue card stock
7Gypsies Gypsy Market 6x6 paper pad
Caran d'ache Neocolor II water soluble crayons

Take a look at your stamps in a different way.  Remember, it is not necessary to find small stamps to fit on a domino.  You can use parts of a stamp for fabulous effects.  In fact, this month, Sin City Stamps is offering a free stamp with any purchase of a stamp plate.  So pop on over and check out their fabulous selection now.


I hope you enjoyed my video tutorial and, perhaps, inspired you to make some fun domino embellishments for use in any and all of your mixed media projects or jewelry pieces.


Thanks so much for stopping by, and until next time, have a wonderful creative weekend!

Barbara

Monday, June 29, 2015

Bluebirds and Butterflies Card with Sin City Stamps

Hello all!  I have a really pretty vintage style card to share with you today using two of Terri Sproul's new stamp sets from Sin City Stamps.

Stamp image onto slick white card stock with black StazOn or any permanent ink.
Paint the birds, nest, flowers and leaves with Twinkling H20s in Burnt Umber, Pink Azalea, Ocean Wave, and Moss Green.  The best way to activate the "twinks" is to spritz water into each pot and let them sit for a few minutes.
I wanted to age the paper, so I used a blending tool to add Antique Linen distress ink to the white card stock.
Here is a close up of the coloring with the antiqued background.
Next, I layered this piece onto a pink card stock layer, then onto a dark green card stock layer.  I left the tiniest border of each color around the image.  Then I die cuts a piece of tan card stock with the Fancy Tags die, and before removing the paper from the die, I used the blending tool to add more Antique Linen distress ink to it.
When I removed the die, the tag now has this nice, aged look and highlights.
I adhered the stamped piece slightly off center of a 5"x7" periwinkle blue card base, and I cut the tag in half, adhering each half to the sides of the stamped image, as shown.
Die cut a branch from brown mat board with the bird branch die and adhere to the card front above the nest image.
Add some paper flowers to the left side, covering the edge of the branch.
Punch several leaves from the dark green card stock scrap, and paint with the Moss Green Twinkling H20s.
Adhere the leaves around the flower bouquet, and cut leaves apart to add to the branches.
The give my card a nice balance, I decided to stamp two butterflies from the Terri Sproul's Wish stamp set with black StazOn ink.  I used the Pink Azalea, Ocean Wave, and Moss Green twinks to color them.  Then I fussy cut them out, shaped their wings and adhered to the right hand side of my card.  I added Amber glitter liner to their butterfly bodies.

Supplies used:

Sin City Stamps: Terri Sproul's Vintage Set; Terri Sproul's Wish
ColourArte:  Twinkling H20s:  Burnt Umber, Pink Azalea, Ocean Wave, Moss Green
Card stock:  White, Pink, Green, Periwinkle Blue
Black StazOn ink pad
Antique Linen distress ink
Blending tool
Bird Branch (Sizzix)
Brown mat board
Fancy Tags Two die (Spellbinders)
Leaf punch (Martha Stewart)
Paper flowers (Prima, Recollections)
Amber Glitter (Viva Decor)

I hope you enjoyed my card project today.  I love these sets and I think you will too.  So pop on over to the Sin City Stamps online store and check out all of the new sets and products that Sin City Stamps carries.

Thanks for stopping by, and have a wonderful, creative week!

Barbara