
Hello again, TRN fans, and welcome back to our blog. I hope you are all beginning to see the signs of Spring wherever you live. Here, in the mid-South, we had a fairly mild winter, so I fear we may have a HOT Summer awaiting us. If you are needing a bit of Spring inspiration, however, I hope you will visit the Daisy Days blog hop, sponsored by The Robin's Nest. There is still time to hop and leave a comment to enter the giveaways at each of the 18, yes, 18 blogs, and a grand prize from The Robin's Nest. The odds are certainly in your favor to win, so I hope you will try to visit and have some fun with us. All winners will be announced at The Chattering Robins blog on Sunday, April 21st.
There is still more news to tell you. The Sorbet Glitter CS collection is still on sale this month at 20% off. Also this month, we are teaming up with another wonderful company that I am sure your are familiar with, Gel-à-tins. All of their stamp sets come in these cute metal tins for storage. They also carry their own brand of embossing powders, some of which are scented. Here are the products I get to play with.
This is a super duper easy card, and here is my finished piece. I think this would make a wonderful Mother's Day card, don't you? It is so Springy, and certainly feminine.
1. Stamp and emboss one of the petals 7 times onto the reverse side Pink Crackle Glitter CS. Cut out the petals and set aside. (Tip: When trimming embossed images, always leave a tiny bit of CS around the edge so that the embossing powder does not chip off. If you do not like the edge showing, you can always ink the edge with a matching color.)
2. Stamp and emboss the doodle circles "live", 'laugh", 'love" onto scrap vanilla CS. Cut out each circle and set aside.
3. Lay a piece of double-sided adhesive down, sticky side up. I used a jumbo sized (1") glue dot for this. Arrange your petals as you adhere them to the glue dot or adhesive.
4. Add your word circle to the flower center with a large foam dot. Add pink gumdrop tear shaped dew drops to each petal. (See finished card photo above).
Foam dots give some dimension to the flower center. (See photo below).
5. Just as you made the flower petals, stamp three open petals onto the front side of kiwi sorbet cardstock using shabby shutters distress ink. Cut out each and set aside.
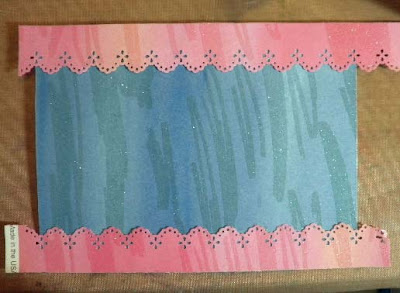
6. Trim blue raspberry sorbet CS to 5" x 6-1/2", adhere to front of white card. (See photo below).
7. Punch 1" x 7" strip of shocking pink CS with scallop eyelet edge punch, adhere to front of card, as shown. Trim excess. (Tip: I like to cut my strips longer than I need so that I can center the decorative edge on the card. I have also found that a wet glue works best when adhering paper to the glittery side of this cardstock.)
8. Arrange large flower, leaves, and word circles onto card front, as shown in finished card photo above. Add tiny heart to "love" word circle. Use glossy accents to adhere large clear circle dew drop.
The Robin's Nest Pink Crackle Glitter CS
The Robin's Nest Blue Raspberry Sorbet Glitter CS
The Robin's Nest Shocking Pink Sorbet Glitter CS
The Robin's Nest Kiwi Sorbet Glitter CS
The Robin's Nest Gum Drops Tear Dew Drops
The Robin's Nest Large Clears Dew Drops
5"x 6-1/2" White Card (Michaels)
Gel-à-tins Stamp Set (Doodle Garden)
Gel-à-tins Unscented Gelly-Powder (Pink of Me)
Stamp n' Stuff embossing powder (Sea Mist Pearls)
Colorbox Pigment Ink (Pink, Moss Green)
Distress ink (Shabby Shutters)
Martha Stewart edge punch (Scallop Eyelet)
Foam dots
I hope you have enjoyed my card project today, and will visit our blogs often for more fun and inspiration, as well as updates on new TRN products and monthly sales at The Robin's Nest online store. Also, please check out the Gel-à-tin's website, as well, to see their latest products.
Thanks again for stopping by, and have a very happy Spring and a wonderful week!
Barbara


No comments:
Post a Comment