
Now for today's project. This week, I am using one of Sin City Scraps fabulous rubber stamp plates. This one is called Metal Madness, and I have to say, I am absolutely "mad" for this one. The images on this plate are absolutely gorgeous, and my mind is reeling with ideas for this set.
To begin with, I made this really cool card using this ornamental background image. It reminds me of an ornate door, so I decided to go with that.

I love the phrase on this plate: "Art is never finished, only abandoned". I thought this would be nice for the recipient to find inside when they open the door. To enhance the phrase, I die cut a Spellbinders fancy tag out of black card stock and, with an embossing mat, ran it through the machine again to emboss it. The photo below shows what is beneath the door, before the door was added to the card front.

Directions:
1. When embossing onto card stock, especially a glossy card stock, it is a good idea to swipe the card with an anti-static pouch to help keep the stray embossing powder from sticking to the card.

2. Stamp image with Versamark ink onto card stock and heat emboss the image using detail gold embossing powder.

3. Fussy cut the image.

4. Distress the image with Brilliance archival ink. Distress inks are dye-based and do not dry on non-porous card stock, such as glossy.

5. Follow steps 1 and 2 for the ornate background image using black detail embossing powder.

6. Before cutting out, adhere the image to the reverse side of your chosen print paper. This will be the back side of the door when it is open. Trim all layers at one time and distress edges with black soot.

7. One easy way to find center of a rectangle is to first draw an "X" from corner to corner.

8. Using my door image piece to determine where I will make my frame opening, I aligned the corners to match the pencil marks.

9. Draw around the door image with pencil. I wanted my frame a bit smaller than the door, so I used those pencil marks to remove approximately 1/4" more all around, inside the frame.


11. To make the door open, you will need some sort of hinge. When I saw these ornate decorations, I thought "hinge". Follow steps 1-3 using black detail embossing powder.

12. Fold the hinges in half, but leave the center straight, just as if you were folding a butterfly, leaving the body flat.

13. Attach one half of each hinge to the front side of the door and adhere only that portion of the hinge. When it is dry, align the door to the front of the card and glue the center and part of the remaining hinge to the front. Clamp down until glue dries before proceeding.

14. Turn the remaining portion of hinge to the back and adhere.

15. Clamp the hinges until dry.

16. Here is what your hinge should look like when finsihed.

17. Attach the pocket watch image to the front at an angle, as shown.

18. Attach a half moon bullet holder over the center of the clock.
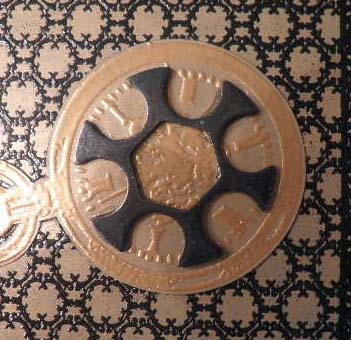
And here is the final photo of the card front beneath the door. The hinges are attached and working as they should, and you still have the traditional inside of the card to write your sentiment.

Supplies Used:
Sin City Scraps rubber stamp plate - Metal Madness
Gold/Silver marbled glossy cardstock
Bo Bunny 12x12 double-sided paper - Timepiece Numbers
Spellbinders Die - Fancy Tags Three
Black Soot distress ink
Versamark ink
Detail Black embossing powder (Mark Enterprises)
Brilliance Lightning Black ink (Tsukineko)
Glossy Accents (Ranger)
Tombo Mono Multi Liquid Glue
I hope you have been inspired to try making a door front card. Just imagine all the things you could hide beneath the door, to the surprise and wonderment of the recipient.
I hope you will take a moment to visit Sin City Scraps online store to check out their wonderful products and pre-order sale, and to check back often to visit the blog to see what the other wonderful designers have come up with to entice and inspire you.
Thanks so much for stopping by. Have a happy, creative week.
Barbara
No comments:
Post a Comment