1. Cut 12"x12" Aquamarine Glitter Sorbet card stock in half to 6"x12".
2. Place short edge of card stock along the ornate edge die and cut out.
3. Cut a second piece of card stock 1-1/2" x 6" and die cut this piece using the same die.
TIP: To help you see where to place your card stock on these edge dies, draw straight lines with a white pen and mark the center of the die. This will help you make straight cuts.
The edge made by the second die cut gives you a horizon line to place your daffodils, so they are not floating in the air.
5. Punch multiples of the daffodil punch in both green scrap card stock (3 complete) and Kiwi glitter sorbet card stock (12 flower heads).
 |
| Cut three complete green daffodils |
 |
| Cut the two flower heads six times for total of twelve |
6. Adhere the first daffodil image in the center, and continue adhering the remaining two on either side.
7. Snip off the excess stem from each Kiwi flower head and adhere them to each of the green images, as shown.
8. If you have been following me, you know by now that I am a glutton for dimension. Dry emboss the remaining six flower heads using a large ball stylus tool and a piece of fun foam. If you do this from the reverse, you will "cup" the flower. Turn it back over to the front and gently push the center back down. This will give you a nice form to your flower.
9. Put a small bead of white glue in the center of each flower, and using a pair of tweezers, lay the embossed flower on top, a bit offset from the bottom one. This gives the appearance of more petals.
10. Allow to dry, then glue tiny orange neon dew drops to the flower centers. Isn't that pretty?
I also glued a few pink and purple neon mini dew drops to the bottom of the card front.
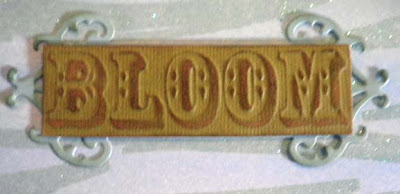
11. Cut out just the word "BLOOM" from the Core-dinations Seasonal embossed card stock.
12. Sand the letters, and distress with peeled paint.
13. Die cut another piece of Aquamarine Glitter Sorbet card stock using the Fancy Tags 2 die cut and distress edges with peeled paint. Adhere to card, as shown.
15. One last thing to do was punch a beautiful pink butterfly from the pink sorbet card stock, adhering only the body of the butterfly and allowing the wings to remain free.
Supplies Used:
Aquamarine Glitter Sorbet card stock
Kiwi Glitter Sorbet card stock
Shocking Pink Sorbet card stock
Neon Orange Mini Dew Drops
Neon Pink Mini Dew Drops
Neon Purple Mini Dew Drops
Sizzix/Tim Holtz Alterations On the Edge die - Ornate
Spellbinders Fancy Tags 2 die
Tim Holtz Core-dinations Seasonal embossed card stock
Paper Shapers Daffodil craft punch
Martha Stewart butterfly punch
Distress Ink - Peeled Paint
Scotch Quick Dry Adhesive
I hope you have enjoyed this Spring card, and that I have inspired you to pull out those punches and dies and get busy making some easy cards using The Robin's Nest gorgeous papers and dew drops. Check out their newest products and sale of the week while you are visiting their online store.
I also want to invite you to The Robin's Nest Daisy Days blog hop on 12 April There will be prizes given away; over a $290 retail value. There are 18 chances to win a daisy package, retail value of $15. One Grand Prize will be a gift certificate to their online store: Retail value of $25. So be sure to come back and visit The Chattering Robins Blog on 12 April, and don't forget to tell your friends.
As always, thanks so much for stopping by, and have a wonderful, crafty week.
Barbara


Thanks for sharing how you made this!
ReplyDelete