Sunday, May 27, 2012

Viva Las Vegas Link Up Blog Hop Featuring Mary Vogel Lozinak Stamps

 Welcome back to the second day of the Viva Las Vegas Link Up Blog Hop Featuring Mary Vogel Lozinak Stamps.  If you are just starting out today, I believe you can click on the link above and start over from there.   You certainly don't want to miss any of the wonderfully talented designers and artists who have shared their creativity with you this weekend.

I am having way too much fun with Mary's images, so for today's submission, I once again used Claybord to make this cute Steampunk Owl embellishment.  I used the same technique as in yesterday's post, first stamping the image onto a piece of Claybord with black Ancient Page ink.  I think Mary's stamp images are perfect for this technique.
After stamping, I then took the piece to the scroll saw and carefully cut out my image.  I gently sanded the edges, as needed.
I then began coloring my cute little steampunk owl with a wash of Claybord ink colors.  As you can see in the photo, I also started scratching away color to "highlight" the image.
Below, I am adding more color washes to the parts I have scratched away.  
And voila, the glossy sealed piece is finished and ready to be used as an embellishment on a card, an altered book, a decorative box top, or whatever you dream up.  The possibilities are endless.  Of course, I thought about adding metal gears, and you certainly could do that. But I stopped myself because I really feel this image is wonderful just as it is.  Once you highlight the image, including the gears, you really don't want to cover it up with anything.  

Stamps Used:  Steampunk Owl image from Mary Vogel Lozinak Plate 1400

Hope you are enjoying the blog hop this weekend, and that you all have a wonderful Memorial Weekend.  And as always, thanks so much for stopping by.

Saturday, May 26, 2012

Viva Las Vegas Link Up Blog Hop Featuring Mary Vogel Lozinak Stamps


Hey there everyone.  The Design Team at Viva Las Vegas Stamps is having a blog hop featuring stamps by Mary Vogel Lozinak on Saturday, 26 May, and Sunday, 27 May 2012.  And best of all, they have kindly invited other artists to play along with them by simply linking into their blog, hence the name:  Viva Las Vegas Link Up Blog Hop Featuring Mary Vogel Lozinak Stamps.  Needless to say, you are about to see some fabulous designs by the very talented VLVS design team, as well as the talented artists who have also come to play.

For my submission, I have made an image using Claybord, also known at Stampbord, by Ampersand.  It is a wonderful surface to stamp on because it takes inks and stains beautifully, is very forgiving, and a lot of fun to use.  When I saw Mary's stamp images, I just knew they would be quite suitable and lend themselves beautifully for this technique.  As you will see, there is so much imagery to play with in her stamp images.
I first stamped the Sun Background image onto a piece of Claybord using Black Ancient Page ink.  I then added a wash of Claybord Inks in various color combinations, without worrying about staying within the lines.  In the photograph below, you can see where I had to use a black Sharpie pen to fill in a few areas that did not stamp.  
Did you ever think you could erase your mistakes when you stamp your image?  Well, you can with Claybord.  As I said, it is very forgiving.  In the next picture, you can see where I actually "erased" some of the color and leveled out, or equalized the appearance of the black stamped image with the area I had fixed by adding the black Sharpie marker.  To do this, you simply take a tiny piece of #0000 steel wool and gently rub it over the clay surface until you are satisfied.  Erase too much, no problem.  Just add more color. 
Still doesn't look like much, does it?  In the next picture, I have first scratched the clay surface and added more color to the image.  If you look closely at the picture, you can see the tiny scratch marks made with the scratch tool.  I am actually removing color with the tool or, as I like to call it, "highlighting" the image.  At this point, more color can be added.  You can add different colors or the same colors, or even leave it white. For instance, if you look closely, you  can see where I added a wash of pink ink over the green background in the areas that I scratched back to white.  
At this point, I am actually done with coloring and scratching.  However, the piece looks quite dull and flat.  Now comes the magic.  Spray the piece with a nice coat of clear gloss sealer.  The colors will absolutely pop, and the areas scratched will become more visible.  When the light hits these areas, they seem to glow with a beautiful pearlescence.  

This piece would make a beautiful addition to a box top, a book cover, or even inside a frame.  


Stamps Used:  Images from Mary Vogel Lozinak Plate 1400

I hope you enjoyed my Claybord piece, and please check out all of the other wonderful artists who have shared their creativity.  And don't forget to come back Sunday, 27 May, to see more submissions. I have a few more things in the works, so I hope you can come back.

Thanks for stopping by, and have a wonderful Memorial Day weekend.

Barbara


Friday, May 11, 2012

My Mind's Eye Birthday Card


I got busy with this paper pad from My Mind's Eye.  The 6x6 paper size is so easy to use for making cards.  This is from the same paper pad as my previous post, just changed up the colors a bit.  

This card is 6" x 6" square.  I don't usually make square cards because of the extra postage issue, but  I loved all of the elements on the paper, so I just could not cut any of it off.  I used another piece of lace along the top edge, which I die cut from the Sizzix vintage lace die by Tim Holtz.  The pennants were simply hand cut to the size I wanted and adhered along the left edge with pop dots.  The stamped and die cut bicycle, as well as the sentiment inside the die cut arrow, are from the Sizzix/Hero Arts stamp and die set called Bicycle.  I simply stamped the images on one of the printed papers from the pad, then die cut them out and adhered to the card.  The bicycle is pop-dotted.  Could not be easier.  

Thanks for stopping by, and have a great day!

Tuesday, May 8, 2012

Mother's Day Card


Here is yet another center stepper card I made for my mother-in-law for Mother's Day.  I am having way too much fun with this style of card.  This time, I downsized the card a bit and made it a normal A2 sized card (4-1/4" x 5-1/2").  


This is the paper I used.  It is again a 6x6 pad from My Mind's Eye.  I simply cut the paper pieces to size, placed them in a pleasing manner (to me, at least) and used a Sizzix rosette die by Tim Holtz to make the rosette flower.  I also used a Sizzix vintage lace die by Tim Holtz to cut the lace shown along the top of the card.  I computer generated the sentiment, punched out with an EK Success decorative sign punch, and the butterfly was punched out twice using a Martha Stewart punch.  I layered the butterflies, one atop the other for dimension, and added a bit of pink pigment ink to the butterfly's wings for added interest.  Then I knotted a tiny piece of twine in the center and attach it to the butterfly as antennae.  


Once again, a side view of the card to show it's dimension.  I think I like these cards so much because it allows the recipient a way to display it.  It has it's own built-in easel.  

As always, thanks so much for stopping by.

Friday, May 4, 2012

Altered Book Swap Pages-All About Wings

A small group of close friends decided to start an altered book swap.  Each month, we trade our books with each other to be artfully altered.  There are eight of us, so at the end of the
eight-month period, we each will have our very own, beautifully altered book.  The best part, however, is that we come away with a part of each other that we can treasure always. 

I am so pleased how my pages turned out, I just had to share.  For my first offering, I made what is sometimes called a "tip in" page.  By doing this type of page, I could work on it completely outside of the book.  The pages are made from one 12"x12" piece of Prima "Fairy Belle" scrapbook paper that I cut down to the size of the book's pages, and folded in the center.  Hence, my scrapbook page measured 12"across x 9" high, before folding in half to measure 6" x 9".  Before working on the page(s), I made a second score line approximately 1/4" in from the folded edge, to allow for placing double sided tape between the folds for later adhering into the book. By scoring a second time, this will relieve pressure on the spine where I will later adhere the page into the book.  


The fairy on these inside pages (pages 2 and 3) were already printed on the paper, so all I had to do was decorate her with tiny ribbon and gems,  fussy cut papers, and use a paper tole technique (described below) to add dimension.  I also added Prima flowers and gems, a punched butterfly, and a pop up butterfly in the center.  


  If you look closely in this picture (page 1 of 4), you will see the 1/4" wide strip of adhesive that I placed down the fold.  It still has the white release paper on it.  I used  Miracle Tape from Viva Las Vegas Stamps.  This is a truly fantastic adhesive.  By placing it on the folded edge first, it reminded me not to go any closer to the folded edge with my image placement, as it would be lost when later adhered to the spine of the book.


Page 4, or the last page of the tip in, is shown here.  Again, you can see where I placed the adhesive tape along the folded edge.  Pages 1 and 4 are the back side of the Prima paper, and it was only printed with a dotted background.  I used a paper tole technique throughout these pages, attempting to give dimension to otherwise flat printed paper.  I fussy cut all of the images, embossed them on a piece of foam with a large ball stylus, and then arranged them in a pleasing manner, using pop dots to raise them.  The butterfly was punched from a scrap of the decorative paper, and I used a Martha Stewart branch punch for the flower fillers.  The gold butterflies are from Clearsnap's Design Adhesives rubons and then gold foil applied to the adhesive shapes.  I also used an EK Success rose vine punch for the vertical climbing flower bush.  


I know it is hard to see the dimension clearly, but here is a side view of the central page.  Can you see the butterfly floating off the page in the center of the book.  I used a clear piece of acetate for the pop up structure.  The butterfly floats off the page when you open the book.  Pretty cool.  


Well, as always, I hope you enjoyed my somewhat "long-winded" description.  And I love comments, so if you have time, please leave me one.  Thanks for stopping by.  

Thursday, April 26, 2012

Center Stepper Card

It's been awhile since I last posted something.  My, how time flies when you are having fun.  


I made this sports-oriented card for my brother for his birthday.  I know how hard it is to make masculine cards, especially when so much of the scrapbooking industry is catering to "girls".  So, when I saw this paper line from Echo Park, called "This & That Charming", I knew it would be useful for my masculine cards, as well as scrapbooking.  I chose the 6"x6" paper pad because the print designs are reduced and sized perfectly for cards.

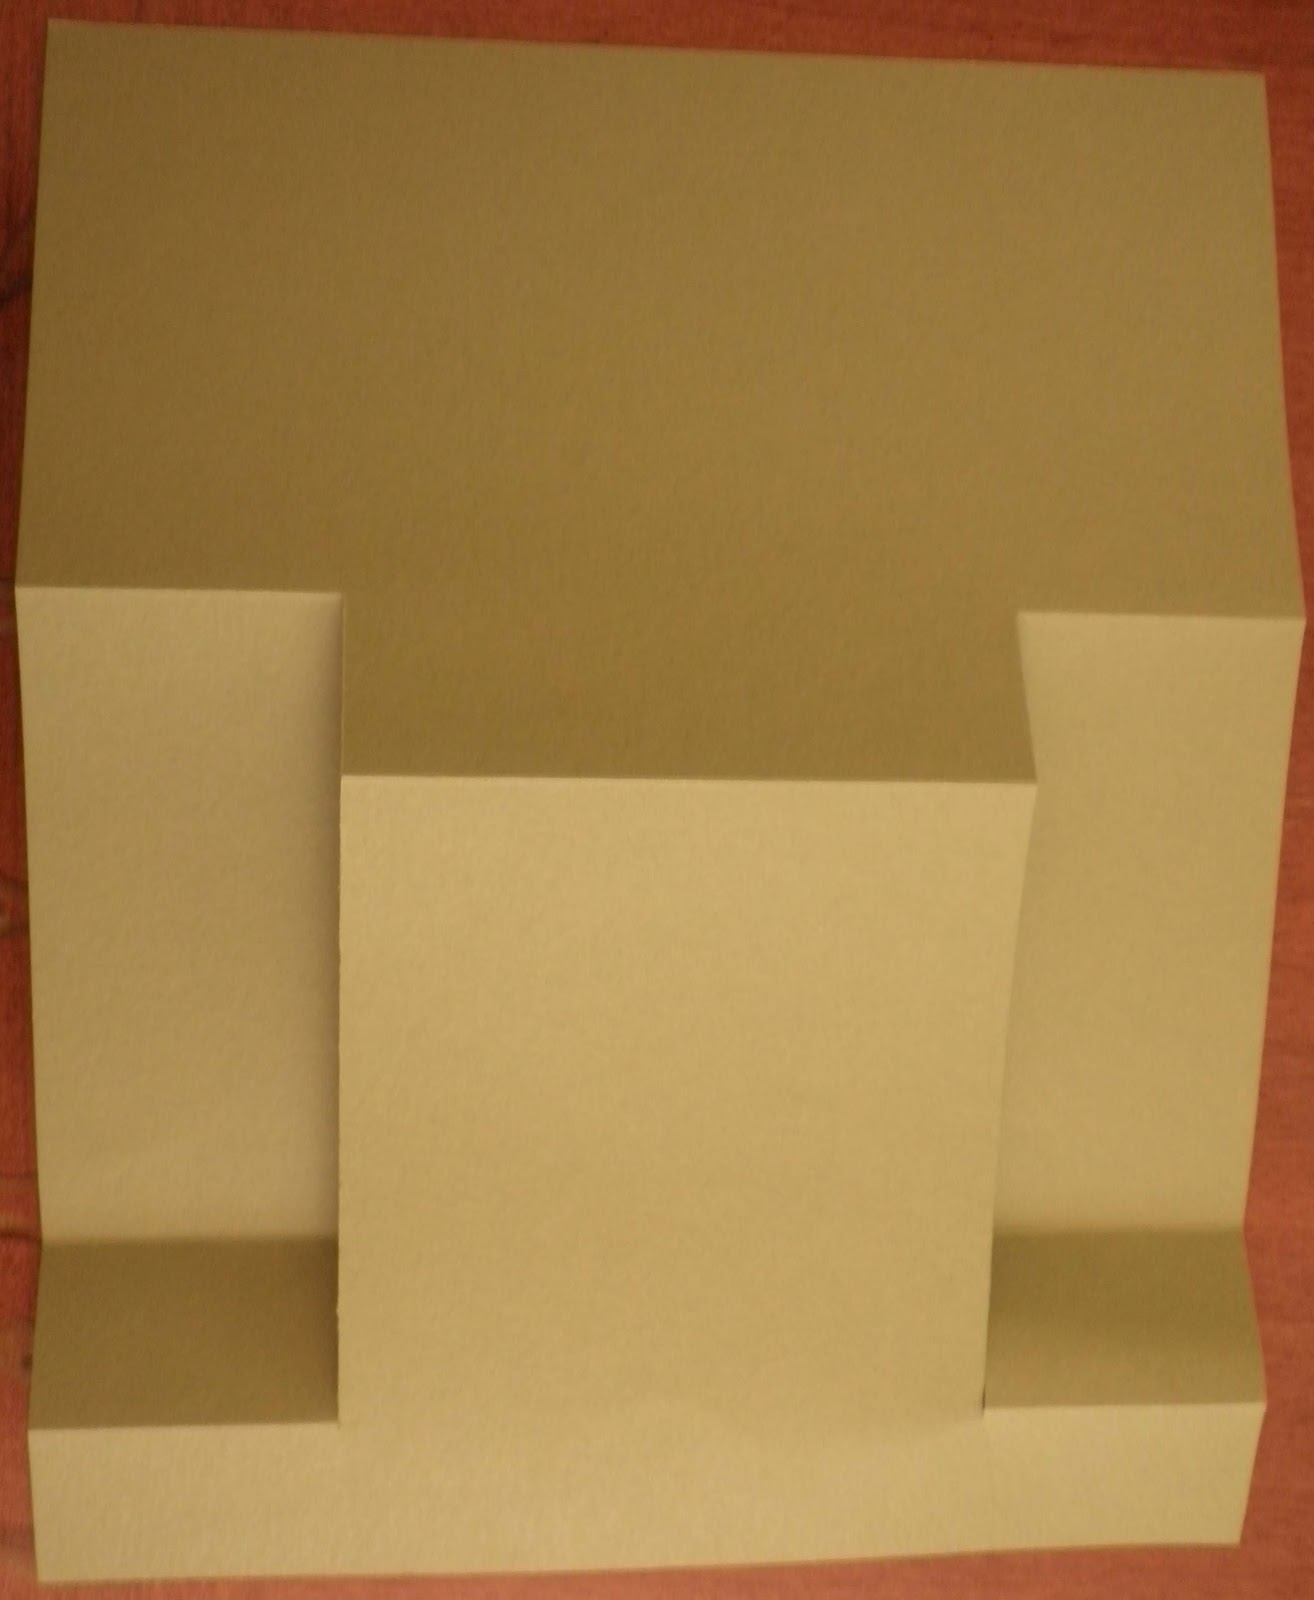
I had been wanting to try my hand at a center stepper card.  While there are many versions of this style, I have given you the template dimensions I used below.  You will make only two cuts along the solid vertical lines marked at 2" from each side.  The dotted lines are scored from the sides to the cut lines at 1-1/4", 2-1/2", and 7".  The dotted line marked at 5-3/4" is scored only between the cut lines.  There is only one valley fold, and that is the fold scored at 2-1/2".  The remaining folds are all mountain folds.
This is a picture of the card after I made the vertical cuts, and how the folds of the card should look.
Bear in mind that you can change the central stepper portion to accommodate your image(s), simply by moving the placement of your vertical cuts.  You can either enlarge it, or reduce it to fit your needs.  If you reduce the central stepper portion, it will then enlarge each of the two side stepper portions.  This could come in handy if you have, say, three larger images you want to display.  Oh, and don't forget, you can change the size of the card altogether by changing the size you cut card stock.  For instance, instead of starting out with a full size piece of card stock, i.e., 8.5" x 11", you can trim it and then downsize your cuts and folds accordingly.  It really is a very versatile card.  Just play with it and have fun.  

Now, here is a picture of the finished card from the side, to show you the dimension.  The card folds up for mailing.  


The vintage baseball card images were found online, and are in the public domain, from the Baseball Cards Collection at the Library of Congress.  As always, you want to be aware of copyright.  


Hope you enjoyed this post, and as always, I am so happy you stopped by.  Please leave a comment, as I always love to hear from you.  

Friday, April 6, 2012

Welcome to the Ginger Snap Scraps Grand Opening Blog Hop!


Ginger Snap Scraps is owned by Cori Wagner, a stay at home mom who has been scrapbooking, card making and rubber stamping for 15 years!

Ginger Snap Scraps carries Cricut Cartridges always for $35 and under. They have popular brands such as My Mind's Eye, Tim Holtz, Copic, Doodlebug Design, The Twinery, Bella Blvd, Graphic 45, La La Land, Little Yellow Bicycle, Riley & Co., Peachy Keen, and any more!

For the grand opening of Cori's online store, many wonderful ladies have created projects to showcase some of the brands that are available in the store.


For my project, I made a tri-fold shutter card using My Mind's Eye 6x6 "Rosy" paper pad. To glue the more intricate pieces, I used Zig Two-Way Glue pen. The buttons are from Graphic 45. The doily lace die (green vertical strip along the card edges) and rosette die are both from Tim Holtz . I also used Tim Holtz distress inks to add color and shading to all pieces of cardstock. It seems to frame each piece and make them stand out a bit more. Can you find the cute little frog on the card?

Various punches were used, as shown in photo below.


Please visit Ginger Snap Scraps today and enjoy free shipping on $25 orders to the U.S. and Canada!

Below is the blog hop lineup, in case you started hopping somewhere else.

Thank you, we hope you are enjoying this weekend's hop!