Thursday, April 26, 2012

Center Stepper Card

It's been awhile since I last posted something.  My, how time flies when you are having fun.  


I made this sports-oriented card for my brother for his birthday.  I know how hard it is to make masculine cards, especially when so much of the scrapbooking industry is catering to "girls".  So, when I saw this paper line from Echo Park, called "This & That Charming", I knew it would be useful for my masculine cards, as well as scrapbooking.  I chose the 6"x6" paper pad because the print designs are reduced and sized perfectly for cards.

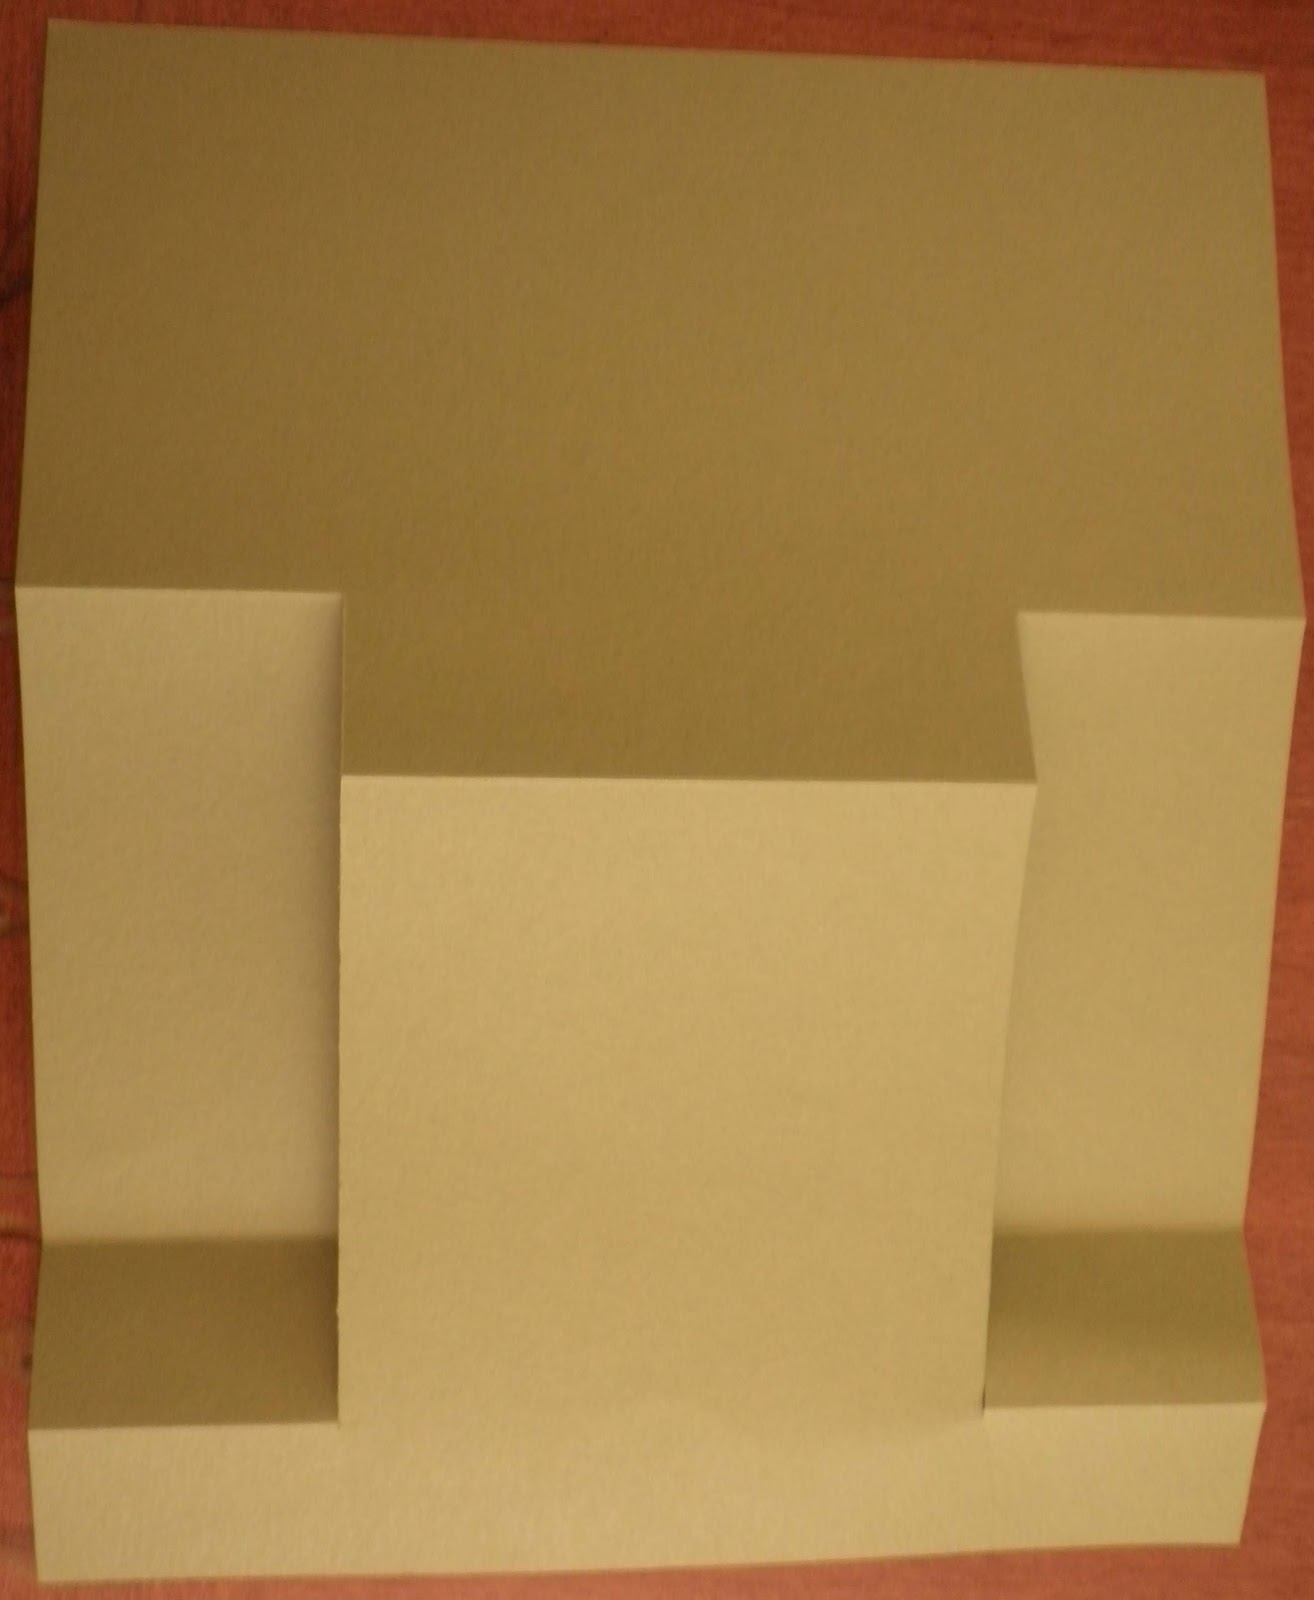
I had been wanting to try my hand at a center stepper card.  While there are many versions of this style, I have given you the template dimensions I used below.  You will make only two cuts along the solid vertical lines marked at 2" from each side.  The dotted lines are scored from the sides to the cut lines at 1-1/4", 2-1/2", and 7".  The dotted line marked at 5-3/4" is scored only between the cut lines.  There is only one valley fold, and that is the fold scored at 2-1/2".  The remaining folds are all mountain folds.
This is a picture of the card after I made the vertical cuts, and how the folds of the card should look.
Bear in mind that you can change the central stepper portion to accommodate your image(s), simply by moving the placement of your vertical cuts.  You can either enlarge it, or reduce it to fit your needs.  If you reduce the central stepper portion, it will then enlarge each of the two side stepper portions.  This could come in handy if you have, say, three larger images you want to display.  Oh, and don't forget, you can change the size of the card altogether by changing the size you cut card stock.  For instance, instead of starting out with a full size piece of card stock, i.e., 8.5" x 11", you can trim it and then downsize your cuts and folds accordingly.  It really is a very versatile card.  Just play with it and have fun.  

Now, here is a picture of the finished card from the side, to show you the dimension.  The card folds up for mailing.  


The vintage baseball card images were found online, and are in the public domain, from the Baseball Cards Collection at the Library of Congress.  As always, you want to be aware of copyright.  


Hope you enjoyed this post, and as always, I am so happy you stopped by.  Please leave a comment, as I always love to hear from you.  

Friday, April 6, 2012

Welcome to the Ginger Snap Scraps Grand Opening Blog Hop!


Ginger Snap Scraps is owned by Cori Wagner, a stay at home mom who has been scrapbooking, card making and rubber stamping for 15 years!

Ginger Snap Scraps carries Cricut Cartridges always for $35 and under. They have popular brands such as My Mind's Eye, Tim Holtz, Copic, Doodlebug Design, The Twinery, Bella Blvd, Graphic 45, La La Land, Little Yellow Bicycle, Riley & Co., Peachy Keen, and any more!

For the grand opening of Cori's online store, many wonderful ladies have created projects to showcase some of the brands that are available in the store.


For my project, I made a tri-fold shutter card using My Mind's Eye 6x6 "Rosy" paper pad. To glue the more intricate pieces, I used Zig Two-Way Glue pen. The buttons are from Graphic 45. The doily lace die (green vertical strip along the card edges) and rosette die are both from Tim Holtz . I also used Tim Holtz distress inks to add color and shading to all pieces of cardstock. It seems to frame each piece and make them stand out a bit more. Can you find the cute little frog on the card?

Various punches were used, as shown in photo below.


Please visit Ginger Snap Scraps today and enjoy free shipping on $25 orders to the U.S. and Canada!

Below is the blog hop lineup, in case you started hopping somewhere else.

Thank you, we hope you are enjoying this weekend's hop!

Thursday, April 5, 2012

Welcome to Leslie Rahye's Hippity Steampunk Easter Blog Hop


And the winner of the Hippity Steampunk Easter Blog Hop candy is ...
Jewels


Very cute bunny! I'd sure love to win! When we owned a home in Ohio I 
spent hours going around Lowe's, etc..in an electric cart.  Used to make 
pot holders with copper tubing and wire...my, what they'd look like now! 
This is quite cool! Thanks!
By Jewels on Welcome to Leslie Rahye's Hippity Steampunk Easter...on 4/6/12


I am so glad you stopped by.  I made this Hippity Steampunk Easter Bunny for Leslie Rahye's blog hop this weekend.  After spending some time (and money) at my local hardware store, I found some really neat things to add to this cute bunny.  I had a blast shopping for the necessary pieces.  Of course, I've always been a big fan of hardware stores.

I first covered a styrofoam egg with glue and multi-colored gold leaf.  When dry, the fun began.
I made bunny ears using two window screen latches, covered with pieces of adhesive-backed metal sheets that I had run through my Big Shot using Cuttlebug's Diamond Plate embossing folder.  I felt the ears were not long enough for a rabbit, so I used Terri Sproul's technique for making her beautiful 3D Crystal Lacquer wings, but instead of wings, I made the bunny's ears.  I first shaped copper tubing into ear shapes, then poured a mixture of powdered pearls and 3D Crystal Lacquer between the copper tubing shapes, and let it dry before attaching to the egg.  I left the silver window screen latches in place as the bunny's inner ear. 
I made his eyes from two gold metal circle shapes with a black lamp knob inserted in the center of each.  I used a white paint pen to put a spot of white onto each black knob.  I found these neat little half round metal pieces, I am told are called Woodruff keys, which I thought made great eyebrows.  For his nose, I used some sort of black "washers" and a silver clip shape.
 I tightened a bracket used for duct works around his little belly, and adhered square stickers along it.
I used four pegboard pliers holders for his paws, which I also covered with that same adhesive-backed metal sheet that I had embossed with the Diamond Plate embossing folder.  I put two Tim Holtz swivel clasps together end to end, and wired alphabet beads together to spell "Happy Easter", which were added to the jump rings on either side of the swivel clasps, then placed in each of the bunny's front paws as though he his holding the sentiment.
I inserted a Silcock Key on his back to look like he needs to be wound up.  Don't we all need that sometimes.
His little bunny tail was made from adhesive-backed metal that I adhered to gold cardstock which I die cut using Sizzix/Tim Holtz Mini Paper Rosettes die.  I used both rosettes and stacked them for extra dimension.  Had to add a sprocket gear and game spinner to his tail.  I placed Tim Holtz sprocket gears along the side of the bunny's body, as shown.  I also inserted copper brads all along his back side to look like rivets.

I have a little blog candy to give away to one lucky winner.  All you have to do for a chance to win is post a comment on my blog, and become a follower.  Due to postage costs, however, I can only send to U.S. addresses.

Thanks so much for visiting, and I hope you enjoy the hop.


Wednesday, March 28, 2012

Viva Las Vegas Stamps Monthly Challenge - A Birthday Card for Terri Sproul


Here is the birthday card I made for Terri for the Viva Las Vegas Monthly Challenge.  I used the Steampunk Flying Machine image from  VLVS Plate 1376 to first stamp in black on the cardstock.  Then I stamped and cut out portions of that same image several times onto various pieces of steampunk printed cardstock. I used pop dots beneath the boat and balloon images to make them pop out in a 3D fashion.  Rock Candy Crackle Paint was used on the balloon of the Flying Machine.  I used a silver paint pen to color the pole and workings of the fan and propellers.  I used Couture Creations Ascension embossing folder on blue cardstock, sanded and cut out each image, then adhered to the bottom layer of cardstock.  I cut a slit in the VLVS Flying Machine image to insert part of the blue embossed balloon behind the stamped balloon image.  I also cut out a few more embossed images from the Ascension embossed paper and adhered, as shown.  I then used Jillibean Soup tiny alphabet stickers to spell out "Happy Birthday" and "24".  I stamped portions of the Hero Arts watch gears along the edges of a kraft card using Vintage Photo Distress Ink. At this point, I felt the card needed a little more, so I die cut some gears from Donna Salazar's Spellbinders Sprightly Sprockets die, and embossed each one with a copper and patina embossing powder before adhering to the card.  I used the punched out portion of one of the larger gears to decorate the large balloon.

Thursday, March 22, 2012

Guest Designer and All Things Altered Blog Hop - "Sewing Bird" House

Here it is ... I call it my "Sewing Bird" House.


I covered a bare wooden bird house with DCWV self-adhesive fabric paper (blue collection), then cut three gears from handmade copper-colored paper using the Spellbinders Sprightly Sprockets die, toning down the copper color with a wash of Walnut Stain Distress Stain. When dry, I adhered the gears around each opening in the bird house.  Next, I hammered the metal roof on the inside, then applied Baroque Art Gilder's Paste (copper, rust, and verdigris) to the outside.  Before reattaching the roof to the bird house, I punched a small hole in each crease and inserted Tim Holtz Ideaology antique gold chain through it.  I ran two sizes of Graphic 45 metal butterflies through a Vintaj Deco Motif embossing folder, applied copper Gilder's Paste and Vintaj Patinas in blue and green before adhering to top of roof.  I used Tim Holtz Sizzix mini dress form and thread spool movers and shapers die to cut them from real wood paper, then adhered another matching piece of DCWV fabric paper to the dress form.  Next, I wrapped floss around the thread spool and waist of the dress form and adhered both to the base of the house, along with some Tim Coffey (K & Company) and Prima flowers.  I also used the copper paste to color the vintage (replica) sewing bird.  It was a bright, brassy gold color.  I finished the bird house off with a few sewing-themed embellishments.  Look closely at the scissors in the lower left ... they are etched with a cute little squirrel, who appears to be watching the sewing bird above.  The scissors are also a replica, but I can always remove them to use, if I choose to.


In case you are unfamiliar with sewing birds, I am including a picture of one below.  It was used as a "third" hand.  By clamping the "bird" onto a nearby table, you would  insert your fabric into the mouth of the bird, and holding the fabric taught with your left hand, you could then continue working with your needle in your right hand, and vice versa, of course, if you are left-handed.


This particular sewing bird is a replica of an antique sewing bird, and I was able to find it inexpensively at Lacis.com.  It was blemished, so I purchased it for a "song", and I'm still looking to find what is wrong with it.  Being inexpensive, and not an actual antique, I was able to allow myself to alter it without a sense of destruction to an otherwise beautiful Victorian tool. 


The All Things Altered Blog Hop is hosted by Pam Bray, so you will want to visit her blog Scrapbook Flair to start hopping in the right direction.  There you will find the links to the many talented artists participating in the blog hop.  Enjoy your hop, and thanks for stopping by.

Tuesday, March 20, 2012

A New Look

I know I should be working on my projects for my blog hops, but I could not resist playing around with the blog backgrounds I found on Shabby Blogs. I am partial to Victorian and birds, and there they were.  All of the backgrounds and tutorials are free.  What a blessing for someone as computer-illiterate as I am.

Sunday, March 18, 2012

Upcoming Events

I can hardly believe that nearly a month has gone by, and I have not posted anything. Shame on me. But we have had an early spring, and with it came pollen, and lots of it. Need I say more? I seem to be over the worst of it, for the time being, and so I wanted to update you on what's coming this week. I have been working feverishly on my first submission for my first blog hop later this week. It is an altered art blog hop, hosted by Pam Bray, who kindly invited me to be a guest artist. I am so excited to be participating, and would like to invite you all to stop back by my blog on Thursday, 22 March. I will also post a link to her blog hop then.