Monday, December 28, 2015

A Merry and Bright Holiday Canvas

Happy Holidays, friends!  I hope everyone had a very Merry Christmas!  The Altered Pages team has been working all month with some really cool products from Activa® .  Today, I want to share a project, not only using Altered Pages products, but also two Activa® products, Lumina Air Dry Polymer Clay and PermaStone Casting Compound.  Both products give fine detail from these molds, but each one works a bit differently.  Complete directions can be found on the packaging.


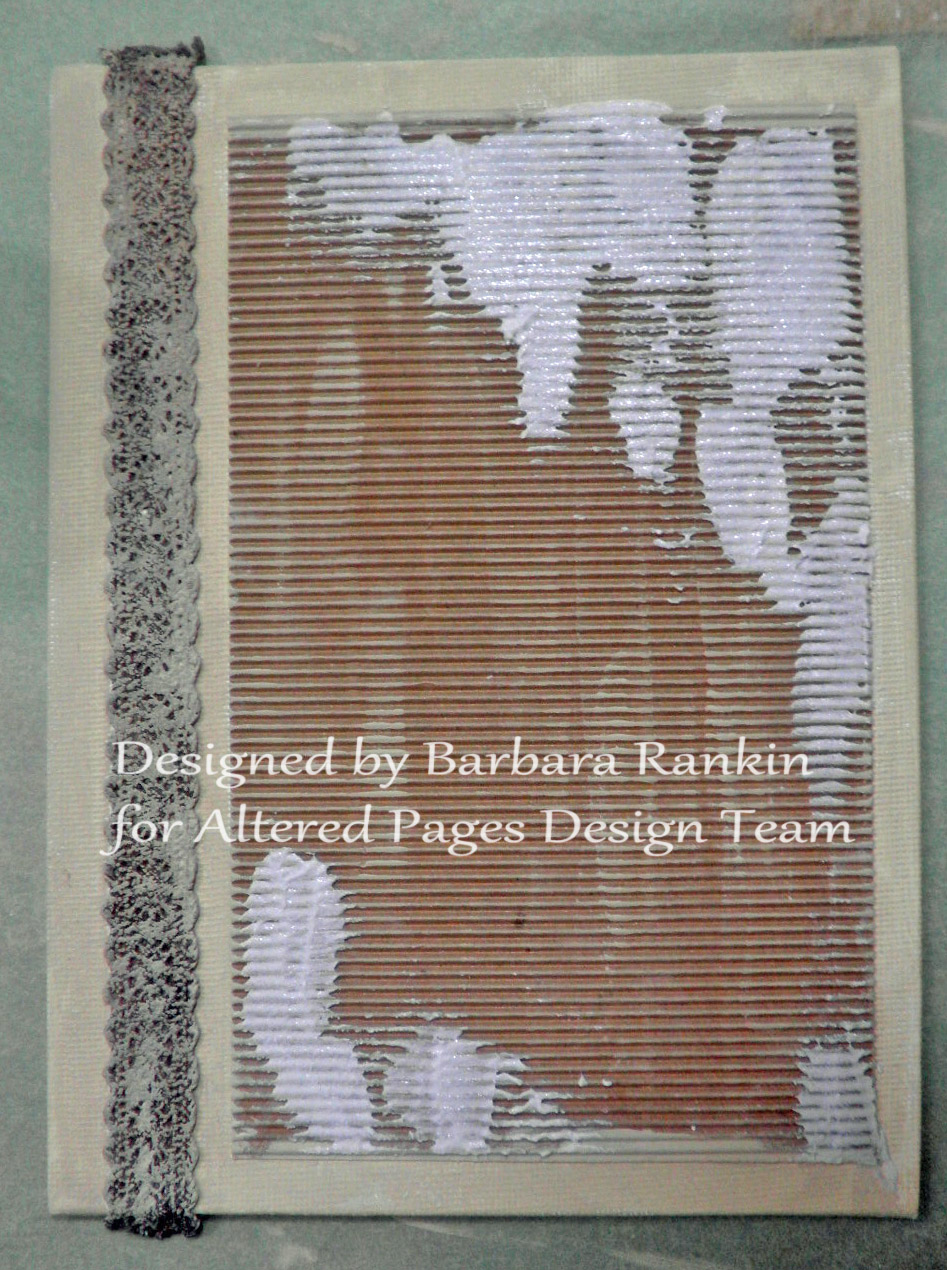
I began with a 6"x8" Canvas Panel, adhering a 4-1/4" x 7-1/4" piece of Kraft colored Adhesive Corrugate paper  to the front. I offset the corrugate paper, as shown, so I could add a strip of the brown Vintage Lace Tape along the left side.  I used Aleene's Tacky Glue to ensure I got good adherance to the canvas.


Paint canvas and lace with Timeless DecoArt Chalk Paints, but dry brush the color over the corrugate paper.  

Randomly spread sand paste over corrugated board.


Mix a small amount of the PermaStone Casting Compound and pour into the ornament mold.  As you can see in the picture, I was having a good time making different pieces for more projects.  You will want to do that while you have it out, plus it's fun and quite addictive.  Tomorrow, I will show you what I did with the frame you see in the lower part of the photo.  The compound dries pretty quickly, but I like to let it cure overnight for added strength.


 I also made many roses using both the Permastone and the Lumina clay.  Below is a picture of the clay in the mold.


Silicone molds are the easiest molds to use because nothing seems to stick to them, and they are flexible, making it easy to remove your molded pieces.  

In the photo below, you can see the difference in the two products.  The clay is more ivory colored and very smooth.  The Permastone is white and, while I think the detail is awesome, there is a slight difference in the smoothness of the finished roses. But that can be a good thing for some  of our more shabby chic projects. 
If you are short on time, the PermaStone is the way to go, because it dries so quickly, while the Lumina clay requires 24 hours.

I coated my ornaments with glaze medium because the PermaStone is quite porous and I want to be able to blend and mix colors as I paint them. 

I painted the ornanments first with a coat of white fluid acrylic. The fluid acrylics are very thin, so I used them instead of regular acrylic so the paint would not fill in my details.


I next brushed on a coat of interference gold fluid acrylic.  


Activate the Mica Paint Palette with water and color the ornaments with the blue and green colors, blending as you paint until you like the effect, let dry.


Next, I added a wash of the gold metallic, mostly hitting the high spots on the ornament.  


I used the Lumina Clay to mold this little beauty.  I made a thick, creamy paste with the gold and hit just the tops of the flowers.


Now, back to the canvas.  Paint the canvas panel with purple, red, violet, and gold from the Mica Paint Palette , mixing and blending on the panel until you like the effect.    Set aside to dry.


Adding Purple and Red


Adding Red and Gold


Adding White Pearlescent

Finally, randomly brush on some of the white pearlescent over the background, and spread a bit of the African Bronze Gilder's Paste in some areas.  Set aside to dry.


Adding African Bronze Gilder's Paste
I die cut some leafy foilage from green double sided paper and adhered to the canvas, as shown in the finished photo.  Some of the smaller foliage was painted with the green and gold mica from the Mica Paint Palette .


I used the Aleene's Tacky Glue to adhere all of the embellishments to the canvas, including the molded pieces.   Visit the Altered Pages shop for a nice variety of embellishments you could use on any of your art projects.


I "hung" the ornaments from a piece of twisted wire and decorated the tops with tiny pine cones, punched leaves, and twine bow.  Finally, I added some faux snow on the leaves and along the top of the canvas.

Here are a few close-ups of the canvas sections.


Altered Pages Supplies:

Canvas Panel (6x8)
Adhesive Corrugate paper (Kraft)
Vintage Lace Tape (chocolate brown)
Aleene's Tacky Glue
DecoArt Chalk Paints (Timeless)
Mediums Textural Accents Sampler
Mica Paint Palette  (Pearlescent & Metallic)
Gilder's Paste (African Bronze)
Molds

Other supplies:

Lumina Air Dry Polymer Clay
PermaStone Casting Compound
DecoArt Media Texture Sand Paste Neutral
DecoArt Media Fluid Acrylics Titanium White
DecoArt Media Fluid Acrylics Interference Gold
Finnabair Snowflake Paste
Foilage dies and punches (Sizzix 658759-Holiday Greens)
Twisted wire
Mini pinecones and berries
Brown twine


I hope you enjoyed my canvas and that I have inspired you to try making one for yourself or a special person in your life.  Remember, the Altered Pages design team shares even more inspiration daily on the Altered Pages blog.  Stop by and see what they are up to.

Many thanks to Activa® , our sponsor this month.  Check out their website for a complete look at all of the products they carry.

Thanks for stopping by, and have a very Happy New Year!!!

Barbara

Thursday, December 24, 2015

Altered Christmas Gift Bag with Gypsy Soul Laser Cuts

Merry Christmas, everyone!  Well, 2015 is almost over  and here I am with my last post for this year, so I thought and thought about what I would like to share with you.  Then it came to me.  I want to give each and every one of you a bag full of blessings and good wishes for the new year.  So, I needed something to put them in, and what better way to present them to you than in a beautifully hand-decorated gift bag.  

As you know, Gypsy Soul Laser Cuts is chock full of fabulous designs to help you with all of your crafting needs.  And here is just one example.  


I started with a plain, ordinary brown gift bag.  Nothing special, but I  hope you will agree that I managed to turn it into something quite nice, and it was so easy.  I made this in an afternoon, including paint drying time.  

Here is a short video tutorial of this quick and easy process.


Here are a few closeups of the bag.


Gypsy Soul Laser Cuts Products Used:

Flourished Deer
Pine Tree Shape Set
Snowflake Shape Set
Christmas Shape Set

Other Supplies Used:

Brown gift bag
DecoArt Media Fluid Acrylics Sap Green
DecoArt Media Fluid Acrylics Phthalo Green-Yellow
DecoArt Media Fluid Acrylics Green Gold
DecoArt Media Fluid Acrylics Burnt Umber
DecoArt Media Fluid Acrylics Dark Grey Value 3
DecoArt Media Texture Sand Paste
Finnabair Snowflake Paste
White Gesso (Liquitex) in dauber bottle
Crystal Stickles glitter glue
Viva Decor Ruby Glitter Liner

Be sure to stop by the Gypsy Soul Laser Cuts blog to see more inspiration from the design team, and check out the fabulous chipboard in the shop.  There is always something new.

Thanks for stopping by, and have a very Merry Christmas and a wonderful New Year!

Barbara

Friday, December 18, 2015

ColourArte Mixed Media: Christmas Snowflake Home Decor

Happy Holidays to one and all!  I am so excited to share another video tutorial with you today as part of the ColourArte Video Creator team.  Although I doubt we will have a white Christmas here in the mid-South, I was very much in the mood for seeing snowflakes, so I made my own.


Here is the video for you to enjoy.


Supplies Used:

ColourArte Silks Acrylic Glazes
  • Oyster
  • Celedon
  • Autumn Skies
ColourArte Twinkling H20s

  • Burnt Umber
  • Hunter Gray
  • Icicles
  • Douglas Fir
  • Jasmine
  • Snapdragon
  • Wintermist Gray
  • Egyptian Gold
  • Blue Ice
ColourArte Radiant Rains Dauber
  • Blue Ice
Other Supplies Used:

Snowflake Icon  (Paper Studio)
Merry & Bright wooden cutout (Michaels)
Snowflake wooden cutout (Michaels)
Bazzill 6x6 Antique Aged Paper pack
Jenni Bowlin ST866 Pointed Star stencil (6x6)
Snowflake Paste (Finnabair)
Soft Gel Matte (Golden)
White Gesso (Liquitex)
White Crackle Paint (DecoArt Media)
Flowers (Paper Studio, Prima)
Christmas Sprays (Hobby Lobby, Dollar Tree)
Cheesecloth
Stickles Stardust glitter glue

If you liked my video, I sure would appreciate if you would give me a thumbs up.  Also, I regularly post new videos each month, so if you subscribe to my YouTube Channel, you won't miss when new video projects come out.

As always, thanks for stopping by today, and have a very Merry Christmas!

Barbara

Thursday, December 17, 2015

A Wintry Mixed Media Canvas with Gypsy Soul Laser Cuts

Hey there my fellow chipboard lovers.  I have a wintry mixed media canvas to share with you for your holiday decorating.  I love snowmen (or snow people) and I think this pair from Gypsy Soul Laser Cuts are just the sweetest.  And look at all the other pieces you get to go along with them.  


I started out with an 8x10 canvas, and chose these pieces from the Christmas Shape Set.   I wasn't sure if I would use them all, but I did, except for the holly leaves.  Those will be used another project.  
Choose a nice background paper to go on the inside of the canvas.  I wanted the paper a bit more brown, so I used a blending tool to add Antique Linen distress ink over the paper, which was cut to fit inside the opening on the back of the canvas.  You can see the subtle difference in the top sheet, compared to the original color on the bottom piece.  

I used blue Inktense ink with a water brush to add some color to the birds printed on the paper.
Insert and glue the paper to the inside of the canvas, as shown.
I cut strips of the wood grain paper to fit the top of the frame and cover those ugly staples.  I laid each strip down and mitered the corners by aligning my ruler with the inside and outside corners and removing the excess.
Glue the strips to the top of the frame.
Cut and glue more strips to the inside and outside of the frame.  Edge the frame with a silver ink pad.
Now let's get started coloring and decorating the chipboard pieces.    I painted the two snow people with white gesso, then dabbed snow paste over the body portion.  The top hat was colored with black Inktense ink and a water brush, as shown below.  The fully colored hat will be glued to the base for added dimension.
The knit hat, bow, and scarf were colored with Inktense inks and a water brush.  I later added gold glitter to them, and some ivory Flower Soft on the pom pom.  I made tiny black pieces to use for buttons and eyes.  
Here are the chipboard pieces all colored, glittered, and decorated.  

Let it Snow was colored with Inktense colors, and the snowflakes and icicles were glittered with Crystal and Waterfall Stickles.

I heat embossed the lamppost with clear embossing ink and black embossing powder.  The light inside was colored with Inktense colors, and a coat of 3D Crystal Lacquer added.

The light bulbs were colored with Inktense colors, and a coat of 3D Crystal Lacquer added. A gold Krylon pen gave the ends the metal look needed, and a few details added with a black pen.  White alphabet rub ons were added to spell "brrrr".

The snow people were finished off by gluing the black clay pieces, as shown, and a white dot with a pen added to the eyes.  A clay "carrot" piece was colored with Inktense ink and a water brush and adhered, as shown.   A black pen was used to draw the smiles.

A few paper punched ivory leaves were added to the top hat with a couple of red glitter dots for berries.
And here is the final placement of each piece.  While decorating the bottom of the frame, I decided to use the small pieces from the Yarrow piece, colored brown with Inktense inks, and added to the bottom left corner, and a few sprigs around the words in the upper right.

Additional flowers and leaves were added, as shown, and some Crystal Stickles added for extra sparkle.
And here are a few close-ups, starting in the upper left and clockwise, to help you see it a little better.  

Here, you can see the piece of twisted wire I used to "hang" the light bulbs from, and the rub-on letters spelling "brrrr".  


In this close-up, you can see the clay "carrot" noses, the white dots in the eyes, and the decorated hats.
Here you can see the Patina gilder's paste I added to the "iron" look of the lamp post.
And finally, I added more snow paste to the inside along the bottom of the frame, to give my little snow people something to keep them cool.  

Supplies used:

GSL - Christmas Shape Set
GSL - Winter Shape Set
GSL - Yarrow

8x10 canvas
Recollections Rustic Luxe 12x12 paper pad
Derwent Inktense Ink Blocks
Water brush
Stickles glitter glue (Crystal)(Waterfall)
Patina Gilder's Paste
White gesso (Liquitex)
Clear embossing ink
Black embossing powder
3D Crystal Lacquer (Sakura)
Paper Flowers and Leaves (Recollections)
Snow Paste (Finnabair)
Black clay (Sculpey)
White Big Brush Pen (Faber-Castell)
Twisted wire (4")
Ivory Flower Soft

I am also going to enter this in the Gypsy Soul Lasercuts monthly challenge (as inspiration only).  The theme is Let it Snow.  I hope I have inspired you to perhaps make your own holiday canvas, and check out the challenge and show us your creations.  Yes, there is always a prize.  Whooooo hooooo!

In the meantime, I hope you have a wonderful holiday, stay safe, and keep on crafting!


Barbara