Showing posts with label Graphic 45 Olde Curiosity Shoppe. Show all posts

Thursday, August 23, 2018

Olde Curiosity Shoppe Shadowbox with Gypsy Soul Laser Cuts and Graphic 45

Hi everyone!  Today I want to share a peculiar shadow box with you using Gypsy Soul Laser Cuts
Deco Front Shadow Box and Graphic 45's Olde Curiosity Shoppe Collection.  Of course, this is just my jumping off point.  Who knows where this will lead me. 


Back of Box
Here is a diagram of the parts of a dovetail joint.  It's really easy, just pins and tails.


Cut paper to 6-3/4" square for the back of the shadow box, and four strips 1-1/4" by 6-3/4" for the inside of each side piece.  Glue each piece to the respective chipboard, leaving the dovetail pins and tails uncovered so they can be inserted into their respective openings, as shown.


Glue chipboard pieces together to form the box.


Ink up front of shadow box with Patina ink and heat emboss with Patina Oxide embossing powder.  Work in sections so you always have a part to hold onto.  


Repeat process for back side of frame.

Put glue on inside and outside of box pins and inside each of the tail openings.


Lay frame over them and push down on the pins to adhere frame to box.


When the glue dries, ink up the box pins showing through on the front and emboss with the Patina Oxide embossing powder.  I happened to have a reinker for my ink pad, and it made it easier to just ink and emboss the pins, but is totally optional.


You will still see the pins, but you could always continue adding embossing powder until it levels out.  However, I chose to leave it because most of it will be covered up by embellishments, and I kind of liked the texture and design it gave to the front.  


Cut two  pieces print paper to 1-¾"x 7-¾" and cover two sides opposite each other, mitering corners, as shown.

 Cut two more pieces 1-3/4" x 7", glue to remaining sides of box, turning edges only, as shown. 


Cut a piece of print paper to 7" square and adhere to back, as shown.  Edge box with Black Mixed Media ink pad.  Use heat tool to dry ink.


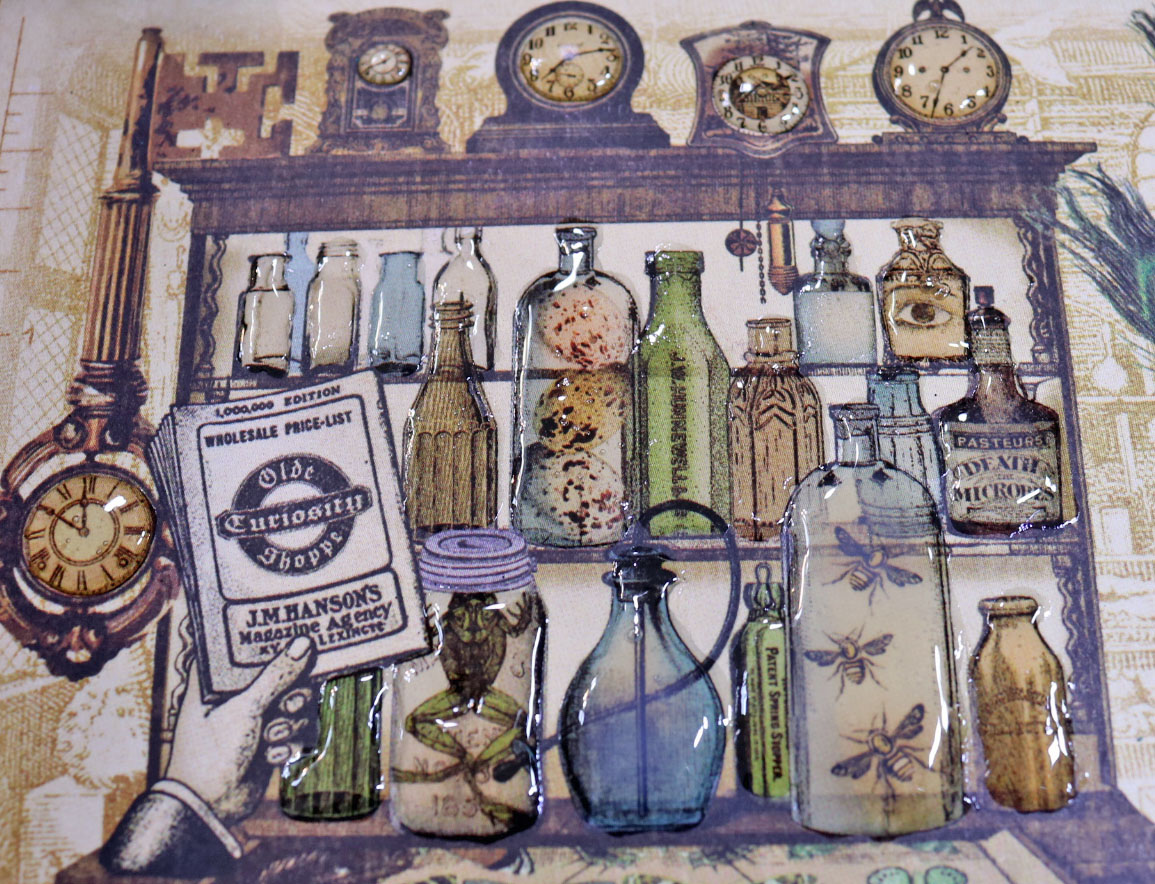
Use Glossy Accents on the bottles and clock bezels in and on the cabinet to bring them to life and add a bit of dimension.


Cut out the words "the Olde Curiosity Shoppe of Unusual Oddities" and layer it onto a slightly larger piece of black cardstock.  Adhere to inside along top edge with pop dots, as shown.


Fussy cut some images from the Graphic 45 paper.  I used Ultra Matte Varnish on the pieces because it adds strength to the paper and dries completely invisible.  I also added a layer of glossy accents to the legs in the jar at upper right in the photo.


Fussy cut a second shoe skate, curve it outward with your fingers and pop it up on top of the printed one using black foam squares or pop dots.  It's hard to tell in the photo, but I think you can see a shadow on the right side because I was shining a light inside the box from the left.  There is also a cut line showing on the right side of the skate because the paper is elevated by the foam dots.


To disguise the join between the two skate images, I fussy cut some additional leafy flourishes from the paper and edged each one with a Sepia Big Brush pen.


Then I carefully placed them over the edge of the skate to cover that cut line and add some cool dimension at the same time.


Cut apart the wrought iron border piece, as shown.  I used only two portions of what was left of my border piece.  Click on this link to see the entire Wrought Iron Set.  


 Ink pieces with Black Mixed Media ink and heat emboss with Oil Rubbed Bronze embossing powder.  Repeat this process for the two corner pieces in the  set.


Put dots of glue onto the right side of the border piece, as shown below.


Place border piece under lip of box frame and sides.  


Repeat embossing process for the two corner pieces in the Wrought Iron Set and adhere them to the inside edge of the frame, as shown.


Use a distressor tool to rough up the edges of the Olde Curiosity Shoppe sign.  Add Walnut Stain DS to the edges, then "water down" the color using the Antique Linen DS.


Use your fingers to shape the sign and glue it to the top of the frame, centering it over the opening.  I used clamps to hold the paper in place while it dried.


 Color some small ivory feathers with Peeled Paint and Antique Linen DS.  Use water to actually lighten the color.  The feathers will look like a hot mess, but they will dry back to their normal "fluffy" state.  

See, I told you so!  LOL


Insert the feathers inside the shoe skate, as shown below.


I layered all the bottles and clock bezels in and on the cabin with Glossy Accents.  I recommend you do this just before bedtime or when you are taking a break to let the Glossy Accents dry.  I tend to forget it's there and inevitably stick my finger or arm or something into it.   


I started adhering my remaining fussy cut pieces, as well as that last piece from the Wrought Iron Set which I placed just behind the lady.  I used a tiny wooden spool to elevate the larger flying pig, and a piece of a paper straw to elevate the smaller pig.  I also adhered the legs in glass piece to the right side of the frame (lower corner).


 To make the lamp that I placed above the jar with legs, I cut apart the sconce piece from the Fancy Lamp Post & Sconce Set Small.  The bottom of that is still useable as a corner piece.  


I also chose four propeller pieces (one is hidden beneath the pile of embossing powder).  I inked all pieces, both sides, with Adobe Mixed Media ink and heat embossed them with the Chunky Rust embossing powder.  


To finish the lamp, I traced the lamp area onto a small piece of mica with a black sharpie marker.


I cut the mica out and glued it to the back of the lamp with Glossy Accents.  Then I glued it just above the jar with legs, as mentioned before,


The propellers were layered with small metal beads glued between them.  I found it was easier to glue a bead to the back of  each propeller and let it dry.  Then I would stack them on top of each other.  This photo also shows how I glued the tiny wooden spool to the back of the larger pig.


Here is what I mean.  I used a rusty screw piece from Prima on the very top propeller. 


As you can see, the propellers were glued on either side of the Olde Curiosity Shoppe sign.


I fussy cut some butterflies from the paper and placed them randomly over the shadow box.  


Supplies Used:

GSL Deco Front Shadow Box
GSL ATC Stand
GSL Fancy Lamp Post & Sconce Set Small
GSL Wrought Iron Set
Graphic 45 Olde Curiosity Shoppe paper collection
DecoArt Media Ultra Matte Varnish
ColorBox Mixed Media Ink Pad (Patina) (Black) (Adobe)
Patina Oxide Baked Texture embossing powder (Seth Apter)
Chunky Rust Baked Texture embossing powder (Seth Apter)
Oil Rubbed Bronze embossing powder (Allure)
Tim Holtz Distress Stains (Peeled Paint, Antique Linen, Walnut Stain)
Mini Mica Tiles (USArtQuest)
DIY Shop Paper Straws (American Crafts)
Mini wooden spool
Glossy Accents (Ranger)
3D Foam Squares (black optional)
Aleene's Fast Grab Tacky Glue
Distressed Tool

Well, I hope you enjoyed all the photos and step-outs today.  Be sure to check out the Gypsy Soul Laser Cuts shop to see what fun things you will be inspired to make.  And don't forget to share your projects with us on our Facebook Group Page.  

Thanks so much for stopping by, and have a wonderful day!

Barbara

Thursday, February 18, 2016

Mini House Shadowbox with Gypsy Soul Laser Cuts and Graphic 45

Hey chipper gang!  Barbara here, and it's my turn on the Gypsy Soul Laser Cuts blog to share a project with you today.  I love making things with dimension, and when I saw these adorable house shaped mini shadowboxes from Gypsy Soul Laser Cuts, I knew I had to play with them.  I expect this will be a series of projects that I will post, so stay tuned.  Today's box is using the fabulous Graphic 45 Olde Curiosity Shoppe.  


I always lay my chipboard out the way it will be glued together, just to make sure I have it positioned  correctly.  I like to use Aleene's Fast Grab tacky glue to put my chipboard together.  It does just what the name says, grabs fast so you are hands free to continue working on your project.


After gluing the house together, I painted it, inside and out, with green chalk paint.  I cut a piece of blue print paper for the inside of the box.  Next, I carefully cut along this tiny diamond border from the paper collection and adhered along the front edge, as shown, piecing as needed.

NOTE:  All papers were edged with ink before adhering to help hide the white cut edges.  


I covered the outside (back and both sides only) with the red flourish print paper.  The roof was covered with red circles paper.  

I painted a small piece of the Texture Sheet Diamonds with black chalk ink and adhered inside the box.  

I then fussy cut small images from the Graphic 45 paper collection to see what would fit inside my mini box.  For added strength, I coated each piece with the ultra matte varnish.  It is totally invisible.  I place all of my images inside the box, as shown, including a tiny flower pot miniature I had in my stash.

Two strap hinges, gears, and propeller, were painted with black chalk ink, then I added a bit of the rust paint.  You will want to paint both sides if the backside of any of these shapes will be seen, as with the propeller, the lower part of the strap hinges, and a few gears. 

Glue the strap hinges to the roof.  The propeller with brad were added between the roof eaves that have been covered with the strip of wording from one of the papers from the collection.  

The curio cabinet was fussy cut, then pop dotted with two layers of dots to give it enough lift before adhering to the bottom of the house.  Half of the eyeglass and the peacock head were fussy cut, then adhered to the back above the curio cabinet image.  Wind up girl was shaped and adhered to the left edge of the box.  She is curious and is thinking of going into the shoppe.

Gears were added to the box, as shown. Some were cut in half and added to the box sides.  

On the back, the Olde Curiosity Shoppe sign was made by using a 1 ¼" square punch, and then I used a ticket stub corner punch on all four corners.  The raven holding the Carter's Liver Pills sign was fussy cut and also adhered, as shown.

Here is a closer look at the inside of the shadow box, as well as the sides and back.  


GSL Supplies Used:


Other Supplies Used:

Graphic 45 8x8 Olde Curiosity Shoppe paper collection
Black Chalk Paint (DecoArt)
Green Chalk Paint 
Ultra Matte Satin Varnish (DecoArt)
Rust Paint (Viva Decor)
Mini brads and flower pot
1-¼" square punch
Ticket stub corner punch

I hope you enjoyed my version of an Olde Curiosity Shoppe with this fun little Mini House Shadowbox 3 from Gypsy Soul.  I have a few more of these little cuties, so stay tuned to see where my imagination takes me next.  

Thanks so much for stopping by, and have a very curious, and crafty, week!

Barbara

Friday, October 25, 2013

All Things Altered Fall/Halloween Blog Hop 25-27 October


Hi everyone, and welcome back to the annual All Things Altered Fall/Halloween Blog Hop, hosted by  Pam Bray, and featuring some really fabulously talented artists.  You can begin the hop on her blog at Scrapbook Flair.  She will be giving away a fabulous prize to one lucky winner.  To enter, all you need to do is visit each blog, leave a really nice comment, and return to Scrapbook Flair and tell her that you did.  We would also love it so much if you would follow our blogs, as well, especially if you like what you see.

For my project piece, I want to share my Graphic 45 Olde Curiosity Shoppe mini album.  I learned to make this book in one of Marsha Bichler's classes.  She is a very talented local artist who loves to share her bookmaking talents.  While I love making these books, after all the technical part is finished, the really fun part of embellishing follows.  I usually spend many days, or even weeks, embellishing my books.   So let me share some photos and brief descriptions of the book pages.

Front Cover
Fussy cut various images from the Graphic 45 papers.  
These feathers were fussy cut and multiple snips made around the edges with scissors to give it a fluffy, feathery look.  
3D Crystal Lacquer added to eyeglass image, clear crackle medium added to butterfly wings
When opened, each page has this lace doily flap.
Each page is actually a pocket that holds a tag that is attached to the doily flap.  I used some of the curious definitions on each of my pocket tags.
Inside cover and Page 1
Page 1 with tag flap closed
Page 1 with tag flap opened
Crackle mediums and glossy accents used on various images for dimension and interest.
Page 2
Embossed chipboard shapes were painted with gold acrylic paint, then black ink to age it.  Also see picture of spine below.

Page 3
Page 4
Page 5
Flourish gem stickers, more snipped feathers, and 3D Crystal Lacquer added for dimension.

Page 6
Page 7
Some images were adhered on only three sides to form a pocket in which to hold tags and other tiny bits of ephemera.
Page 8
Page 9
More gem stickers, a crochet flower, vintage button, and metal bee charm were added to this page.
Page 10
Page 11
Page 12 and inside back cover
Page 12 with gem stickers and a metal filigree butterfly
Inside back cover with gem stickers, and Tim Holtz film strips added 

Outside Back Cover
Aged embossed chipboard pieces on the spine
The closure was made by punching a hole in the back cover and inserting a Tim Holtz swivel hook with chain through the hole.  A binder clip was attached to the chain with a jump ring, and more charms were hung from the clip. 


I hope you enjoyed my curious, and a bit macabre, mini album, perfect for Halloween, don't you think?  A complete list of all of the bloggers is listed below to help you on your way.  Your next stop will be with Jessica, and I know she has something really special to share with you.  

Thanks so much for stopping by today and hopping along with us.  Enjoy the rest of the hop, and have a wonderful weekend.

Barbara