Thursday, April 30, 2015

ColourArte Silks: Mixed Media Circle of Life Wreath

.............................................................................
If you are here for the House of Cards blog challenge, please click here.
˙˙˙˙˙˙˙˙˙˙˙˙˙˙˙˙˙˙˙˙˙˙˙˙˙˙˙˙˙˙˙˙˙˙˙˙˙˙˙˙˙˙˙˙˙˙˙˙˙˙˙˙˙˙˙˙˙˙˙˙˙˙˙˙˙˙˙˙˙˙˙˙˙˙˙˙˙˙˙˙˙˙˙˙˙˙
Hello fellow ColourArte-ists, and welcome back to my first post for May.   I am so excited to share my project with you today because we are featuring some gorgeous paints, aka, Silks Acrylic Glaze.  They are an iridescent and semi-transparent acrylic glaze paint.  These paints are named perfectly because they go on smooth as silk.  We are also featuring Primary Elements, which are a highly concentrated powder to make your own paints, glazes, and shimmery mists.  The design team will be sharing lots of ways to use these fabulous products all month.  Inspiration awaits you!


I made this Spring themed "Circle of Life" wreath to hang up for Spring and Summer!  I will sure enjoy watching all the butterflies flit around the circle... ah, if only they were real!


Start with a chipboard circular wreath.  Paint surface with white gesso, let dry.
                            
Adhere G45 Moulin Rouge print paper to front of chipboard with regular matte medium.  Trim away excess paper inside and outside.  On reverse, mark center between hanging holes.

Before proceeding, turn chipboard over to back and align hanging holes horizontally, then mark "TOP".  This will help as you adhere your embellishments later.

Wet sections of the paper with a brush, let sit a minute or two.  Start to peel and rub away those sections.  (NOTE:  Yellow post it note adhered to denote "TOP").
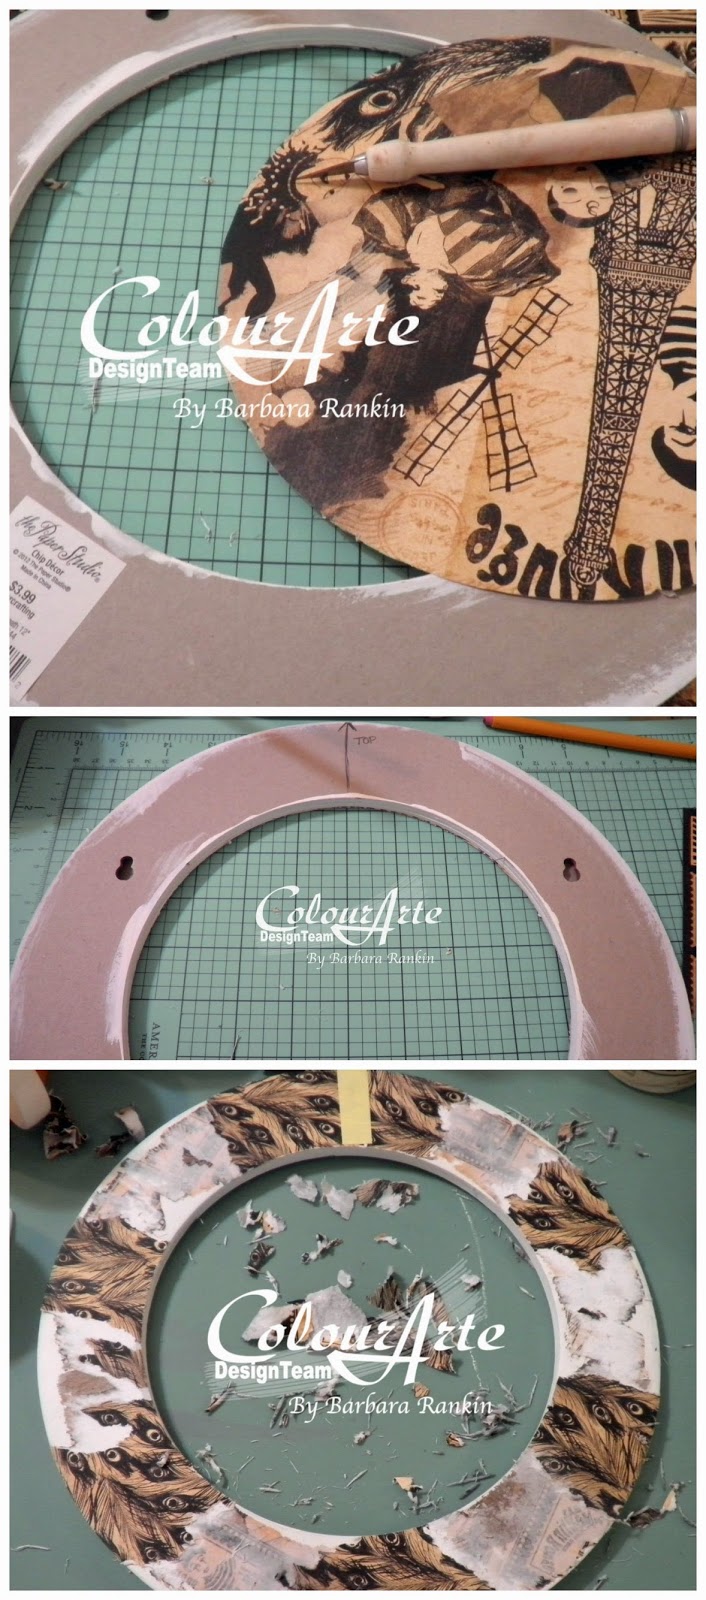
Paint a gesso wash over the circle, wipe away some of the gesso from the print paper; let dry.

Spread modeling paste through script stencil around the circle.  There was some blue paint on the stencil which got picked up in the paste.  No matter ... it will get covered up by all the layers to come.
Dab Radiant Rain Nutmeg over entire surface, then randomly dab Solar Gold, as shown.
Die cut six sets of butterflies from chipboard and emboss with the matching embossing folder. 
Paint each one, front and back, with black gesso.

Paint one set of butterflies with Mediterranean Blue PE (Primary Elements) mixed with Clear Medium.  Let dry.  Hit high spots with black archival ink pad.

Paint another set of butterflies with Ginger Flower PE mixed with Clear Medium.  Let dry.  Brush on a coat of Sunflower PE mixed with water to the butterfly centers, rub excess with finger.  Let dry.  Hit high spots with black archival ink pad.
Add Black Pico Embellisher to the butterfly bodies.  Let dry.
Paint several honeycomb chipboard pieces with white gesso, let dry.
Sponge Yellow Rose and Spiced Pumpkin Silks onto each piece of honeycomb, front and back.
Add a coat of white gesso to the chipboard berry stems, let dry.
Paint each one on both sides with Silks Emperor's Gold.  Do you see how one of the berry stems looks lighter than the others?  That is what makes this paint so beautiful, how it changes colors depending on the way the light hits it.  It is amazing to me!
To bring out the stenciled script, I hit the high spots with black archival ink.

Make a mist with Mediterranean Blue PE and water in a mister bottle.  Spritz onto circular chip piece and dry.

Using a paintbrush to pick up the PE colors, sprinkle PE Mediterranean Blue, Black Orchid, and Ginger Flower around the perimeter.  Continue to spritz with Mediterranean Blue mist, let it mix and run and marbleize, heat with heat gun.  Spray a workable fixative over the surface to set the PE and prevent it from rubbing off.  It does need a binder and I only used water in my mister.
Look at these gorgeous textures and colors.  They make me so happy!
Paint both inside and outside edges of chipboard with Silks Nutmeg.
Spray paper flowers with Radiant Rain Autumn Leaf.
While still wet, spray flowers with Radiant Rain Ginger Flower.  Let dry.  Look at that amazing color combo forming on the craft sheet.  Isn't is gorgeous!  I did not let any of it go to waste.  I picked the excess up with a paintbrush and applied to areas of the flowers that I missed when misting.  Boy, try saying that three times real fast.
Hit the high spots on each rose with Silks Emperor's Gold.


Make chipboard frame to measure 1-3/4" x 2-1/4" with a 1-1/2" x 2" opening.

Give the frame an antique gold look by first dabbing with Vintage Photo distress stain, dry, then Radiant Rain Solar Gold dauber, dry, then Radiant Rain Nutmeg dauber, dry.

Stamp "Circle of Life" onto scrap tan card stock with black archival ink.  Center words inside frame die cut, trace around inside and outside.
Trim frame from around the "C" and the "e" to fit .  Erase the pencil lines and slip the frame over the letters before adhering the two pieces together.  Add corner embellishments with Platinum Pearl Liquid Pearls.
Begin adding embellishments to the wreath.  Start with the title "Circle of Life" frame, placing it centered at the top.
Adhere butterflies, flowers, berry stems, and honeycomb around circle.

Here are some closeups of the different sections of the wreath.  I only hope you can see the beautiful shimmer as it appears real life.  These paints are super gorgeous and it is hard to capture them with a camera, but that is why I take so many pictures. I hope to capture some of its beauty in different views.


ColourArte Supplies used:

Silks Acrylic Glaze:

Nutmeg
Emperor's Gold
Yellow Rose
Ginger Peach

Radiant Rain Daubers: 

Nutmeg
Solar Gold

Primary Elements:

Mediterranean Blue
Ginger Flower
Black Orchid

Other Supplies:

Sin City Stamps: Art Journal 3 rubber stamp plate (Circle of Life)
DecoArt Media Modeling Paste
Golden Regular Matte Gel Medium
Graphic 45 Curtain Call Collection (12x12) (Moulin Rouge)
Sizzix Butterfly Duo die with matching embossing folder
The Crafter's Workshop Art Is Stencil (6x6)
Chipboard:  Bits of Honey (honeycomb), Berry Stems (Blue Fern Studios)
Liquitex white gesso
Utrecht black gesso
Black archival ink
Vintage Photo distress ink
Tuxedo Black Pico Embellisher

Stop by the shop and check out the rest of these gorgeous paint products.  And that's not all!


Win Free Product Twice a Month 
How do you win? Go to ColourArte  Arte Blog April 30th and May 15th. 
Scroll to the bottom of that days post The rules for the bi-monthly scavenger hunt will be posted Winner is announced  in 72 hours.  

Thanks so much for stopping by, and I hope you are inspired to try some of these fabulous paints and watercolors in your next project!

Have a wonderful, creative weekend!

Barbara

Tuesday, April 28, 2015

Faux Etching with Sin City Stamps

Hello again my dear fellow stampers!  I hope everyone had a fun-filled weekend.  So, are you ready for some fun?

Today I want to share a simple yet fun technique that I believe has been around for a long time, but is sometimes forgotten.  It is a faux metal etching technique.  This technique is a bit different from faux embossing, as the results are not raised as much as in embossing.
The first thing you need is a piece of silver glossy metallic card stock and a rubber stamp, of course.

Ink the angel collage stamp with Versamark, or any embossing ink.  Heat emboss with detail clear embossing powder.
Heat emboss image.  I used detail embossing powder since my image has lots of detail, and it also is what gives the etched effect, rather than embossed.


Apply a coating of black ink, let sit for a few seconds.
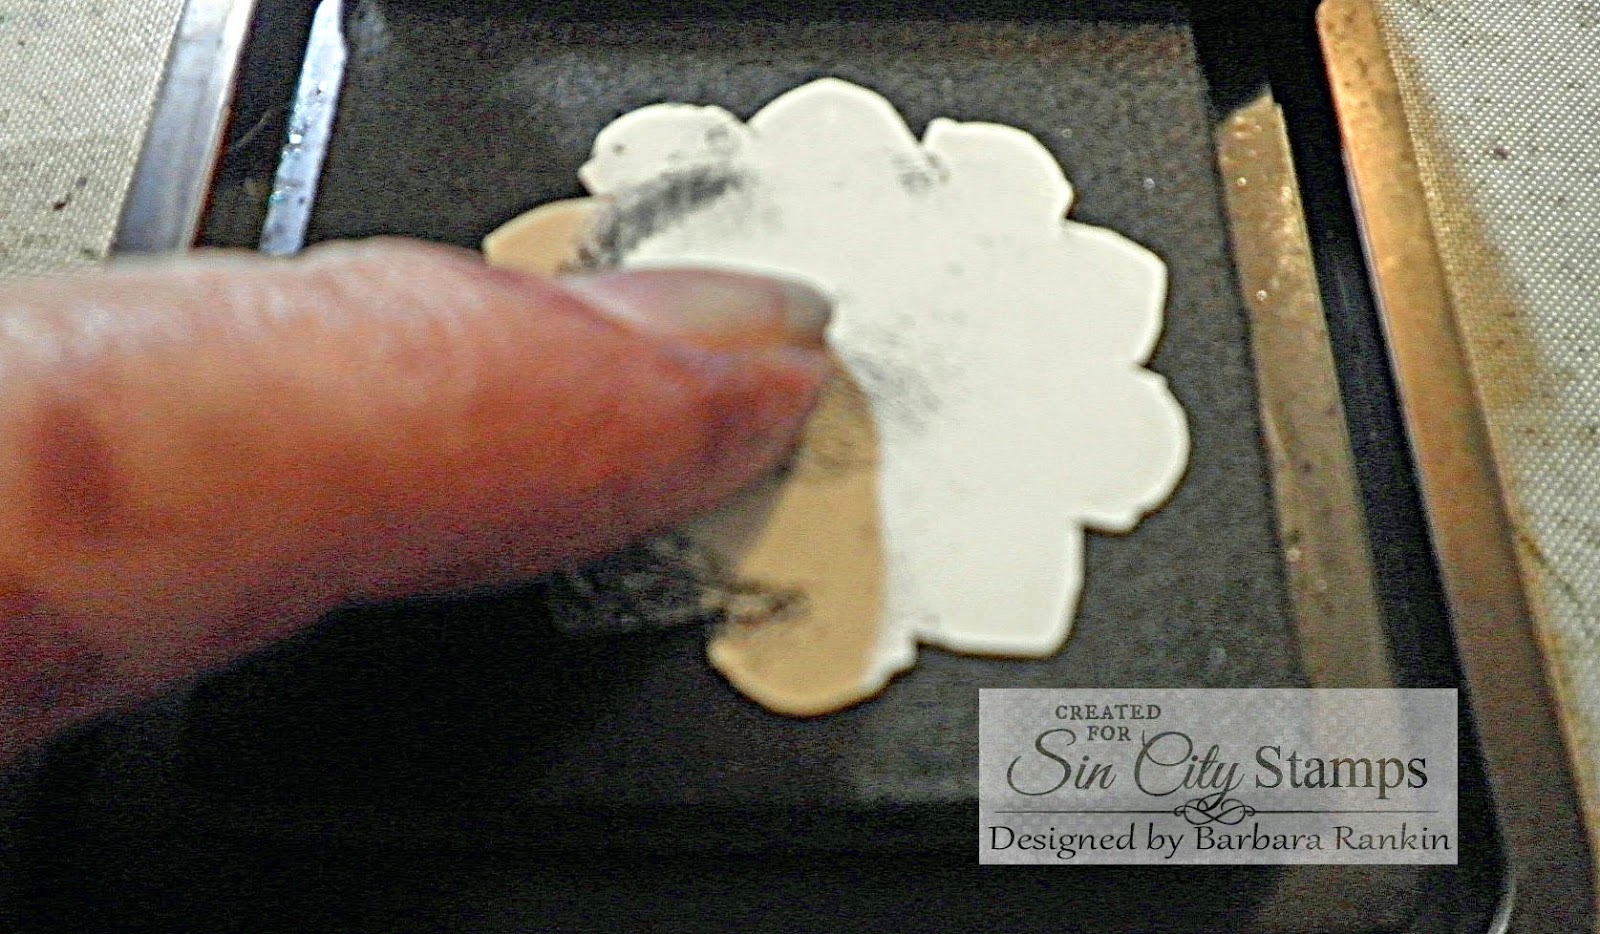
Wipe away the excess.
The ink will remain in the crevices and give depth and dimension to the image.  I also like the antiqued effect from the ink.
I did a little pen work pen on the image with a Copic black to get more depth and dimension and help the image show up a little better.  It sounds like a lot of work, but it was very relaxing and I probably spent no more than ten minutes doing that.  I think the result was well worth it.
Trim around the image, leaving a small border and cut out around the wings.  Layer onto  4" x 5-1/4" black card stock, then to 4-1/4" x 5-1/2' silver card stock.

Add metal embellishments, as shown, with Beacon 3-in-1 glue.  Adhere to black pre-folded card front with foam tape for dimension.

Here is another card I made, this time with the background stamp from the Rosette Hearts set. I used the same technique as before.  However,  this time I first added Pitch Black alcohol ink, then removed excess ink with plain alcohol.  This left a reddish tint that resembles copper.  Very interesting.
So, next I added a wash of black fluid acrylic ink and some water, then wiped away the excess.
I got more black definition and some very cool colorations.
I trimmed the excess from the image, leaving a tiny border.  Then I cut a piece of green glossy card stock to 4" x 5-1/4" and adhered the image to that layer, which was then adhered to the black card.
I stamped the  three rosettes onto a scrap of copper glossy card stock with Versamark ink and detail clear embossing powder.  The three furthest to the left were embossed with regular clear embossing powder, but I lost all definition from these detailed stamps.  So I used detail clear embossing powder on the three to the right.  Can you see the difference?
I cut those three out and pressed each one onto a brown distress ink pad to get some antiquing and definition to the embossing.
I then added them to the card front, layering each with varying thicknesses of foam tape, and added black bling, as shown.
You can make this a lovely thank you card by simply stamping the "Thank You""Thank You" with black StazOn ink onto another scrap of the copper metallic card stock.  Punch out with label punch and edge with a black pen.  Add to upper left of card front with foam tape.


Supplies used:
Sin City Stamps:  Wing It; Rosette Hearts
Cardstock: Black, Silver Metallic Glossy, Copper Metallic Glossy, Green Metallic Glossy
VersaMark ink pad (or any embossing ink pad)
StazOn Black ink pad
Clear detail embossing powder
Heat tool
Fine Line black pen
Black swirls bling
Stampin Up Label Punch
Brown and Black distress ink
Liquitex black ink
Ranger Pitch Black alcohol ink
Blender tool with felt
Rubbing Alcohol
Black fluid acrylic ink
Beacon 3-in-1 Glue

I hope you enjoyed my project today and that I have inspired you to create something using this faux metal etching technique.  Play around with your stamps, inks and paints to see what you can come up with.  By the way, there are still a few more days left to get your Sin City Stamps and supplies, so stock up now.


Have a wonderful, creative week!

Barbara

Monday, April 27, 2015

A Summery Card with Altered Pages and Stencil 1

Today I want to share a project using products from both Altered Pages and Stencil 1. There were three two-part butterflies in this stencil set, and as promised, I am going to show you how I used the third butterfly stencil.  I have tried to vary the techniques, and my previous posts can be viewed by clicking here for the first post, and here for the second post.

My project today is a layered, collaged card.
Cut yellow card stock to 5-1/2" x 11", folded in half to make a 5-1/2" square card.  Cut two frames, one larger than the other, from blue and yellow houndstooth card stock. Cut a third piece from gray print to measure 2-1/2" by 5-1/2"; punch one edge with Trellis punch.  Adhere all three pieces, as shown in photo above.

Trace open butterfly onto yellow print paper with a pencil.
Align matching detail butterfly stencil over penciled image and apply Versamark ink through openings.
Heat emboss with black puff embossing powder.  Trim butterfly, leaving off antennae.  Glue wire for antennae to back of butterfly and add Stickles Star Dust to the wings.  Edge wings with big brush pen.  Gently shape wings for dimension.
I have had this puff embossing powder for many years and was not sure of my results, so here is a closeup.  I like the texture from the puffiness it gives.  Kind of interesting, don't you think?
Fussy cut butterfly, but don't bother cutting out the antennae.  They will be replaced with a piece of wire, as shown.  
Adhere the wire to the wrong side of the butterfly, and add Stardust Stickles to the wings.  Edge butterfly with a black Big Brush pen.
Adhere butterfly to card front using 3D Crystal Lacquer.  Add Petaloo flowers to bottom left corner.  Use Black Bling to make the flourish beneath the butterfly.  

Trim the words "summertime" from the Summer Words collage sheet   Cut in half and edge with Scattered Straw distress ink.   Adhere to card front, as shown.

Edge card base with Scattered Straw distress ink.

Supplies:

Other Supplies used:
Stencil 1 Butterfly stencil set
Ranger Black Puff embossing powder
Scattered Straw Distress Ink
Martha Stewart Garden Trellis punch

GIVEAWAY

You have one more day to play along.  Stencil 1 will provide a FAB stencil and Altered Pages will provide a package of tools! SHARE the Altered Pages blog posts daily on YOUR Facebook page for the monthly random drawing. Include ‪#‎alteredpages‬ in your post. Drawing on May 1, 2015. More you share more chances to win! 

Stay tuned each day and get ready for a giveaway!   Stencil 1 will provide a FAB stencil and AlteredPages will provide a package of tools!

SHARE our blog posts daily on YOUR Facebook page for the random drawing.  Include #alteredpages
in your post.
  Drawing on May 1, 2015.


I hope you enjoyed my easy peasy card today.  I also hope I have inspired you to try some of these products from Altered Pages and Stencil 1. Stenciling is so much fun, and there are so many different ways to utilize them.  And be sure to visit the AP Blog regularly to see what the rest of the team is working on.


Have a wonderful and oh so creative week!

Barbara

Tuesday, April 21, 2015

Vintage Masculine Birthday Card For A Birthday Linky Party

Hello stamper friends.  Today I have a masculine card I made.   Shhhhh.... it's for my brother's birthday next week.  


I was invited by my fellow House of Cards design team member, Monika Reeck, to join in her  BIRTHDAY LINKY PARTY on her blog this month.  She turned 42 this past April 10th, and she is celebrating all month.  

One lucky participant will win a $25 GIFT VOUCHER to your favorite store, such as Simon Says, Stamplorations, Bugaboo, Create a Smile, Taws, etc.    

To link up your card project, you can click here.  You can see the complete instructions on her blog.  


Supplies used:

Paper:  Kraft card stock, Prima Cigar Box Secrets, 
Tim Holtz 8x8 Menagerie Paper Stash pad,
Rubber Stamps:  Hats Off (Stampabilities), Vintage (Hampton Art),
Black Archival Ink Pad, Vintage Photo Distress Stain

So, I hope you will join in for a fun time, lots of inspiration, and to wish our friend, Monika, a very happy birthday!

Barbara

Thursday, April 16, 2015

Inspire Wall Plaque

Hello fellow ColourArte-ists, and welcome back to my second post for April.  As I mentioned before, this month, ColourArte will be featuring Twinkling H20s!  These are the most shimmery, super concentrated, watercolor paints you will find anywhere.  


I have been wanting to make an inspiration piece to hang in my studio.  Something I can see everyday and that will color me h-a-p-p-y.
When I found this wooden heart and laser cut word "Inspire" in my local craft store, I knew exactly what I was going to make.  Coming up with the idea is half the battle right there, isn't it?
Paint heart and word pieces with white gesso.  Adhere word and strip of lace.  
Stencil areas (as shown) with white modeling paste.  Allow to dry.


Add light wash of gesso over lace.  

Glue all the embellishments to the surface and allow to dry.
Dry brush some white gesso over the flowers and metal bits and let dry.  Begin by adding washes of Twinkling H20s in Hopeful Honeysuckle and Ginger Flower. Terra Cotta Rose was painted over the entire wood surface to blend the colors and give a more vintage look.  

To cover the surface more quickly, I decided to try something new, to me at least.  I mixed a lot of water into each pot with my paint brush, then dropped the color mixture right from the jar onto the surface, allowing it to run into the nooks and crannies.  I love the effect.

Leave to dry naturally to allow the fullest shimmer to shine through, which unfortunately the camera does not capture well.  Next, I misted the entire piece with Ginger Flower Shimmering Mist, some water to lighten it and let it flow, then Copper and Namorado Shimmering Mists.  I left it to air dry.


Paint metal butterfly with white gesso first.  Let dry.  Add Radiant Gels Guatemalan Green, Key Lime, and Stargazer.  Cedar Wood Twinks finished off his body.  Adhere butterfly to plaque.

Paint burlap leaves with Twinks Moss Green and Radiant Gels Key Lime.  Glue Champagne glass glitter inside cone shaped bead.
Paint Inspire with Radiant Gels Emperor's Gold, then the lower half of the letters with Twinks Ginger Peach.  Spread a wash of the Emperor's Gold randomly over the base for warmth.  
Mix Twinks Blue Zircon with a lot of water and apply to edge of wood, allowing excess to run and puddle.  If it does not run enough, you can mist it with water.
Color the flowers with any and all of the Twinks, using lots of water to blend them.  I also added some Key Lime to the centers of a few of the petals.  

Color the metal embellishments with Radiant Gels Emperor's Gold.  When that dries, add Ginger Peach over that for a faux rusted metal look (see photo above).  

Add a light wash of Moss Green over the ribbon, and randomly on the background.  Give the letters a deeper shadow by painting a line of liquid pencil around the word. 


Lastly, mist entire piece with Namorado Shimmering Mist for a real vintage feel. 

Allow to dry, then edge heart with brown chalk ink.


ColourArte Supplies used:
Radiant Gels Dimensional Paint:  Key Lime, Emperor's Gold, Guatamalan Green, Stargazer
Radiant Rain Shimmering Mists:  Ginger Flower, Copper, Namorado
Twinkling H20s:  Hopeful Honeysuckle, Ginger Flower, Terra Cotta Rose, Cedar Wood, Moss Green, Ginger Peach, LemonGrass, Blue Zircon


Other Supplies:
DecoArt Media White Modeling Paste
White gesso (Liquitex)
Finnabair Ripped Fishnet stencil 
Denim and Lace ribbon, Inspire and Heart Laser cut wood pieces, paper flowers, metal charms, burlap die cut leaves (Michaels)
Champagne glass glitter (Stampin Up)
Liquid Pencil (Derivan)
Brown chalk ink (Mix'd Media-Leather)

ColourArte just announced they have six new Silks Acrylic Glazes for Spring 2015, Sea Spray, Apple Blossom, Lemon Drop, Kiwi, Cool Water, and Plum Blossom, and each is as gorgeous as they sound.  In addition, there are also eight new Radiant Gels that are to "dye" for.  Stop by the shop and save $10.00 off your next order, good until 20 April 2015 with coupon code:  aprilshowers.  

And that's not all!


Win Free Product Twice a Month 
In our Bi-Monthly Scavenger Hunt
How do you win? Go to the ColourArte  Arte Blog April 15th or 30th. 
Scroll to the bottom of that days post. The rules for the bi-monthly scavenger hunt will be posted.  Winner is announced  in 72 hours.  

Thanks so much for stopping by, and I hope you are inspired to try some of these fabulous paints and watercolors in your next project!


Have a wonderful, creative weekend!

Barbara