First, I want to show you the card before the magic happens. While the card is pretty, the image is pretty plain right now.
Supplies used:
Sin City Stamps Dressforms plate (wire dress form, Live, Love, Laugh)
Sin City Stamps Steampunk Circus plate (Happy Birthday)
Design-ables Clear Transparencies (Z-International)
White card stock (Neenah)
Red card stock (Bazzill)
Print Papers: Lost & Found - Union Square 6" x 6" pad (My Mind's Eye)
Spellbinders die: Labels Twenty-Five
Memento black ink
Archival black ink
Distress ink: Vintage Photo
Copic Markers: 0, BG72, E04, E09, E33, W3
Crochet lace ribbon
Flowers and embellishments (Prima, Recollections)
Directions:
Stamp wire dressform image from the Dressforms plate onto a piece of white paper.
Copy stamped image onto the clear transparency, using your inkjet printer. (Follow transparency directions.) Allow transparency to dry well. (NOTE: You can stamp the image onto the transparency with an archival ink, like Stazon, but I tend to get a better image through my printer.)
Use clear transparency image to figure placement for window opening. Move it around to determine where you want to cut out your window opening. I decided to offset, rather than center, my window.
Place die over image, remove transparency.
Die cut opening in the print paper.
Trim red card stock to 6" x 12", fold in half. Unfold card, place printed paper over card front.Place same size die over opening and lightly pencil die shape onto card base.
 |
| Die edge does not align with cut edge, as shown by pencil mark. |
Remove print paper and re-align die with pencil marks. Tape die in place with low tack tape and run card through die cut machine. (NOTE: As you can see, the pencil mark does not align with the cut edge of the paper, but rather with the metal edge of the die. So, to align the die properly, you need to align the metal edge of the die with the pencil mark.)
Center transparency image through card window, trim any excess and adhere over opening on front of card.
Adhere print paper to card front, matching up window openings.
Color card stock image with markers.
Open card up, align and adhere the colored card stock image behind the transparency image.
To make the sliding panel, cut a piece of the same white card stock to 4" x 6", trim off 1/4" from each long side, but stopping 1/4" from the bottom, which will leave 1/4" tabs on either side.
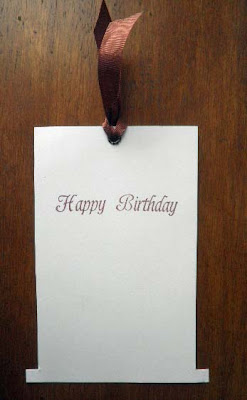
Add large eyelet and ribbon (or a pull tab) to top of slider panel. Stamp "Happy Birthday" from the Steampunk Circus plate with on the back.
Open card up, and place slider panel on top of transparency window. (NOTE: Remember, you are now working on the inside of the card, and the window is beneath the slider panel in this photo). Place adhesive along top (but not beneath the slider part), bottom and side edge of card, as shown, and close card.
Use the two largest dies from the set to make a frame for the front. The reverse side of this paper is red print, but I was trying to avoid the bird image to use later, so I arranged my dies on the back of it.
 |
| Dies taped together to prevent movement |
Oh my gosh, isn't this fun? I just love magic cards. But one more thing I did was to stamp Live, Love, Laugh from the Dressforms plate onto the paper ticket. The ticket had a glossy finish, so I used the black Archival ink for this and dried each word before stamping the next word to prevent smearing.
Now, while making this card, I discovered the magical key to assembly, (at least for me) without precise measurements for any card. Even though I've made these cards many times before, my mind simply could not compute the simplicity I am about to share with you.
Bottom line is, you do not have to cut only square or rectangular windows, as long as the slider will cover the entire window on the inside, at its widest points for irregular shapes, and uncover the stamped image completely when the slider panel is pulled. And you can have the slider pull up, down, or even from the side, if it works with the image.
Well, that's it for now. I hope you were able to stick with me to the end, and if you are reading this, then you succeeded. And as always, I hope you will visit the Sin City Stamps blog for more inspiration from the design team, and check out their online store to see their absolutely fabulous stamps and plates.
As always, have a great week, thanks for stopping by, and wish me luck!
Barbara


Love this idea, thanks for all your hard work on this team and your interest in stay apart of it.
ReplyDeleteI love using acetate. I need to go pick up some sturdy acetate. I hope we make it to stay good luck!
ReplyDeleteWOW! That was a fabulous tutorial! I have to try it!!
ReplyDeleteI hope we get to work together~~
xxDaniella
Love this, Barbara! You are way too talented.
ReplyDeleteGreat job Barbara!! Love the Vintage look , all the pretty touches and wonderful tutorial! Best Wishes!
ReplyDeleteGreat Job Barbara! love the vintage, beautiful..
ReplyDeleteWonderful card and tutorial! Truly magical! I stayed with it all the way and will definitely give this a try some time, the result is just fab!
ReplyDelete