


Supplies used:
The Robin's Nest: Black and White Glitter PIne Tree CS, Christmas Trees Glitter CS, Red Distressed CS, Snow Covered Glitter Trees CS, Gold Glitter Swirl on Creme CS, Classified Mini Dew Drops (silver), Metallic Silver Dew Drops, Gum Drops Tear Dew Drops, Jade Diamond Dew Drops, Indigo Diamond Dew Drops, Aquatic Green Mini Dew Drops,
Snowflake ornament, Wreath ornament, Tree (Smoothfoam)
Bookbinding or white glue
Chipboard Frame
White gesso
Metallic Garnet Red, Metallic Peridot acrylic paint (Folk Art)
Holly punch (McGill)
Heirloom Gold Perfect Pearls Mist (Ranger)
Metallic Green Maya Mist
Fresh Lime Dylusions spray ink
Directions:
Cover chipboard frame with Black and White Glitter PIne Tree.
 |
| Lay frame, right side down, onto reverse side of paper |
 |
| Miter corners & wrap excess around to back of frame |
 |
| Cut an "X" on the paper inside the center of the frame |
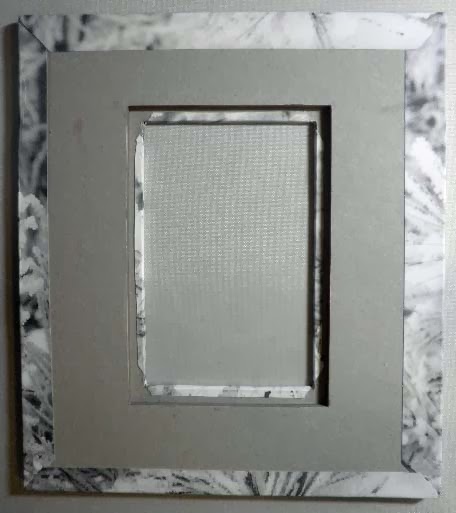 |
| Back of Frame |
 |
| Front of frame |


Punch approximately 20-25 holly leaves from reverse (green) side of Black and White Glitter PIne Tree CS. Glue around top portion of wreath.

Add Metallic Silver Dew Drops and a few silver botanicals, as shown. Spray gold mist over the entire wreath and allow to dry. Dry brush Metallic Peridot and Metallic Red over holly leaves and bow.

 |
| Smoothfoam tree ornament |
I first sprayed a piece of the Snow Covered Glitter Trees CS with lime, metallic green, and gold sprays. When dry, I die cut three rosette strips, accordion folded, and attached to each layer of the tree. Simple as that.

Here is a close-up of the tree.

If you want to make your ornament removable, as I did, you can either use removable glue dots or adhere a velcro dot to both the frame and wreath and attach to frame. When you want to change it out, it is real simple.
I made a second ornament (snowflake) to change out as my mood suits me, or if my photograph changes.


The blog hop today is going to work a bit differently than the usual blog hop. It is more like a link up because we are joining the Smoothfoam design team, as well. You can win a $100 Christmas gift from the Robin's Nest and some Smoothfoam products, as well. To enter, you will need to leave a comment and follow each blog. This will automatically enter you for a chance to win this awesome prize. Just click on each link shown on The Robin's Nest blog to visit each participating blog.
Have a wonderful weekend, and enjoy the rest of the hop.
Barbara
Love the frame, Barbara. Great technique to use the rosette die to create a Christmas Tree!
ReplyDeleteso cute!!! love everything!!!
ReplyDeletepretty frame. I like the little tree
ReplyDeleteas always amazing...
ReplyDeleteVery very very nice,,, those are sooo pretty :)
ReplyDeletestunning and beautiful project.. perfect accents
ReplyDeleteSuch a cute frame.
ReplyDeleteThat paper is spectacular on that frame - and I have fallen in love with those smoothfoam snowflakes.
ReplyDeleteThis frame is so unique and so wonderful for the holiday. Great use of the tree and the snowflake as frame additions, love that 3-D effect!!
ReplyDeleteI love the way you decorated the Smoothfoam ornaments, especially the tree. So creative!
ReplyDeleteDon't you get tired of me telling you how wonderful your ideas are? LOL
ReplyDeleteThis is just charming - I absolutely adore the Xmas tree and have every intention of stealing the idea and using it myself!
Lovely, as always, work!
Love the picture frame you created. The Christmas tree and snowflake really sets it off! As always outstanding job!!! Love! <3
ReplyDeleteBeautiful Frame love the colors and the details. I love the added glitz. thanks for sharing
ReplyDeleteBarbara your frame is amazing! I love what you did with it.
ReplyDeleteI especially love how you decorated the wreatg!
ReplyDeleteFantastic frame, Barbara!
ReplyDeleteLove the frame Barbara, love all the fun details, will have to look at the SmoothFoam more closely because I love how you incorporated it on the frame.
ReplyDeleteWhat a beautiful frame... love the tree and the wreath you altered!!! What a wonderful snowflake! Great projects!
ReplyDelete