Showing posts with label Prima Fairy Rhymes. Show all posts

Thursday, March 3, 2016

Fairy Garden House

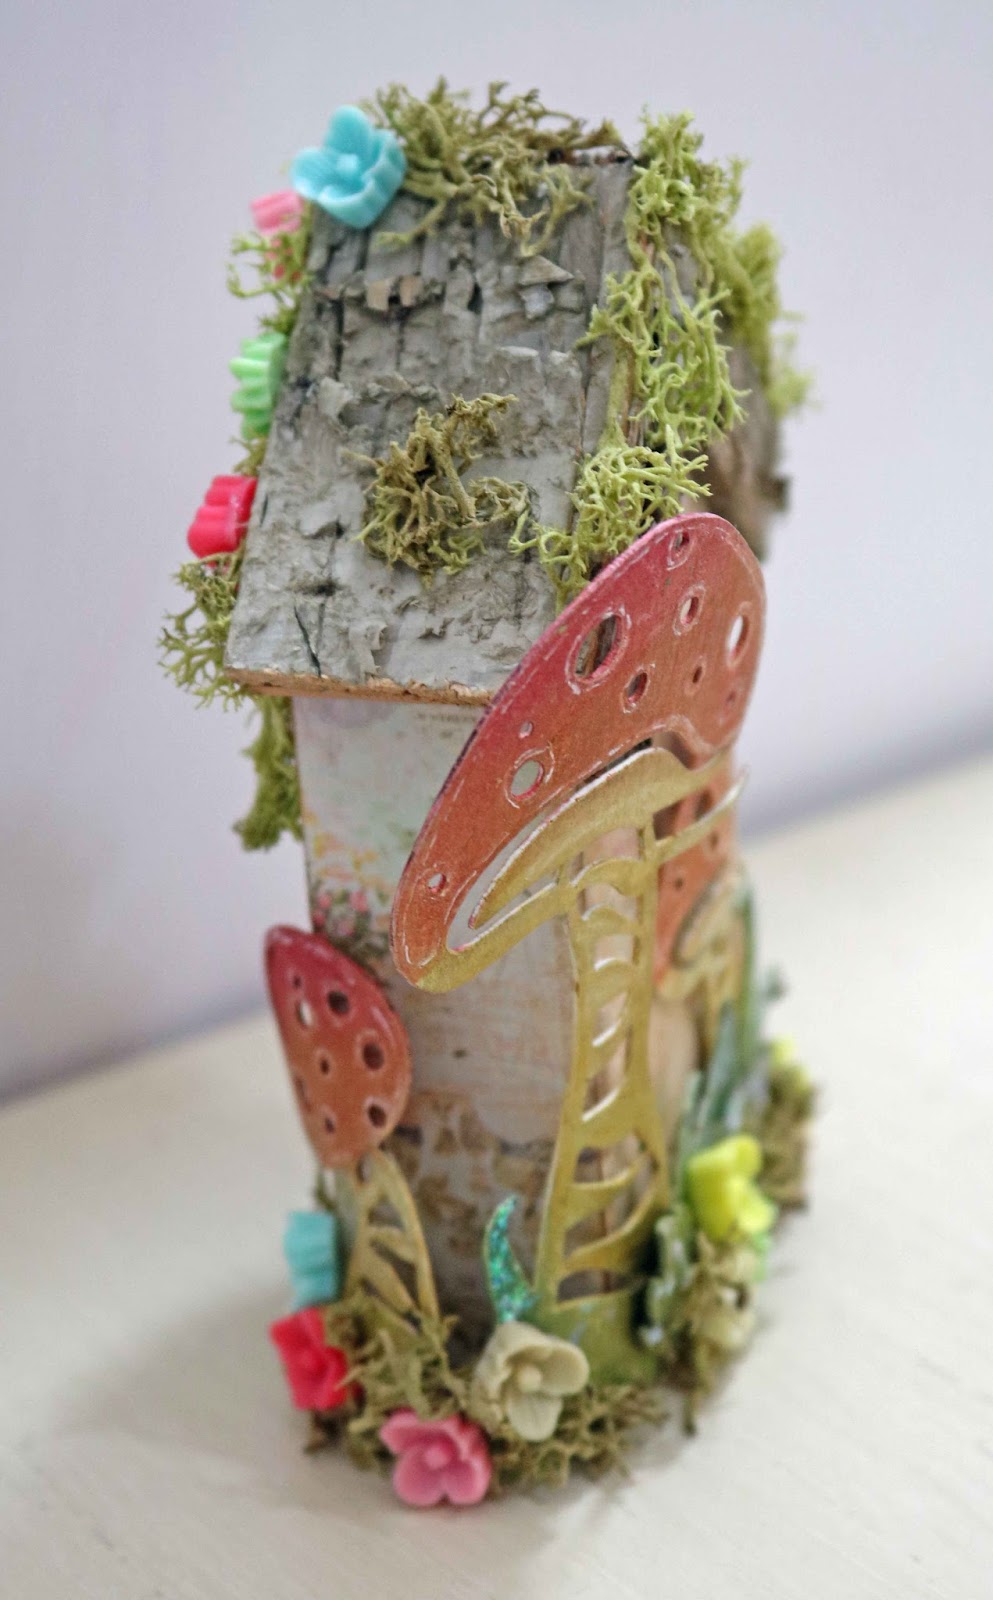
Hey there everyone!  Barbara here with my third in the series of mini house shadow boxes by Gypsy Soul Laser Cuts.  Today's project is a Mushroom Fairy Garden House.  I had so much fun making this one.  I hope you like it.  To see my previous mini house shadow box, please click here.


As always, I start out by laying out my pieces so I can see clearly how to glue them together.


Paint box inside and out with flesh tint acrylic paint, or color that matches your paper.  Then cover box, inside and out, with Prima Fairy Rhymes paper.  The roof was covered with natural birch bark strips.  


I painted the mushrooms with white gesso first, then began the coloring process with Caran'dache NeoColor II water soluble crayons.  I did not color all of these, but I was not sure which ones I would use for my fairy garden until I got started.  I used a white gel pen to do a little pen work on the mushroom heads, an idea I borrowed from my good friend and fellow team mate, Pam Bray.  


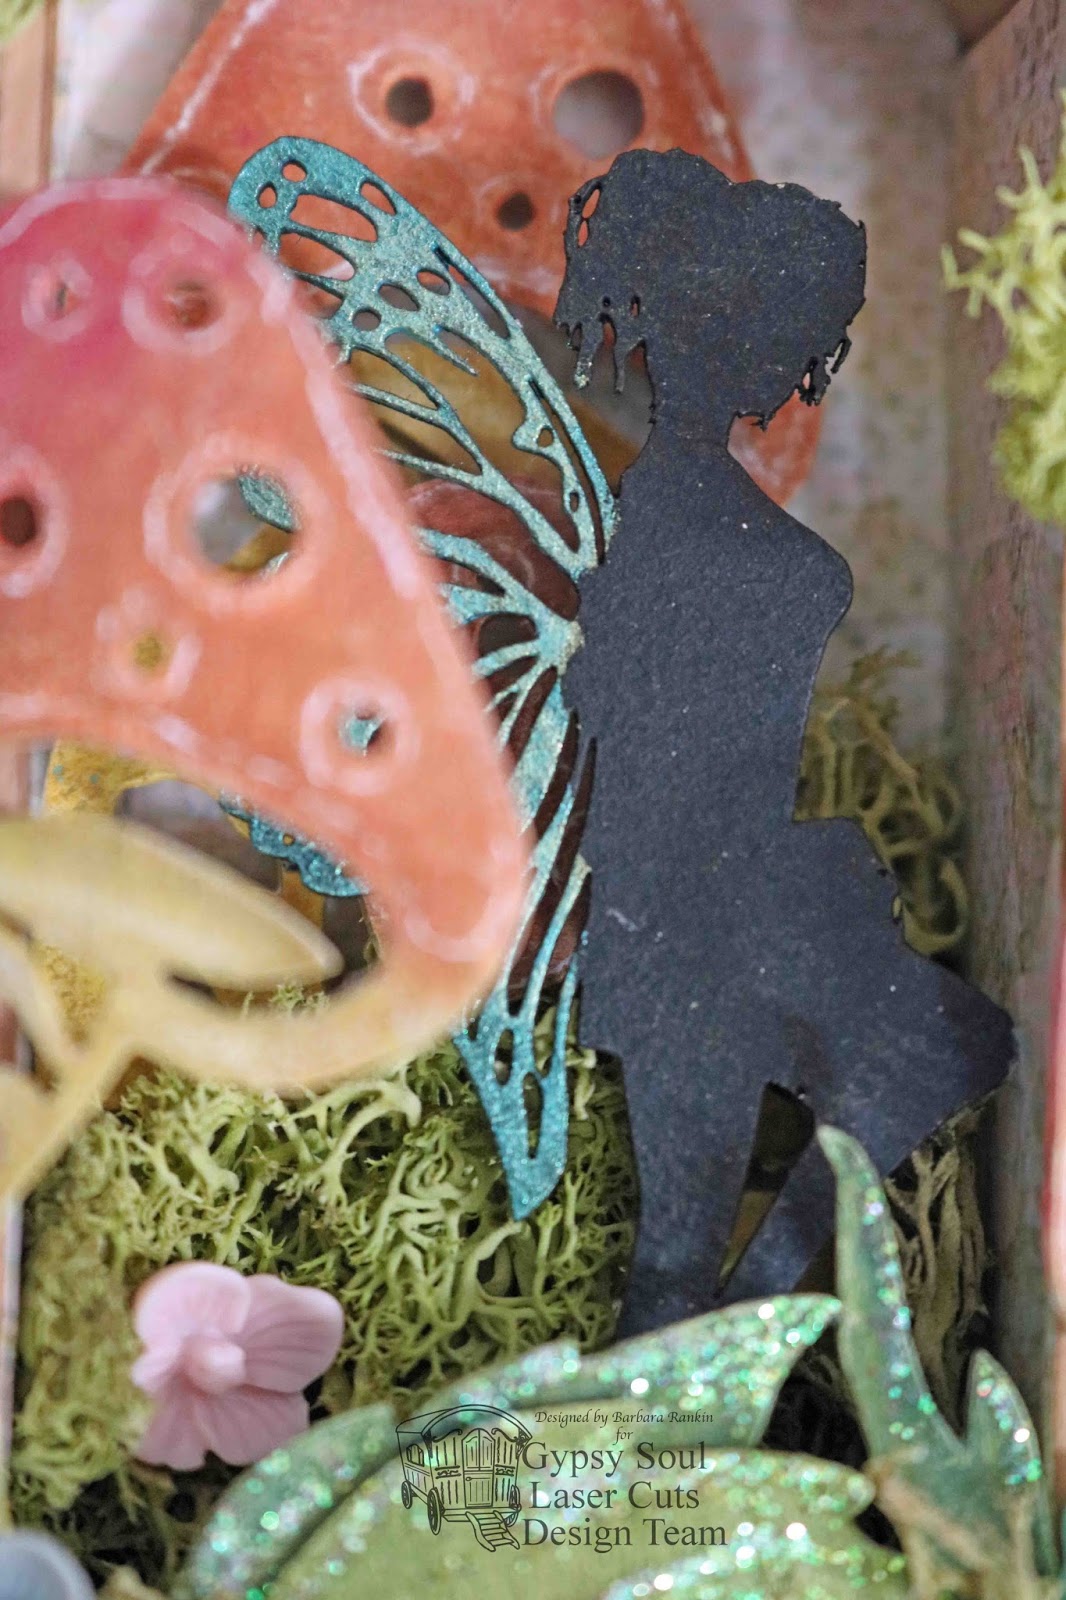
Paint the fairy with black acrylic paint, including the wings.  Then color the wings with Pearl-Ex watercolors in a blue interference color, then add a bit of green interference color, as shown.  The interference colors only show up really well on a black or dark surface.


Using foam dots in varying levels, I adhered the two mushrooms inside the box, as shown.  Reindeer moss was added as garden filler.


Foam dots were placed beneath the fairy to raise her up and glued at her knee and foot.  You can see where the glue is still wet on her foot.  


The largest strip of mushrooms (colored in the photo above) was wrapped around the base of the house and glued to the front and back bottom only.    Use fingers to shape and bend the mushroom base and the mushrooms themselves.  

Tiny resin flowers and bits of reindeer moss were adhered along the base and the roof, as shown.

Crystal glitter glue was added to the leaves for extra magical sparkle.

Here are a few close ups from different view points of my magical fairy garden.


Supplies:

Mini House Shadow Box 4
Mushrooms Shape Set
Garden Fairies Medium (pre-order)

White gesso
Black gesso
Prima Fairy Rhymes paper
Prima resin flowers
Natural birch bark strips
White gel pen
Reindeer moss
Pearl-Ex Interference watercolors
Water brush
Tea Dye distress ink (for edging the paper)
Crystal stickles

I hope you are enjoying my series of mini house shadowboxes from Gypsy Soul Laser Cuts.  I plan on displaying these in my studio for inspiration, and I hope that perhaps I have inspired you in some small way, too.

Thanks for stopping by, and have a crafty week!

Barbara

Thursday, July 23, 2015

Garden Fairy Rhymes Cards with Gina's Designs Lasercuts

Hello all!  Well, the weekend is almost here, so I hope you are ready for some card making with Gina's Designs Lasercuts!  I have a couple of cards I made with the Garden Fairies Small Shape Set, and they are so perfect for card making.  Sized just right, they will make the perfect card for the fairy lovers out there.  So, let's get started.


For my first card, Fairy Whispers...


... I made a 5"x7" card base, trimmed the "Fairy Whispers" paper slightly smaller, edged with white paint for a shabby chic look, then layered onto card front.  These are the pieces I used.
I inked the large rectangular filigree frame with white acrylic paint and added a glitter embossing powder while the paint was still wet.  Then I heat embossed it and gave it a second coat to make it more white and glittery.  The center part of the frame was simply covered with another piece of the paper (see photo above).
I cut one of the fern fronds apart and used those four bottom leaves to add to my bouquet.  I cut those four apart and colored with green crayons, blending with a bit of water.
I colored the tiny fairy with pink crayons, and her wings with ochre and green color crayons to match the colors in the paper.  I used foam dots to lift her off the page, and Eucalyptus Stickles was applied to her wings, also.
The lace border was colored with a gray and ochre crayon, blended together with water, and Platinum Stickles applied over it.

After adding all these parts, I made a small bouquet with paper flowers, the leaves, a butterfly and some swirly gemstones to finish it off.

Supplies Used for Fairy Rhymes Card:
Garden Fairies Small Shape Set
Border Sticks Lace
Fern Fronds Shape Set
Filigree Frames Shape Set
Prima Fairy Rhymes paper
Prima gem swirls and butterfly
Caran d'Ache Neocolor II watersoluble crayons
Burnt Orange card stock
Stickles: Eucalyptus, Platinum
Mini paper roses
White acrylic paint
Glitter embossing powder
Foam dots

Now for my second card, Garden Fairy ...


... I made a 6"x6" card base from peach card stock.  I trimmed another piece of paper slightly smaller, edged it with Seedless Preserves distress ink, and adhered to the card front.  I also added the ruler print along the top edge.  These are the pieces used for this card.
The square filigree frame was first covered with Orchid pigment ink and heat embossed with Blushing Pink Pastel embossing powder.  A second coat was applied to give it that enameled look.  Again, I covered these square frame insert with a piece of the paper.

The fairy was inked with Antique Gold pigment ink and heat embossed with Champagne Pearlustre embossing powder.  I used foam dots to lift her off the page.
In a similar fashion, I covered two fern fronds with Fresh Green pigment ink and heat embossed with Emerald Green embossing powder.

Each piece was adhered to the card, as shown, adding a butterfly and paper flowers to make a small bouquet.  Platinum Stickles was added to the butterfly, the fairy, and the flower tips.

Supplies used for Garden Fairy Card:
Garden Fairies Small Shape Set
Fern Fronds Shape Set
Filigree Frames Shape Set
Prima Fairy Rhymes paper
Prima butterfly
Peach card stock
Distress ink: Seedless Preserves
Caran d'Ache Neocolor II watersoluble crayons
Colorbox pigment ink: Orchid, Fresh Green, Antique Gold
Embossing powder: Blushing Pink Pastel, Emerald Green, Champagne Pearlustre
Stickles:  Platinum
Mini paper roses
Foam dots

I love how these cards turned out, and I could not have done it without these wonderful chipboard shapes from Gina's Designs Lasercuts!  So hop on over to the shop and check out all the gorgeous chippies Gina's has to offer.  You won't be disappointed.

Thanks for stopping by, and have a wonderful and very creative weekend!

Barbara