
Hello everyone! Barbara here, and I am in a card making mood. It might be because I have several birthdays on the horizon, and I am in dire need of masculine cards. My first card is made with the male recipient in mind, while the second card could go either way just by changing the bicycle.
As you know, we have been featuring papers and embellishments from The Robin's Nest this month. I love the quality of their products, and I know you will, too.

Directions:
Cover front of 5"x7" kraft card with the brown herringbone print from the Regent Street paper pad.
Cut Graphic 45 paper to 5"x7", distress edges. Tear a "V" from the top, large enough to fit a gear behind the opening. Distress edges with paper distressor tool, edge with Vintage Photo distress stain. The stain gives the edges a burnt look. Mist corners with water and curl around the end of a paint brush. Let dry.
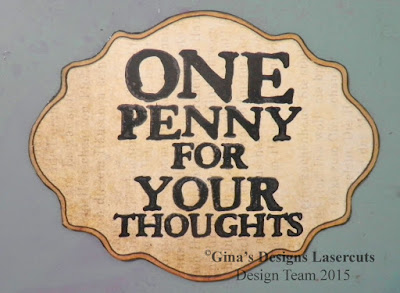
 Stamp sentiment (One Penny for Your Thoughts) onto a fussy cut printed label from the Steampunk Botanica pad with black archival ink.
 The Clockworks Penny Farthing was inked with Vintage Photo and Black Soot Distress stains. The two gears were inked first with Vintage Photo distress stain, then Tarnished Brass and Antique Bronze distress stains.
 I could not resist adding a spinner to the center of the Penny Farthing (below). I love the two-toned effect on the chipboard from the two distress stain colors.


My next card could be either feminine or masculine, just by changing the bicycle to a boy's bike.
Cover front of 5"x7" kraft card with The Robin's Nest Saffron Honey paper. Distress the edges with Vintage Photo distress ink.
Use the reverse side of the Saffron Honey paper to punch a decorative strip and adhere along left edge of card.
Use a Versamark pen to color the bike, and heat emboss with Glacier embossing powder. The tires were heat embossed with Midnight Black embossing powder, while the pedal, handlebar, and seat were heat embossed with Black Puffs embossing powder.
A tiny pieceof olive green paper was glued behind the basket section, while two larger metal gears were glued to the wheels. A tiny watch part was glued above the pedal.
 I cut apart one of the chipboard pieces from the Mixed Media Fragments 2 set and colored the arrow with Vintage Photo distress stain, then dabbed the Peeled Paint Distress Paint randomly over the top.
 The other section I cut away from the Mixed Media Fragments 2 set were colored with the Peeled Paint Distress Paint and adhered to the card, as shown.
 I cut apart a piece of the chain border and colored with Antique Bronze distress stain. Then I dabbed the chain randomly with a Versamark pen, and heat embossed with the Glacier embossing powder to give it a patina.
 I used Big Chat Stickers and Label Letters to form the sentiment "life is a beautiful ride".
 Supplies:
Gina's Designs:
Clockwork Penny Farthing
Steampunk Shape Set
Chain Borders
Mixed Media Fragments 2
Bicycles
The Robin's Nest: Saffron Honey
Rubber Stamp: One Penny 4 (PaperArtsy)
Kraft 5"x7" pre-folded card stock
Versamark Ink Pen
Black archival ink
Embossing Powders: Glacier (Zing), Black Puffs (Ranger), Midnight Black (Mark Enterprises)
Distress Stains: Vintage Photo, Black Soot, Antique Bronze, Tarnished Brass
Distress Paint: Peeled Paint
Paper: Steampunk Botanica, Regent Street (Recollections)
Decorative punch (Martha Stewart)
Tim Holtz Ideaology: Film Strip, Spinners, Brads, Label Letters, Big Chat Stickers
Watch parts, metal gears (my stash)
Prismacolor Metallic Silver pen
I hope you enjoyed my cards today and are inspired to make some with chipboard shapes in mind.
Please check out the links to The Robin's Nest Store and Blog. Don't forget to visit Gina's Store, Blog, and Facebook Group so you will always be privy to all the wonderful happenings
Thanks for stopping by, and have a wonderful, creative week!!!
Barbara
 |
| Clockworks Penny Farthing Card |
Cut Graphic 45 paper to 5"x7", distress edges. Tear a "V" from the top, large enough to fit a gear behind the opening. Distress edges with paper distressor tool, edge with Vintage Photo distress stain. The stain gives the edges a burnt look. Mist corners with water and curl around the end of a paint brush. Let dry.


In this photo, you can see the gold gear that I slipped behind the torn away paper, and on top, I added the second gear with another tiny spinner.

Before adhering the stamped label with foam dots, I heated a section of film strip to "wrinkle" it.

My next card could be either feminine or masculine, just by changing the bicycle to a boy's bike.
 |
| Life is a Beautiful Ride Card |
Use the reverse side of the Saffron Honey paper to punch a decorative strip and adhere along left edge of card.
Use a Versamark pen to color the bike, and heat emboss with Glacier embossing powder. The tires were heat embossed with Midnight Black embossing powder, while the pedal, handlebar, and seat were heat embossed with Black Puffs embossing powder.
A tiny pieceof olive green paper was glued behind the basket section, while two larger metal gears were glued to the wheels. A tiny watch part was glued above the pedal.


Gina's Designs:
Clockwork Penny Farthing
Steampunk Shape Set
Chain Borders
Mixed Media Fragments 2
Bicycles
The Robin's Nest: Saffron Honey
Rubber Stamp: One Penny 4 (PaperArtsy)
Kraft 5"x7" pre-folded card stock
Versamark Ink Pen
Black archival ink
Embossing Powders: Glacier (Zing), Black Puffs (Ranger), Midnight Black (Mark Enterprises)
Distress Stains: Vintage Photo, Black Soot, Antique Bronze, Tarnished Brass
Distress Paint: Peeled Paint
Paper: Steampunk Botanica, Regent Street (Recollections)
Decorative punch (Martha Stewart)
Tim Holtz Ideaology: Film Strip, Spinners, Brads, Label Letters, Big Chat Stickers
Watch parts, metal gears (my stash)
Prismacolor Metallic Silver pen
Thanks for stopping by, and have a wonderful, creative week!!!
Barbara


