Thursday, August 13, 2015

Art Journal: There Are No Limits

Hello everyone!  Today I thought I would do a bit of art journaling.  I love using my Gina's chipboard, and since we are cross promoting with The Robin's Nest this month, I knew these two products would work beautifully together.  

To begin, I pulled out my Cottonwood Arts Canvas Notebook.  I love this book because it has canvas covered chipboard pages, making it so sturdy for adding heavier embellishments to the pages.  
Cut The Robin's Nest Fleur/Stripe Tropicana paper in half, adhere Stripe piece to the left and the  Fleur piece to the right, using matte medium.
Spritz paper with water and randomly remove only the top layer of this two-sided paper, leaving the stripe or the fleur side showing.  This looks really cool, but not sure if the camera is picking up this cool textured effect.
Add torn strips of joint tape to the center and sides of both pages to disguise the paper edges that did not cover the entire pages.
Paint both pages with a coat of the Vintage Mustard chalk paint, wipe away with a baby wipe or damp paper towel.  Dry thoroughly.
 Mix Ultra-Matte Varnish with Burnt Sienna Fluid Acrylic to make a glaze and spread over pages with a Spatula.  This will enhance all of the textures from the papers and joint tape.
To tone down the orange color, I spread the Medium Grey Antiquing Creme over both pages with a baby wipe (or damp paper towel).  I don't know if the camera can really pick this up, but I think it looks like marble, or maybe granite.  What do you think?
Paint a thin line of the Cerulean Blue Fluid Acrylic along the top edge, hold book vertically and spritz with lots of water to make the fluid acrylic run and leave these beautiful striations.
Place open balloon frame onto polka dot side of The Robin's Nest Smoky Chevron paper and trace around it with a pencil; cut out.  .
 Paint a wash of the Patina Green Antiquing Creme with water over the paper, let dry.
 Paint open balloon frame with a wash of Quinachridone Violet mixed with water.
 Adhere paper balloon cutout to page.
Glue black birdcage veil trim to the back of the balloon, let dry.  
 Trim excess veil from around chipboard and adhere over print paper.
 Cut the checkerboard texture sheet into irregular shapes and paint with Carbon Black acrylic paint.  Apply a coat of Clear Crackle Glaze over the checkerboard squares.  (TIP: I used my finger to spread the crackle glaze).
Paint compass with Burnt Umber fluid acrylic.  When dry, add Golden Opal Twinkling H20 for extra shimmer.
Adhere to page and add highlights around the compass with Titanium White antiquing creme a a wet paint brush.  Use your finger to wipe off any excess creme as you work your way around the compass.
Stamp Morroccan Fence and Crackle background stamps with black archival ink all over background for added texture.

I found these puffy stickers in my stash, so I used them to write "The Sky is the Limit".  I used a bit of white glue to ensure they were adhered well.
Paint "Explore" word ribbon, key plate, and balloon basket with Burnt Umber fluid acrylic.

Use your finger to apply English Red Oxide and Patina Green antiquing creme over key plate and the "Explore" banner, then Iridescent Gold fluid acrylic to give it a super metal look.  Dab tiny spots of Patina Green over that to bring back some patina.  Insert tiny brads through holes in key plate and adhere to balloon.

 Adhere basket to a scrap of the Diamonds paper and trim excess when dry.
Adhere the key plate to the balloon, add some jewelry chain between the balloon and basket and adhere to page.
Adhere the Explore word banner to the top of the balloon.
Cut two banners from the sheet and paint with Primary Magenta mixed with Titanium White fluid acrylics.  When dry, add tiny letter stickers to spell out "There are no limits".  Adhere to balloon.
I used Titanium White fluid acrylic applied to a bottle cap to make circles on both pages.  Imperfection is key, here.  I seems to look better if the circles are not perfect.  I also added some white splatters about the page.
I added shading to the puffy sticker letters with the liquid pencil to help them pop off the page.  Because it is rewettable, I was able to use a baby wipe to remove any areas where I felt there was too much shadow.
The very last thing was to add some bling, so I used The Robin's Nest Blue Skies Archival Seeds, which just happened to be the right color, around the page.  I think they really added just the right touch.

Supplies:

Gina's Designs: Mini Display Tray - Hot Air Balloon; Texture Sheet Checkerboard; CompassTexture Sheets FiestaKeys and PlatesWord Ribbons 3;
Robin's Nest: Tropicana Fleur cardstock; Saffron Diamonds cardstock; Blue Skies Archival Seeds
Cottonwood Arts A2 Canvas Notebook (6.75 x 12) Journal
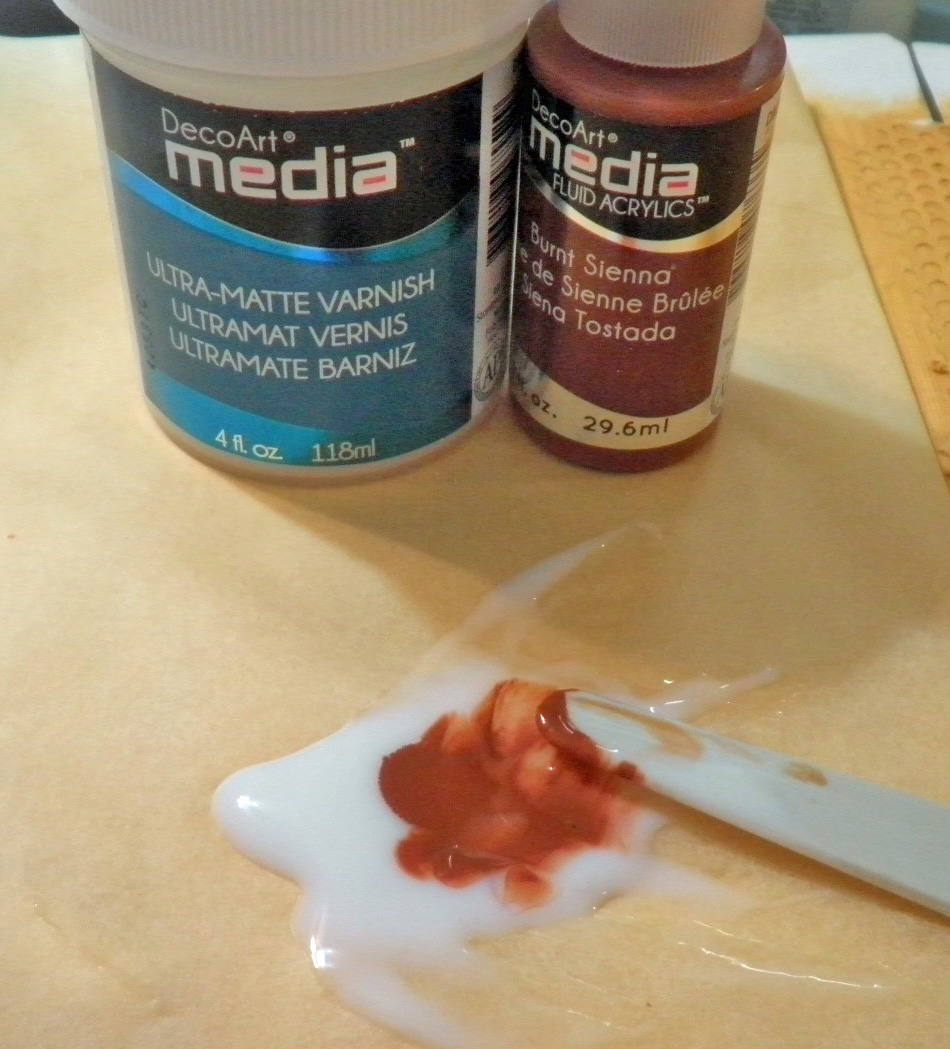
DecoArt Media™: Matte Medium; Ultra-Matte Varnish, Clear Crackle Glaze;   Antiquing Creme: Medium Grey, Titanium White; Fluid Acrylics:  Carbon Black, Burnt Sienna, Quinachridone Violet, Burnt Umber, Primary Magenta, Titanium White, Interference Gold
ColourArte: Twinkling H20s Golden Opal
Drywall Joint Tape (self-adhesive)
Vintage Mustard chalk paint (FolkArt)
Moroccan Fence stamp (LaBlanche)
Crackle clear stamp (Kaisercraft)
Black Archival Ink (Ranger)
Kraft Mini Black Alphabet sticker (Jillibean)
Tiny screw top brads (Tim Holtz)
Jewelry chain (Hobby Lobby Metal Gallery)
Plastic bottle cap
Glossy Accents (Ranger)
Derivan Liquid Pencil (Rewettable)

As always, I hope you enjoyed my step-out tutorial, and that I have inspired you a bit to do some art journaling, especially now that you see how beautifully The Robin's Nest papers work with Gina's spectacular, yes, I said it, spectacular, laser cut chipboard.  It just doesn't get any better than that!


Please check out the links to The Robin's Nest Store and Blog and of course check out all the things happening over at Gina's Store, Blog and Facebook Group.

So, thanks for stopping by, and have a wonderful and creative weekend!

Barbara

Monday, August 10, 2015

Take A Trip Mini Album with Altered Pages: Part One

Hello everyone, and welcome! This month, the Altered Pages design team are taking trips throughout the USA.  I cannot wait to see what everyone comes up with.  We will be visiting various states, cities, and towns.  I chose California and Florida for my posts this month.  Today, I am going to go with the west coast theme, so California it is!

I decided to work in my metal covered mini album that I made a couple of months ago.  I have lots of  blank pages to work in, and Altered Pages is my go to store for dressing up my mini album pages.

First Page Spread
On this page, I added Glitz Design Papers, collage images from USA States California and San Francisco collage sheets. I adhered Petaloo flowers, a scroll corner that I inked with Memento Luxe Nautical Blue and embossed with clear embossing powder, a piece of the yellow Sheer Ribbon, and a few gem stickers.
Left Page of spread
On this page, I added collage images from San Francisco1950s Transportation Cars,  and Drive Me Anywhere Cars collage sheets.  I used a rosette die to make the rosette, adding the Route 66 sign to the center.  I stamped "wanderlust" from the Graphic 45 Come Away With Me Stamp set and adhered to a Glitz Designs  journaling sticker.

I folded a famous hotels tag about one-third of the way up, punched a thumb notch, and adhered the tag to the page, using the blending tool and the Leather inx to distress the edges.  I made a small tag to fit inside (see photos of tag below).
Right Page of spread
I used images from the Route 66 collage sheet on this side of the tag.
Side 1 of Tag
On the reverse, I adhered this fun image of a 1958 Ford Fairlane from the Drive Me Anywhere Cars collage sheet.  It fit perfectly on my tag.
Side 2 of Tag

On my second page spread, I used print papers from the Graphic 45 Secret Garden 6x6 paper pad, adding more collage images from the San Francisco collage sheet.  
Second Page Spread
I fussy cut the word "San Franciso" and adhered to the top of the left page.  I used a coin envelope and punched a thumb notch in the top of it, then added a scrap of Glitz Design print paper that was distressed with Leather Inx.  I added a California license plate image, along with some Petaloo flowers  a fabric butterfly, and more gem stickers.
Left Page of spread
I used a Journey Bingo Card as my tag, since a tiny bit of trimming allowed it to fit nicely inside the coin envelope.

Side 1 of Tag
On the reverse side of the card, I used this "Greetings from Califorinia" image from the USA States California collage sheet.
Side 2 of Tag
For the right side of my second page spread, I used more images from the San Francisco collage sheet, and stamped the trolley image onto a Graphic 45 label with the Leather inks.   I turned it into a pocket to hold yet another tag.  More Petaloo flowers were added, along with gem stickers.
Right Page of spr

I cut out the  black and white image of the bridge and adhered to a slightly larger piece of black card stock.  I thread a piece of the yellow Sheer Ribbon through the hole.


Supplies:

Altered Pages Collage Sheets:  USA States California1950s Transportation CarsSan FranciscoRoute 66;  Vintage Vacations; Vintage Words (Journey); Drive Me Anywhere Cars
Glitz Design Paper Pads: Pretty in Pink, Vintage BlueUncharted WatersSunshine in My Soul
Graphic 45 Secret Garden 6x6 paper pad
Graphic 45 Come Away With Me Stamp set
Tags, Famous Hotels
Valentine Stickers
Assorted Flowers
scroll corners
Coin Envelopes
Bingo Card Packs
Glitz Design journaling sticker
Sheer Ribbon
Ranger Blending Tool
Versacolor Black ink pad
Memento Luxe Nautical Blue
Mixed Media Salazar Inx (Leather)
Cream card stock
Mini Rosettes die
Various gem stickers from my stash

I hope you enjoyed my project today, and that you can use some of these ideas for your scrapbook pages of your summer vacation, or a summer card for someone, or perhaps an art journal page with the same theme.

Thanks so much for stopping by, and have a wonderful and creative week!

Barbara

Friday, August 7, 2015

Blog Hop Winner!!!

Last Friday, the ColourArte Design Team had an Altered Shoe Blog Hop.  Each blog gets to randomly choose a winner from their blog and give away  a $25 gift certificate to the ColourArte store.  And now, for the moment you all have been waiting for.  
The winner is ...

Teresa Godines #6857

Congratulations, Teresa!!  Please go to ColourArte and register on the website by clicking here, then we will contact you on how to claim your prize!
Many thanks to everyone for participating in our blog hop.  I hope you enjoyed it, and we sure do appreciate all of the support you have given us.  I hope you will continue to stop by and visit me.  I am always working on something and love to see you!

Barbara

Thursday, August 6, 2015

Reine des Abeilles Shadow Box

Hello everyone.  So glad you stopped by, because I have another really cute project from Gina's Designs Lasercuts.  I got this gorgeous bee themed shadowbox  that I could hardly wait to decorate.  The ideas were going round and round.  I decided to call it Reine des Abeilles, which is French for Queen Bee.  


Print French Florals Overlays collage sheet onto cream card stock.  Trim to size to fit the back of the shadow box, but do not cover the dovetails that will be glued together.

Cover the sides with damask paper, again leaving the dovetail sections untouched.  I like to lay out the pieces so I can glue them together correctly.
Before putting the box together, cut out a frame piece from print paper to cover the front of the frame after it is glued together.  Set frame and paper aside, but glue the box together.  Save the center piece of the paper to adhere to the back of the box.
Paint the back of the frame with Burnt Orange chalk paint, as well as the outside of the box.  Add a wash of Vintage Mustard over the orange color to tone it down bit.
Print Queen Bee collage image, cut out, and layer onto a slightly larger scalloped circle from brown card stock.  Adhere to center of box with foam dots.
Paint both bees with black and orange paint pens.  Cover the thorax (upper body) of the bee with glue and add black Flower Soft®, and the abdomen (lower body) of the be with glue and yellow Flower Soft®.  I just love how my bees have fuzzy bodies, like in real life.  

Paint Stargazer Radiant Gels dimensional paint over the wings.  Add a coat of clear crackle paint to the wings.  Aren't those wings awesome?
Paint the bee skip with Vintage Mustard chalk paint.  Glue to a piece of scrap chipboard.
Glue pieces of natural sisal inside the openings.
Trim a piece of the bumble bee paper to 2-1/2" high by about 6-1/2" inches long.  Tear a piece away from the middle, inking and rolling the edges back, as shown.  

Paint a piece of the honeycomb chipboard with the Vintage Mustard chalk paint, and distress with brown chalk ink.
Turn paper over, glue a strip of heavy chip board or mat board (1" x 5-3/4") to the lower portion of the bumble bee paper, turning the ends to the back, as shown.  Add the piece of honeycomb.
Glue two bottle caps inside the box, as shown.  Yep, I save everything, but sometimes there is a method to my madness!
Adhere this piece to the inside of the box, onto the bottle caps for support, as shown.
Add a couple of pieces of scrap mat board to the back of the skip to lift it up for dimension, and adhere to the right side of the box.

Paint another small piece of the honeycomb, and the knockout pieces, with Vintage Mustard, adhere inside box, as shown.  

Add the bees to the box, as shown.  The bee in the lower left corner is lifted with foam dots for dimension.
Glue the chipboard frame piece to the box, then cover the frame with the cutout print paper.  

Paint the "Bee Yourself" chipboard with Oatmeal chalk paint, adding brown chalk ink to give it depth.  Adhere to frame, along with a crown inked with Delicata Gold and Silver ink.
A few closeups of the inside of the box.

Supplies Used:

Gina's Designs:  7x7 Themed Shadowbox Bee
ColourArte:  Radiant Gels: Stargazer
Burnt Orange and Oatmeal Chalky Paint (Plaid)
Flower Soft® Black and Sunshine Yellow
Collage Sheets:  Bees; French Floral Overlays (AlphaStamps)
Liquitex paint pens (black, orange)
Buzz & Bumble Paper Collection (Close to My Heart)
White gesso
Aleene's Fast Grab Tacky Glue
Clear Distress crackle paint
Delicata Gold and Silverink
Natural sisal rope

I really love how this turned out, and I find that I am always experimenting with different ways to use Gina's chipboard.  It is so much fun, and I just know you will enjoy working with it, too!  So pop on over and see what other chipboard shapes tickle your fancy!

Have a wonderful and creative week!

Barbara

Wednesday, August 5, 2015

COMING SOON TO A BLOG NEAR YOU!!!

ANNOUNCING...


Welcome! I have some exciting news for all you paper craft hoarders out there! On the 5th of every month, starting September 5th, a fantastic group of hoarding crafters will be participating in an inspirational Monthly Blog Hop! We will share projects with you, show you how we are using up our hoarded supplies, and encourage you to dig into your own stash! Our goal is to inspire you to USE IT UP!

Each month, you will start at Gloria Stengel's Blog and hop through 20 amazing blogs. The participating crafters will share projects in all styles and media types, using both old and new product! Some designers will share tutorials; some will share storage solutions; some will share how to use your scraps and leftovers; some will share videos. There is a wealth of experience and creativity among these crafters! Many of the designers are on popular manufacturing teams and a few are part of exceptional challenge blogs. I hope you will take the monthly journey with us, and DE-HOARD your supplies!

Here is the list of the participating Bloggers. Make sure to hop along and say hello! We will share our first projects on September 5th!


I hope you will save the date and join us every month for lots of inspiration and fun from these talented artists!  

Barbara

Sunday, August 2, 2015

A Trio of ATC Backgrounds with ColourArte

Hello my fellow ColourArte-ists!  Can you believe it is August already.  It seems like only yesterday that my tootsies were cold and I longed for the heat.  In any case, I have a fun video tutorial for you today from some of my experimentations in my Black Hole Art Studio!


Results varied according to each technique used.  For complete  instructions and details, please take a look at my video tutorial.


ColourArte Supplies:

Radiant Rains Shimmer Mists
Persimmon
Ginger Peach

Radiant Rains Color Concentrate Dauber
Nutmeg

Radiant Gels Dimensional Paint
Emperor's Gold

Silks Acrylic Glaze
Sunburst
Ginger Peach
Bolivian Blue

Other supplies:
4"x4" blank coasters
Collage sheets:  Birds and Bees, Bee Banners (Alpha Stamps)
Light Molding Paste (Golden)
White Gesso
Sin City Stamps: Wings
Prima crackle stencil

Cut three 4"x4" coasters down to ATC size (2-½" x 3-½")

Apply light molding paste as shown in video.


Light molding paste applied through stencil

Pat over a thick coat of light molding paste

Crackle rubber stamped into light molding paste
By the way, there is still time to visit our Altered Shoe Blog Hop.  You have until August 5th to enter to win a $25 gift certificate to spend in the ColourArte store.


I hope you enjoyed my experimentation with crackle backgrounds and use of ColourArte paint products.  Stop by the ColourArte online store for more products to choose from.

Thanks for stopping by, and have a wonderful, crafty weekend!  Play on, my friends!

Barbara

Saturday, August 1, 2015

House of Cards August 2015 Challenge: Metallics

Hello everyone, and welcome back to a new monthly challenge here at House of Cards.  I so enjoy seeing all the creations each month, not only from the design team, but also from you, the challenge participants.

This month's challenge is ...

AUGUST 2015
Word Cue Challenge

Here is my interpretation of metallics.  I decided to go with gold metallic card stock for the wings, and a shimmery white metallic card stock for the hearts.  I used the two colors of alcohol inks on the hearts because they are translucent and I knew they would keep the paper shimmery and metallic looking.  I also edged the print layer with silver embossing powder for some extra shine.


Here are the bits and pieces I used to make this simple, yet effective card.

Supplies used:
Kaisercraft Storyteller paper pad
Wheat card stock (to make A2 size card)
Sizzix Tipsy Hearts Originals die
McGill Angel Wings punch
White shimmer card stock (Paper Studio)
Gold metallic card stock
Adirondack alcohol inks:  Mountain Rose, Sunset Orange
Blending tool with felt
Brilliance Platinum Planet ink pad
Silver embossing powder
Cosmo Cricket Tiny Text Stickers


And check out the other DT members for more inspiration~


The DT cards will be showcased on the House of Cards blog throughout the month!

hope you enjoyed my card this month and that I have been able to inspire and entice you to play along with us in this month's challenge, which can be seen by clicking here.

Thanks for stopping by, and please come back on the 3rd for MORE inspiration from this very talented Design Team!  We hope you join in the fun, too--please check out our House Rules HERE before linking up!  I can't wait to see your creations!

Barbara xo