
So, some of you have asked, what is a triptych? Wikipedia defines it:
A triptych (/ˈtrɪptɪk/ trip-tik; from the Greek adjective τρίπτυχον ("three-fold"), from tri, i.e. "three" and ptysso, i.e. "to fold" or ptyx, i.e. "fold")[1][2] is a work of art (usually a panel painting) that is divided into three sections, or three carved panels which are hinged together and can be folded shut or displayed open. It is therefore a type of polyptych, the term for all multi-panel works. The middle panel is typically the largest and it is flanked by two smaller related works, although there are triptychs of equal-sized panels.
 |
| Side 1 - Vintage Christmas |
 |
| Side 2 - Traditional Christmas |
Altered Pages collage sheets: Happy Holidays (AP-505), Holiday Postcards (AP-1155), Ivory Angels (AP 2090),
Christmas Emporium 8x8 paper pad (Graphic 45)
Graphic 45 Coredinations Cardstock
Vintage Text Paper
Faber-Castell Big Brush Pen (Brown)
German Scrap
4x6 chipboard pennants (Paper Accents) (3)
Hinges (Tim Holtz)
Distress Stain: Old Paper (Tim Holtz)
Copper Metallic acrylic paint
Ink Pads: Dark Moss Chalk (Colorbox)
Doily die (My Favorite Things)
Ornate Frame die (Tim Holtz)
Mini Rosettes die (Tim Holtz)
Botanicals, decorative brads, bling
Directions:
Cover one side of three pieces. This will be the front side of the triptych.


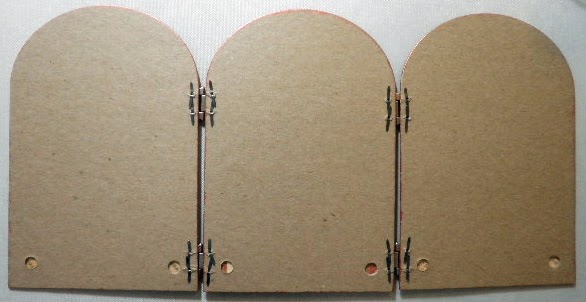 |
| Reverse side - brads holding hinges show |

Center holly flower girl (AP-1155) in center of frame and trim to fit inside opening. Use brown big brush pen to finish off the frame edges.

Die cut one doily from Astroparche paper, distress edges with Vintage Photo, and cut in half.


Die cut two mini rosettes from vintage text paper. Add a strip of washi tape to back of rosettes to give this fragile paper more strength.
 Form into rosettes following directions on die.


Stamp a "2" and a "5" onto a scrap piece of the vintage text paper with moss chalk ink. Punch out with 1/2" circle punch, adhere each to center of rosettes. Add 1/2" epoxy circle to center.


Add oval centers (removed from center of ornate frame die cut) and add to both outer panels, as shown.


 |
| close-up of decorative brad covering ends of botanicals |


A few close-ups of the botanicals and embellishments.


You can get all your supplies to make this at www.alteredpages.com. And don't forget to stop by the Altered Pages Monthly Challenge Page to see all the inspiration from the design team, and go vote for your favorite in the side bar.
Thanks for stopping by. Happy Thanksgiving to you all!
Barbara
Great idea for holiday decor!
ReplyDeleteStunning Barbara, each one is a beauty in itself and together they just look fabulous!!
ReplyDelete