Showing posts with label Clearsnap. Show all posts

Thursday, July 28, 2016

Cards to Remember with Craftwell USA and Clearsnap

Hi everyone!  Barbara here on the Craftwell Blog with some Remembrance Cards using my Craftwell eBrush, along with stamps and ink pads from our partner, Clearsnap.  

The style and theme of these are perfect for making inspirational cards for gift giving, birthday, and special occasions.  As I was making these cards, using the skyline stamp and the Remember dies, I couldn't help but think about 9-11.  But on a happier note, it would be perfect to say to someone, I remembered your birthday or anniversary, and have the Best Day Ever.   


The first card is the one that reminded me so much of 9-11, but I think I brightened it up enough with sunny colors that it is quite suitable for a birthday or any special occasion.  


Of course, I used my Cut n' Boss to die cut several of my Teresa Collins dies.  I also used her paper pad, Sweet Afternoon.


I stamped the skyline image twice, in line, onto a scrap of the yellow paper with the Pink Passion ink pad.  I embossed it with clear embossing powder, and it turned the images to a beautiful peach color.  I think the yellow paper was helping do that.  


I put some glue on the back of the Remember die and adhered it over the stamped image, as shown.  Then I cut the excess yellow paper from around the die image.


Next, I used the Teresa Collins Deco Circles embossing folder with white card stock.  These embossing folders are large enough to emboss an entire sheet of 8-1/2 x 11 paper.  What I don't use in my project today will be saved for later.


I cut a rectangle to measure 3" x 4", then cut it on the diagonal from point to point.  If you want an equilateral triangle, then cut any size square first.  I wanted this uneven triangle, however.


Now comes the fun. I love my eBrush because I get to make my own background papers (or embellishments) to match.  One triangle was colored with a combination of the pink and yellow marker.  The second triangle was simply colored with the blue marker, leaving it darker in some places for dimension.  I inked both triangles with the Gold Shine ink pad for some extra shine.  I love how it turned out.  It actually gave it a bit of a vintage feel.


When all was finished, I added my pieces to the card front, as shown in the finished photo above.

The second card was really fun and simple, too.  The papers were adhered to the card front, as shown, along with a bow and some bling.  The die cut key was cut from blue card, but inked with the Gold Shine ink pad.  You'd never know it wasn't cut from gold card.


A little tip to share:  When you cut your dies with the removable alphabet, such as these, but you want to keep them in tact, before removing the paper from the die, lay a piece of scor-tape, or any double sided adhesive with a paper liner on one side, over the back of the paper.


When you remove the label/letters from the die, the alphabet remains in tact, and you have a ready made sticker with the adhesive on the back.  Fun?


Supplies Used:

Craftwell USA eBrush
Craft well Cut n' Boss
Teresa Collins Today Project Dies
Teresa Collins Remember This Project Dies
Teresa Collins Honeycome Project Die
Teresa Collins Deco Circles embossing folder
Teresa Collins 6x6 paper pad - Sweet Afternoon
Clearsnap Skyline rubber stamp (Teresa Collins)
Clearsnap pigment ink pads Passion Pink, Gold 
Card stock - Textured White, Blue
Prismacolor Markers - Pink, True Blue, Spanish Orange
Clear embossing powder
White ribbon

There will be more fun projects featuring the Clearsnap., so make sure to check out the Craftwell Blog all month long for more inspiration from the team. 

Thanks for stopping by, and have a crafty day!

Thursday, July 21, 2016

Skyline Travel Card

Hi everyone! Today I am up on the Craftwell Blog with a card with a travel theme using my eBrush and stamps from our July partner, Clearsnap.  


Ink the skyline rubber stamp with black archival ink and without re-inking, stamp it twice onto scrap paper and cut out with craft knife, leaving the openings in the paper to use as a stencil, as shown.  


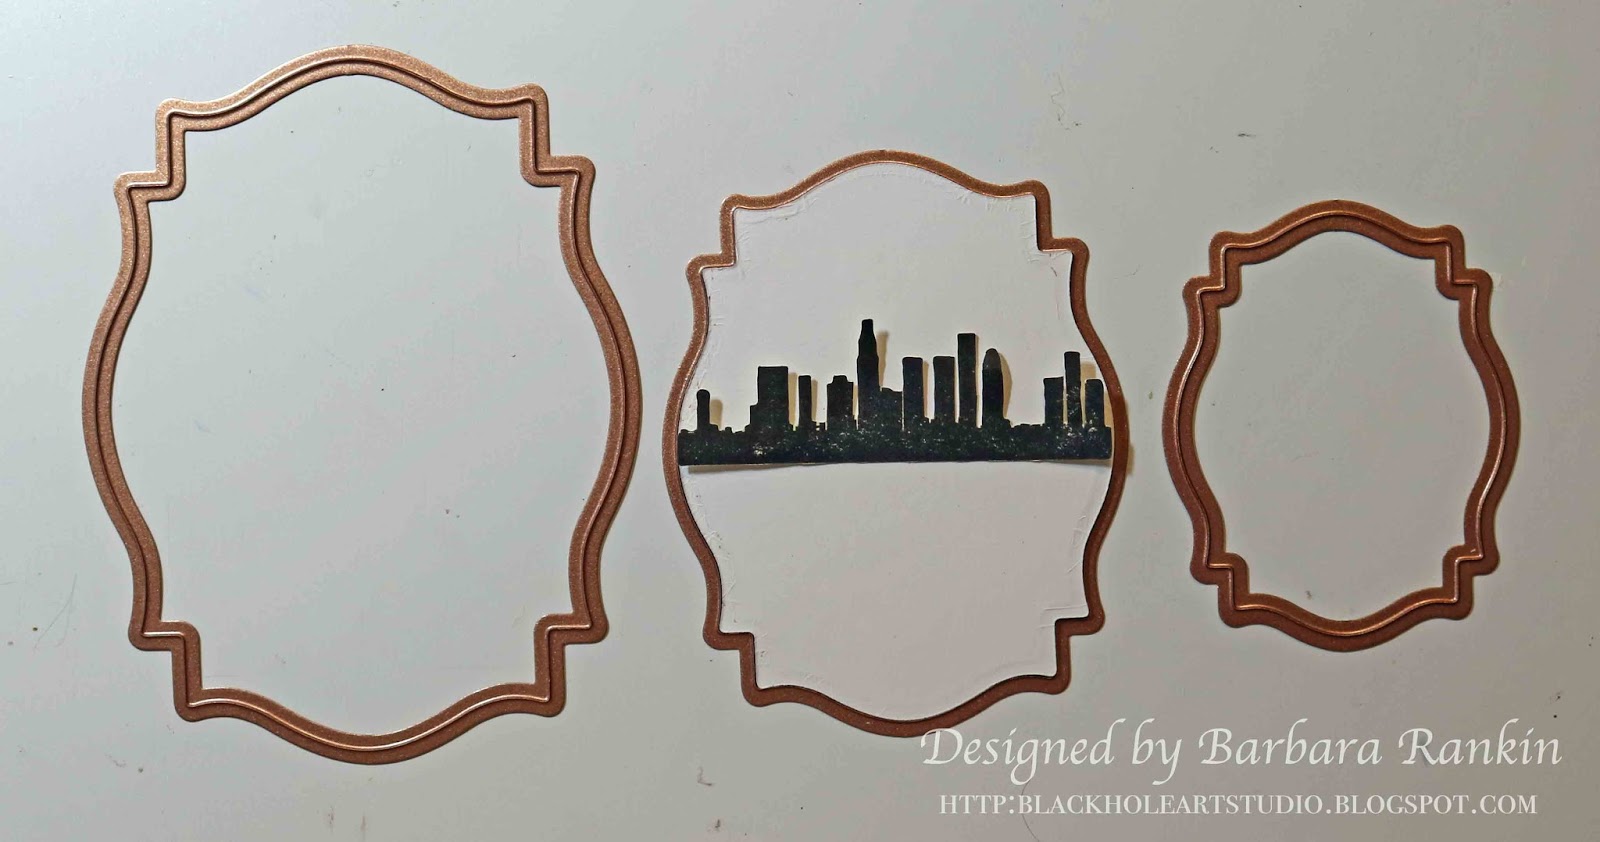
Using a die the same width as the stamp image, die cut one of the nesting labels onto glossy white card stock with the Craftwell Cut n' Boss.  The middle die in the photo below will work perfectly.


Find and mark the middle of the die lightly with pencil.  I like to use a ruler that has both horizontal and vertical markings to help me keep my lines straight in either direction. 


Place a piece of washi tape below the pencil line and protect the bottom half with a post-it note or scrap paper.


Begin eBrushing a beautiful sunset sky on the top half of the die cut.


YR61 Yellowish Skin Pink

YR68 Orange

B97 Night Blue
So far, so good!

Remove tape and place it above the pencil line, and protect the top half with a post-it note or scrap paper.  Begin eBrushing a beautiful blue river or lake on the bottom half of the die cut. 


Looking good!

Place one of the fussy cut pieces of card used to stamp on and, using it as a stencil, making sure to reverse it to match the stamped image, eBrush a dark or black marker through it.  Lay the stamped skyline on the card to check for accuracy.


eBrush through the "stencil" with the W10 Warm Gray marker.


I decided I need to add a bit of yellow to my sunset, so I placed my post it note along the line again and sprayed over the orange area with Y15 Cadmium Yellow.


Better!

I got to thinking that my stamped image was a bit speckle and not real black, so I thought why not airbrush it with my black marker.  


I don't know why I hadn't thought of that sooner.  Now look at that deep, dark black silhouette.  This was then adhered to the second generation stamping of the skyline to give a nice, light shadow effect.


Use the larger die to die cut a piece of coordinating print paper to use as an under-layer.  Edge both pieces with the Gold Shine ink pad.  It really made a difference.


Die cut a film strip from a piece of black card stock.  I used a scrap that was sitting on my desk from another project.  Use the openings to find small pictures from the Cityscapes paper and trim each piece to fit inside the film strip openings before adhering to the back.


I made a 4-½" x 6-½" black card, cut a print slightly smaller than the front and distressed the edges.  This was then adhered to the card front.  I curled the corners to show off that pretty print on the back of the paper, too.

Trim a few more prints of tags, stamps, etc, from the paper and layer them onto the card front, as shown.  

I used pop dots to adhere the stamped image layer, as well as using a single pop dot under the second film strip picture to give it some curl on the paper.  Here is a closer look at the finished card.


Supplies Used:


Clearsnap Skyline rubber stamp (Teresa Collins)
Clearsnap pigment ink pad (Gold Shine)
Card stock - Glossy white, Black
Spellbinders Die Labels 18
Tim Holtz Film Strip die 
Graphic 45 Cityscapes collection
Archival black ink
Copic Markers: B97 Night Blue, YR61 Yellowish Skin Pink, YR68 Orange, Y15 Cadmium Yellow, W10 Warm Gray

There will be more fun projects featuring the Clearsnap products, so make sure to check out the Craftwell Blog all month long for more inspiration from the team. 

Thanks for stopping by, and have a crafty day!

Monday, August 5, 2013

Classic Glitter Swirl Cards with The Robin's Nest

Hello Robin's Nest fans, and welcome back to the blog.  This month, we are showcasing the beautiful Classic Glitter Swirl papers, as well as sharing some fab products from our sponsor this week, Clearsnap®, the makers of Colorbox ink pads, and much more.

So, I want to show you how I combined these two wonderful products to make my cards today.  I have to admit, I had so much fun adding color to my papers and playing with the Clearsnap® products.  Sometimes I am just never happy leaving things alone.


Supplies Used:

White Glitter Swirl on White CS (The Robin's Nest)

Pink Glitter Swirl on Pink CS (The Robin's Nest)

Gold Classic Glitter CS (The Robin's Nest)

Black Classic Glitter CS (The Robin's Nest)

Robin's Egg Blue Glitter CS (The Robin's Nest)

Pink Classic Glitter CS (The Robin's Nest)

Silver Glitter on Creme Swirl CS (The Robin's Nest)

Lavender Glitter Classic CS (The Robin's Nest)

Dew Drops (Baby Tear, Forest Brown Mini, Hillside Mini, Regency Mini, Classified Mini) (The Robin's Nest)

5" x 6-1/2" black pre-folded card
Cream textured CS (7" x 8-1/2")
Chipboard
Metal embellishments (Prima)
Die-namics Upsy Daisy dies (My Favorite Things)
Ornate Frame Back #8 die (Sizzix)
Anna Griffin Acanthus embossing folder (Cuttlebug)
Smooch™Pearlized Accent Inks (Pumpkin/Luscious Lime)(Clearsnap®)
SmoochSpritz Pearlized Accent Sprays (Sea Breeze/Caramel Latte) (Clearsnap®)
Colorbox Chalk Queue (Big Top)
Donna Salazar Mix'd Media Inx - Adobe (Clearsnap)
Twinkling Turquoise Glitter  (Clearsnap)
Banner Wishes Design Adhesives (Clearsnap)
Old Bottles Miniature Shape Set (Gina's Designs)
Palette French Lilac ink pad (Stewart Superior)
Anchors Aweigh 3-in-1 Decorative Corner Punch (Fiskars)
Birds on a Wire Decorative Punch (Martha Stewart)
Distress Inks (Black Soot)

Directions:

Spray White Glitter Swirl on White CS with both colors of SmoochSpritz Accent Sprays.  Use a paper towel to wipe off excess ink.  Allow to dry.


Trim Gold Classic Glitter CS to 4-7/8" x 6-3/8".  Adhere to card base.

Trim colored White Glitter Swirl on White CS to 4-3/4" x 6-1/4".  Use decorative corner punch on each corner, adhere to card base over.


Adhere Pink Glitter Swirl on Pink CS  to a piece of chipboard and die cut Ornate Label .  Ink edges with Berrylicious from the Big Top Chalk Queue.


Adhere this piece to card, offsetting slightly towards the left, as shown.


Die cut Eiffel Tower from chipboard and Black Classic Glitter CS.  Distress chipboard edges with Black Soot.

Adhere both pieces together for stability, and glue Eiffel Tower over label, as shown.


Punch Birds on a Wire from Black Classic Glitter CS and adhere to card, as shown.


Die cut three sizes of flowers from Robin's Egg Blue Glitter CS and Pink Classic Glitter CS.


Shape each flower with a large tip embossing tool.


Each flower petal should look something like this.  Now you can layer them, starting with the largest petal on the bottom to the smallest petal on the top.
  

Cut around one of the Design Adhesive rub-ons.  Remove the protective paper backing, leaving the rub-on on the clear plastic piece.  Place this on top of Gold Classic Glitter CS and rub with the tool included in the package.


Remove the clear plastic piece and the sticky adhesive is left on the card.


Cut around the rub-on, being careful not to touch the sticky parts.  Place on a coffee filter or scrap of paper and apply Twinkling Turquoise Glitter over the rub-on.  Shake off excess glitter and return to container.


Add your flowers and banner sentiment to the card, as shown in the finished photo above.  Of course, my card is not complete without adding some bling, so I had to add some dew drops.  I have a few close-ups of where I added them.  I like them a lot on the Eiffel Tower.  What do you think?


For my second card, I used some of the same products with just a bit of a change-up.  This card is 3-1/2" x 8-1/2" and fits into a #10 long or policy type envelope.


Fold cream card in half to make a 3-1/2" x 8-1/2" card.

Trim Lavender Glitter Classic CS to the same size as card front.  Adhere.

Trim Silver Glitter on Creme Swirl CS to 3-1/4" x 8-1/4" and adhere.


Die cut a piece of chipboard using the Ornate Frame Back #8 die.  Ink the chipboard direct-to-paper with the French Lilac ink pad and emboss with the Anna Griffin Acanthus embossing folder.  Color the high spots and edges with Pumpkin and Luscious Lime Smooch™Pearlized Accent Inks.  Isn't this gorgeous?  I love how the lime antiqued the brightness of the pumpkin color.  Really cool ink!


Choose three different bottle shapes and color each, as noted in photo below. Adobe ink was applied direct-to-paper, Caramel Latte was spritzed onto the center bottle, and Luscious Lime was painted onto the third bottle.  I added a coat of Sakura 3D Crystal Lacquer to the adobe and lime bottles for interest, and left the middle one alone.  I think it looks like it has been hiding in a damp cellar for a very long time.


 I made a banner sentiment using the Open Me Banner Wishes Design Adhesives and adhering it to the reverse side of Lavender Glitter Classic CS, glittered with Twinkling Turquoise Glitter, and trimmed, just as I did previously.


Adhere the embellishments, i.e., chipboard, bottles, and banner sentiments as shown in the photo below.


Here's a close-up of those bottles.  I just love how these turned out.


So, that's it for this time.  I hope you enjoyed my card projects today and will give this gloriously scrumptious glitter swirl paper a try.  And it is on sale for a whopping 20% off this whole month of August.  It is so elegant, yet so versatile at the same time.  So go ahead, check out the Robin's Nest online store, and be sure to come back to the Chattering Robin's blog for more inspiration from the DT using these fab papers!  And a big thanks to Clearsnap for sponsoring us this week and allowing us to share their great products with you.  

As always, thanks tons for stopping by, and have a wonderfully creative week!

Barbara