Showing posts with label Copic Markers. Show all posts

Thursday, September 22, 2016

Using the CraftwellUSA eBrush for a Mixed Media Fall Canvas

Hey all!  Are you thinking about Fall yet?  I sure am, which brings me to my mixed media canvas today.  Of course, I am going to be adding color with my Craftwell eBrush.  So let's get started.


I cut a piece of corrugated cardboard to 11" x 8-1/2".  Then, I tore some of the top layer off, exposing the corrugations in some areas.  Next, I added some strips of flower printed fabric tape and gave the entire background a rough textured coat of Teresa Collins' modeling paste.  Let this dry thoroughly.


Spread extra course garnet gel in a couple of spots, then sprinkle gold micro beads over wet medium.


Brush random strokes of gel medium over background and lay pieces of torn book pages over it.  Let all mediums dry.


Remove any portions of the book pages that did not adhere and you will get this really cool torn effect.


Brush on a wash of white gesso and water to give a nice, light background for the eBrushed colors to adhere to.


I die cut a piece of script paper with Teresa Collins Honeycomb Project Die using my Cut n Boss.


Tear honeycomb apart and adhere pieces to canvas, as shown, along with some of the punched out honeycomb pieces.  Let dry.


Emboss white card stock with the Teresa Collins Beautiful Words A6 Embossing Folder and cut out the word "FOREVER".  (This was left over from another project, so nothing goes to waste.)


Adhere to canvas, as shown.  Let dry.  I also die cut and embossed some leaves from thin chipboard and arranged the on the canvas.  It is a good idea to do this to get an idea of where you are going with your piece, although it can change.


Now the fun begins.  eBrush the first layer with BG15 Aqua, concentrating on the edges and corrugations.


Next layer is eBrushed with R85 Rose Red.


I wanted to warm the background a bit so I eBrushed Y21 Buttercup Yellow over the background, concentrating on the center of the piece.


The yellow leaf was eBrushed with YR23 Yellow Ochre, then E74 Cocoa Brown around the edges.


The two large orange leaves were first eBrushed with YR 23 Yellow Ochre, then YR68 Orange was eBrushed around the edges.  A light coat of E74 Cocoa Brown was added over it to tone it all down.


The wider small red leaf was first eBrushed with YR23 Yellow Ochre, then R29 Lipstick Red was eBrushed around the edges, and a light coat of E74 Cocoa Brown was added over all to tone it all down.


The last reddish green leaf was first eBrushed with YR23 Yellow Ochre, then R29 Lipstick Red was eBrushed in the center.  Next, the edges were eBrushed with the G09 Veronese Green, and a light coat of E74 Cocoa Brown was added over all to tone it all down.  All leaf stems were also eBrushed with the Cocoa Brown.


I found these puffy plastic letters to spell "fall" in my stash, so I eBrushed them with the E74 Cocoa Brown.  It would have been impossible to color them straight from the marker because each brush stroke of the marker removed what I put down.  So the eBrush is super fantastic for this sort of technique.  (Tip:  They are stickers, so you want to place them on your craft mat before eBrushing them so that you can remove them.)


Since I had already adhered my "FOREVER" word to my canvas, I used post it notes to protect the area around it from overspray and eBrushed it with the E74 Cocoa Brown.


I removed the post it notes and outlined the letters with a brown Micron pen to add depth.


I used a die cut piece of card stock as a stencil and eBrushed the E74 Cocoa Brown through it in random spots.


I used brown distress ink and a blending tool to edge all of the leaves, as well as the edges of the canvas.  I just really like the look.


Supplies Used:

Teresa Collins Beautiful Words and Stars A6 Embossing Folder
Copic Markers - BG15, R85, Y21, YR23, YR68, E74, R29, G09
Teresa Collins Modeling Paste
Gel medium
White gesso
Extra course garnet gel medium
Gold micro beads
Sizzix Tattered Leaves die (Tim Holtz)
Sizzix Layered Leave die (Tim Holtz)
Corrugated Chipboard from boxes
Vintage book pages
Distress ink - Vintage Photo
Blending tool

There will be more fun projects featuring up cycled projects, so make sure to check out the Craftwell Blog all month long for more inspiration from the team. 

Thanks for stopping by, and have a crafty day!


Thursday, July 21, 2016

Skyline Travel Card

Hi everyone! Today I am up on the Craftwell Blog with a card with a travel theme using my eBrush and stamps from our July partner, Clearsnap.  


Ink the skyline rubber stamp with black archival ink and without re-inking, stamp it twice onto scrap paper and cut out with craft knife, leaving the openings in the paper to use as a stencil, as shown.  


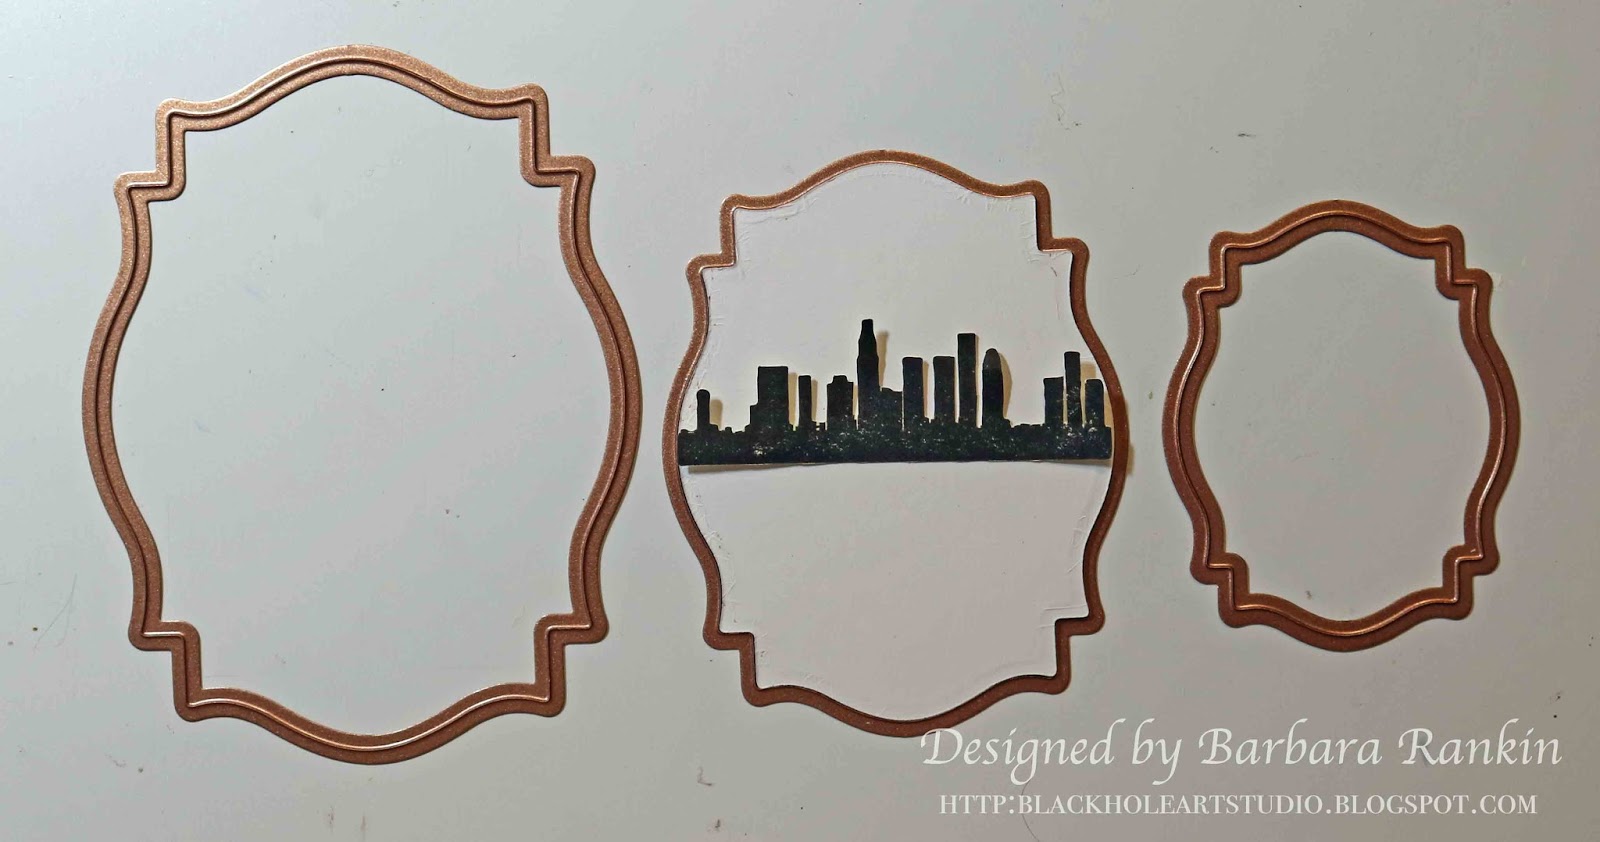
Using a die the same width as the stamp image, die cut one of the nesting labels onto glossy white card stock with the Craftwell Cut n' Boss.  The middle die in the photo below will work perfectly.


Find and mark the middle of the die lightly with pencil.  I like to use a ruler that has both horizontal and vertical markings to help me keep my lines straight in either direction. 


Place a piece of washi tape below the pencil line and protect the bottom half with a post-it note or scrap paper.


Begin eBrushing a beautiful sunset sky on the top half of the die cut.


YR61 Yellowish Skin Pink

YR68 Orange

B97 Night Blue
So far, so good!

Remove tape and place it above the pencil line, and protect the top half with a post-it note or scrap paper.  Begin eBrushing a beautiful blue river or lake on the bottom half of the die cut. 


Looking good!

Place one of the fussy cut pieces of card used to stamp on and, using it as a stencil, making sure to reverse it to match the stamped image, eBrush a dark or black marker through it.  Lay the stamped skyline on the card to check for accuracy.


eBrush through the "stencil" with the W10 Warm Gray marker.


I decided I need to add a bit of yellow to my sunset, so I placed my post it note along the line again and sprayed over the orange area with Y15 Cadmium Yellow.


Better!

I got to thinking that my stamped image was a bit speckle and not real black, so I thought why not airbrush it with my black marker.  


I don't know why I hadn't thought of that sooner.  Now look at that deep, dark black silhouette.  This was then adhered to the second generation stamping of the skyline to give a nice, light shadow effect.


Use the larger die to die cut a piece of coordinating print paper to use as an under-layer.  Edge both pieces with the Gold Shine ink pad.  It really made a difference.


Die cut a film strip from a piece of black card stock.  I used a scrap that was sitting on my desk from another project.  Use the openings to find small pictures from the Cityscapes paper and trim each piece to fit inside the film strip openings before adhering to the back.


I made a 4-½" x 6-½" black card, cut a print slightly smaller than the front and distressed the edges.  This was then adhered to the card front.  I curled the corners to show off that pretty print on the back of the paper, too.

Trim a few more prints of tags, stamps, etc, from the paper and layer them onto the card front, as shown.  

I used pop dots to adhere the stamped image layer, as well as using a single pop dot under the second film strip picture to give it some curl on the paper.  Here is a closer look at the finished card.


Supplies Used:


Clearsnap Skyline rubber stamp (Teresa Collins)
Clearsnap pigment ink pad (Gold Shine)
Card stock - Glossy white, Black
Spellbinders Die Labels 18
Tim Holtz Film Strip die 
Graphic 45 Cityscapes collection
Archival black ink
Copic Markers: B97 Night Blue, YR61 Yellowish Skin Pink, YR68 Orange, Y15 Cadmium Yellow, W10 Warm Gray

There will be more fun projects featuring the Clearsnap products, so make sure to check out the Craftwell Blog all month long for more inspiration from the team. 

Thanks for stopping by, and have a crafty day!

Thursday, June 30, 2016

Patriotic Tag with Craftwell USA

Hello friends!  Barbara here on the Craftwell blog with a very patriotic Happy 4th tag.  Of course, I am using my eBrush to make it all come together so easily and quickly.  I took some liberties, no pun intended, adding white stars to the red tag, with blue and white striped butterflies, representing our freedom.  


First, eBrush Carmine R37 over tag background, then darken the edges with the darker Garnet R39.


Sponge white paint through a stars stencil and let dry.


Die cut two butterflies with the Teresa Collins Project "Today" Die using the Craftwell Cut n' Boss.  


eBrush Royal Blue B28 through a stripes stencil over both butterflies, then offset the stencil and eBrush Ultramarine B29.


I was able to curl and shape the butterflies by misting the back with water and letting it dry.  The paper becomes stiff and will keep its shape.  


eBrush die cut book plate and tag reinforcement with Copper E18.  


Stamp Happy 4th onto a scrap piece of paper with blue ink and cut into an arrow shape, as shown.  Now you are ready to assemble the tag.


Simply adhere the pieces on your tag, as shown.  I adhered the butterflies only along the body, adding tiny red stickers over the body portion, and pearls to indicate the butterfly's flight path.  

The book plate was centered on the tag and the Happy 4th banner was adhered with a wispy bend in the center.  

Supplies used:

Copic Markers
Stencils
Tag
Paper
Stickers

What a wonderful country we live in, and I just wanted to commemorate our Independence Day with a little remembrance of our nation's struggles and blessings.  

Thanks for stopping by, and have a fabulous, safe holiday!