Showing posts with label tag. Show all posts

Thursday, June 30, 2016

Patriotic Tag with Craftwell USA

Hello friends!  Barbara here on the Craftwell blog with a very patriotic Happy 4th tag.  Of course, I am using my eBrush to make it all come together so easily and quickly.  I took some liberties, no pun intended, adding white stars to the red tag, with blue and white striped butterflies, representing our freedom.  


First, eBrush Carmine R37 over tag background, then darken the edges with the darker Garnet R39.


Sponge white paint through a stars stencil and let dry.


Die cut two butterflies with the Teresa Collins Project "Today" Die using the Craftwell Cut n' Boss.  


eBrush Royal Blue B28 through a stripes stencil over both butterflies, then offset the stencil and eBrush Ultramarine B29.


I was able to curl and shape the butterflies by misting the back with water and letting it dry.  The paper becomes stiff and will keep its shape.  


eBrush die cut book plate and tag reinforcement with Copper E18.  


Stamp Happy 4th onto a scrap piece of paper with blue ink and cut into an arrow shape, as shown.  Now you are ready to assemble the tag.


Simply adhere the pieces on your tag, as shown.  I adhered the butterflies only along the body, adding tiny red stickers over the body portion, and pearls to indicate the butterfly's flight path.  

The book plate was centered on the tag and the Happy 4th banner was adhered with a wispy bend in the center.  

Supplies used:

Copic Markers
Stencils
Tag
Paper
Stickers

What a wonderful country we live in, and I just wanted to commemorate our Independence Day with a little remembrance of our nation's struggles and blessings.  

Thanks for stopping by, and have a fabulous, safe holiday!


Monday, May 9, 2016

Card and Matching Tag with Sabor Papel and Rubber Stamp Depot

Hello everyone.  The Altered Pages design team is sharing some fun projects using stamps from this month's sponsor, Rubber Stamp Depot.  Their stamps are beautiful and deeply etched red rubber.  There is even a coordinating set to match the beautiful Sabor Papel paper, which I am also using today.

I decided to make a card and matching tag with these beautiful papers and two of the stamps from the coordinating set .


Let's start with the card.  I stamped the two heart stamps onto separate pieces of eco board with Black Stazon Midi ink.  


I used the three Gelato colors shown below with a water brush to color the stamped eco board images.  I was trying to match the Recuerdos Amor paper color.  The Gelatos make easy work of this and blend beautiful with the Water Brush.


I filled in the background of each eco board piece with the pink Gelato, again blending the color with the water brush.  When that was dry, I edged each eco board with the black Big Brush Pen.


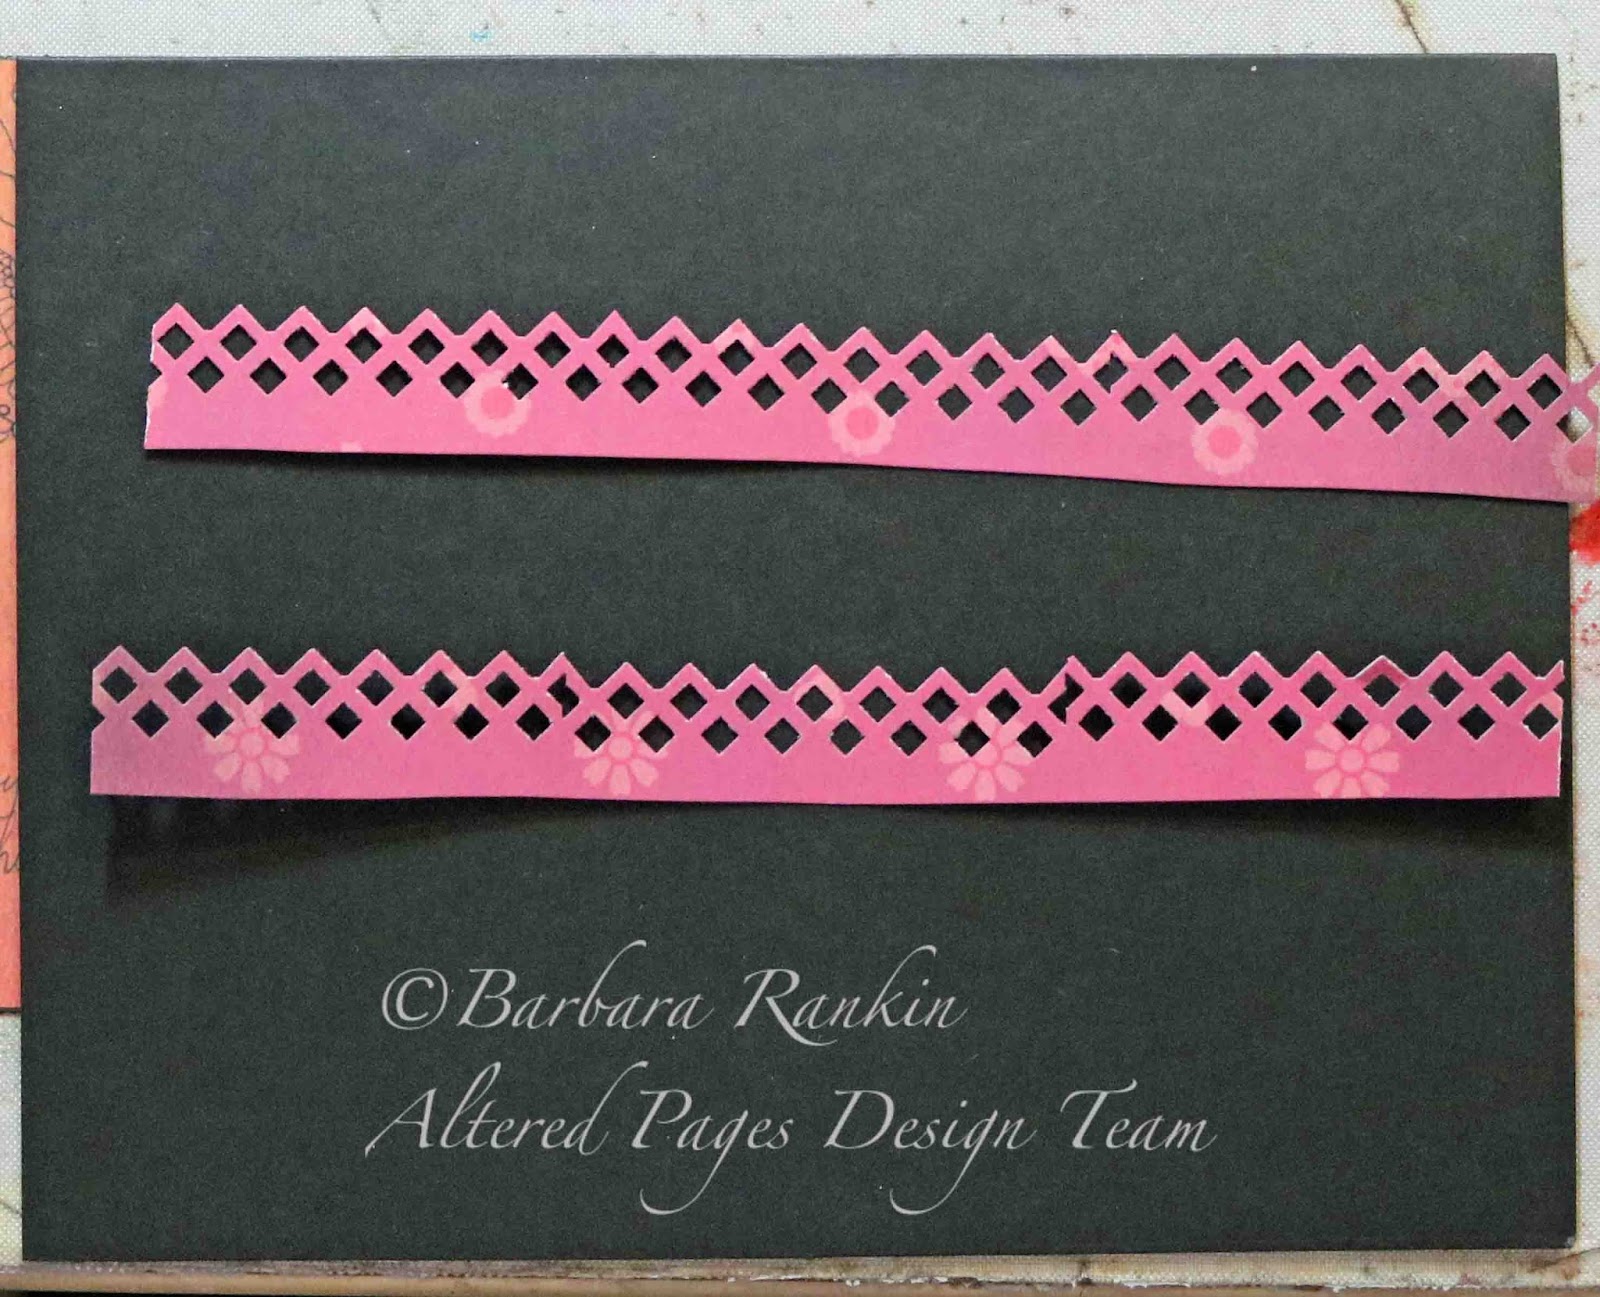
I used a decorative edge punch to make these pink borders from the Picado paper.


I adhered each border piece to the Recuerdos Amor paper using Double Sided Tape ⅜ inch, then adhered the papers to the black card.


I used a scrap left from the Picado paper to die cut a small doily piece, then glued the eco board on top.  To finish if off, I add 3D Crystal Lacquer over the stamped image.


For the tag, I used a piece of the Corazonitos paper cut to 3" x 4-1/4".  I rounded the bottom corners and punched a hole in the top center.  

I cut a small label from the Sentimentios Amor paper and adhered to the lower bottom left of the tag.  I cut a partial image of the guitar from the La Guitara paper and edged with the Black Big Brush pen.  


I used the reverse side of the La Guitara paper and adhered above the small label.  Then I colored it with the orange Gelato, blending the color with the water brush.  I punched another piece of the Picado paper and adhered to the bottom of the tag.  The stamped eco board was glued down over the label and a piece of Sari Silk Ribbon was added through the hole.  


SUPPLIES USED:

Sabor Papel:  Recuerdos Amor, La Guitara, Ramitos, Sopressa, Picado, Corazonitos, Sentimentios Amor
Red Rubber Stamps: Pierced Heart rubber stamp; Divided Heart rubber stamp
Eco board
Gelatos
Big Brush Pens
Water Brushes
Sari Silk Ribbon
Double Sided Tape ⅜ inch
Black Stazon Midi ink pad
3D Crystal Lacquer
Black card stock
Decorative edge punch


I hope you have enjoyed my project today, and be sure to check out all the fun things at Altered Pages.  

Thanks for stopping by, and have a wonderful, creative week!

Barbara

Thursday, February 25, 2016

Airbrushed Tag with the Craftwell eBrush & Teresa Collins dies

--------------------------------------------------------------------------------------------------
I have two posts to share today, so if you would like to see my project for Gypsy Soul Laser Cuts, please click here.  Thanks!
--------------------------------------------------------------------------------------------------

Hello everyone.  Today I get to share my first post as part of the Craftwell eBrush design team.  I am so thrilled to be here, and I don't mind telling you how much fun this eBrush is to use!  It is a fabulous little machine.  While I have done some airbrushing before using monstrous air compressors that were so loud, you could not hear yourself think, this little gem is so much quieter, and has several settings from low, medium, to high air pressure.  It is so convenient to use and store, too, unlike the monstrosities I have used before.  I cannot say enough good things about it.  So let's play!!!!


This month, we are pairing up with products from Teresa Collins.  I get to play with three different die sets, and I used something from each one of them for my tag!


After cutting the honeycomb from manila card stock, I used it first as a stencil to make background layers.


Move the die cut around the page, spraying Copic markers with the eBrush by Craftwell.  Keep your images random and uneven for best results.


BG72
BG34
YR23
B34, BG72
Script stamp from Bo Bunny set with Forest Moss distress ink
Airbrush these colors until you like it.
Stamp Finnabair Crackle randomly with Vintage Photo distress ink.
Stamp Blips randomly with Black Soot distress ink
Airbrush edges with 100 Black
Airbrush R85 in a few spots
Cut paper into a tag shape, approximately 8-1/2" by 5" wide, and set aside.  Die cut a butterfly from manila card stock.

Airbrush edges with B100
Y17 and YR23
B28 around edges, softening as you move inward
Die cut the numbers from manila cardstock and airbrush them in a similar fashion as the butterfly.  I added a white edge with a white craft pen to help it stand out better against the background.  

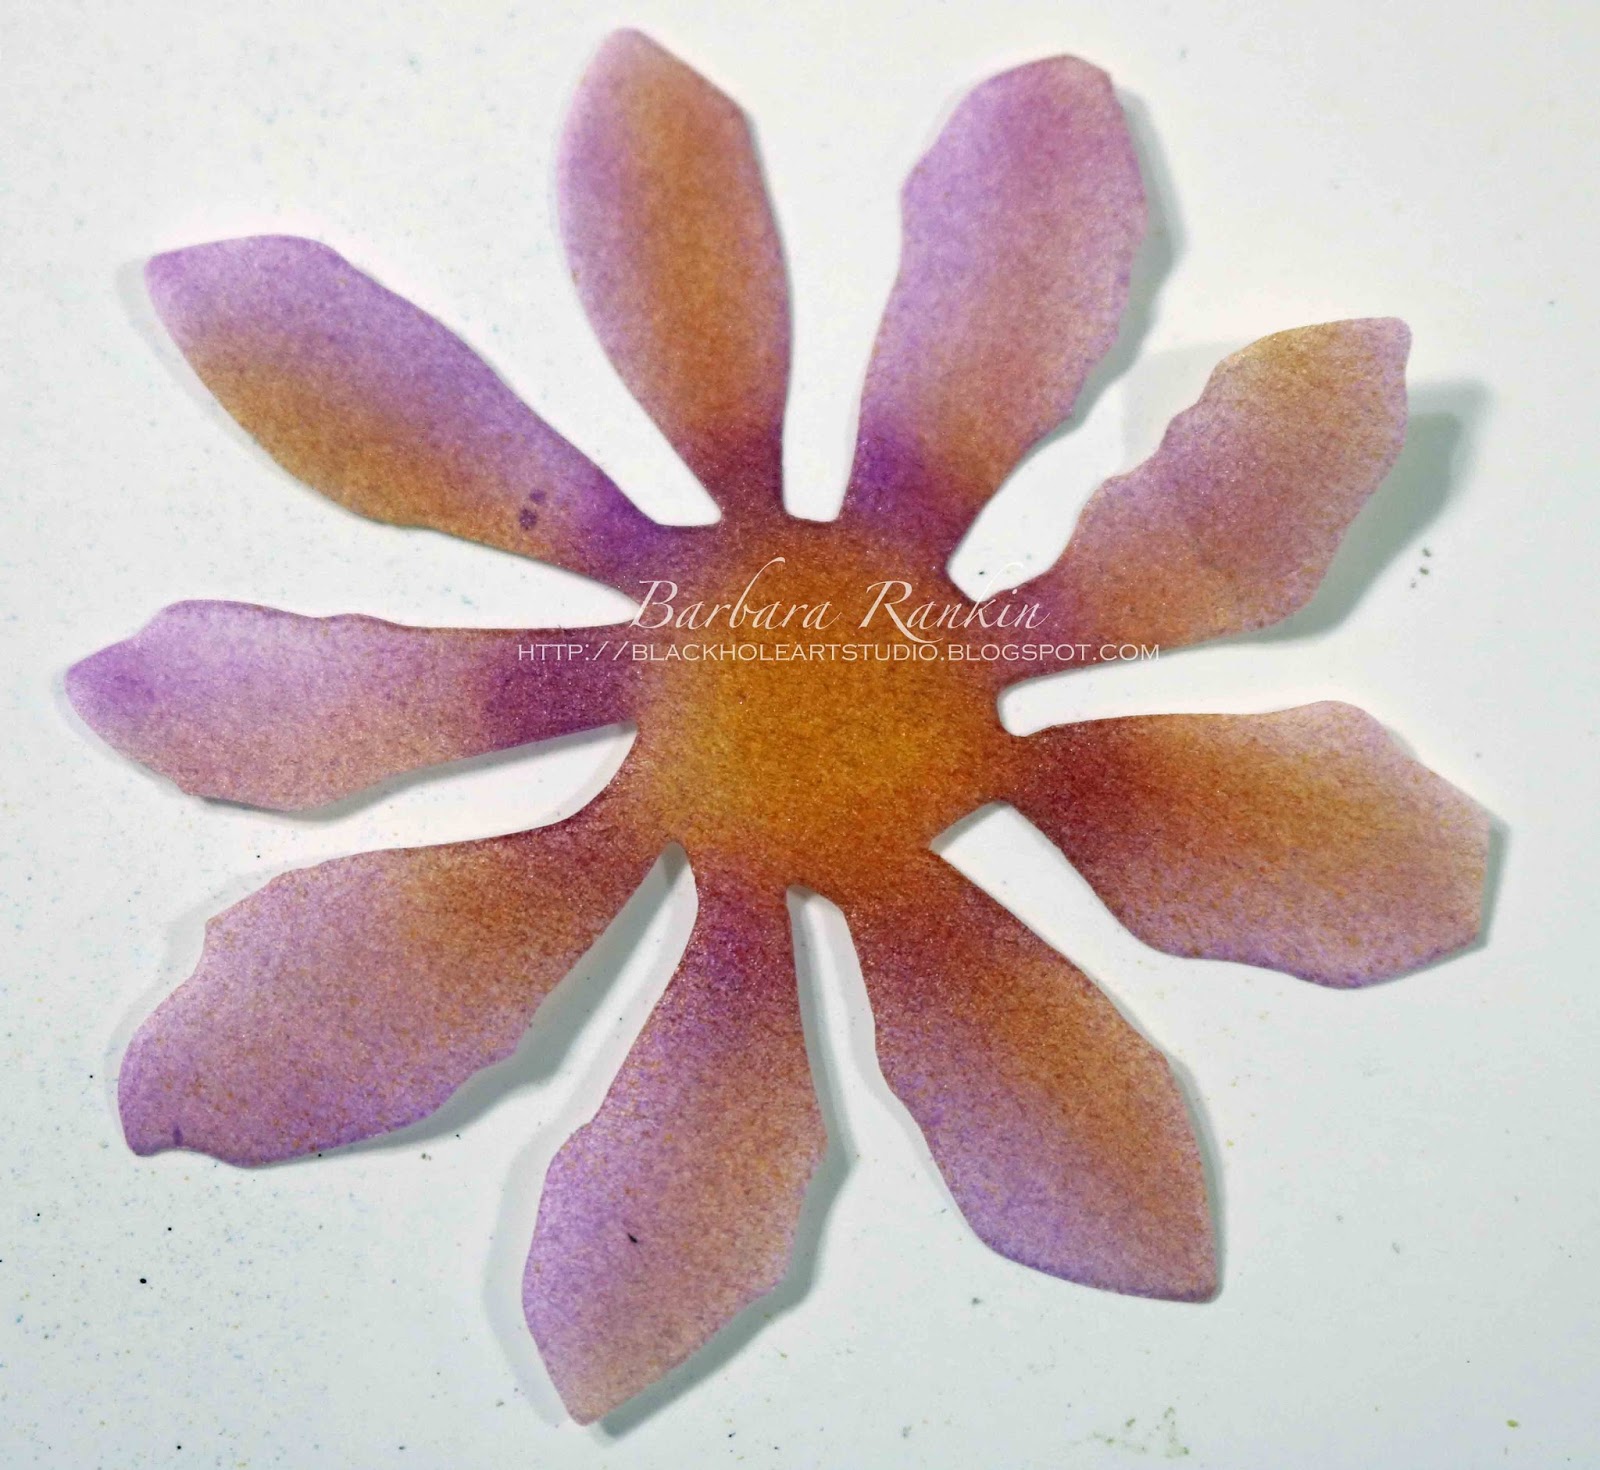
Die cut four tattered flowers from coffee filter paper.  Airbrush each as shown.


V11
YR23
V15
Offset two petals for each flower.
Trim the edge of the honeycomb die cut unevenly, then adhere to center of tag.  Add flowers, butterfly, numbers, and gold leaf ribbon trim, as shown.  Punch a hole and add eyelet to top center of tag.  Add jewel stickers to butterfly body and flower center.


Use the negative of the butterfly die cut (the portion left in the card stock piece after cutting out the butterfly) as a mask and airbrush Warm Gray No. 5 through the opening, lower right and upper left.


Airbrush with Warm Gray No. 5
The illusion of butterfly shadows
Lastly, pretty yarns were added through the tag hole to finish it off.  See photo of finished tag at top of post.


Supplies Used:


Teresa Collins Project Dies
Copic Markers
  • BG72
  • B34
  • B28
  • YR23
  • Y17
  • Y38
  • YG23
  • R85
  • V12
  • V15
  • 100 Black
  • Warm Gray No. 5


Rubber Stamps
  • Finnabair Crackle
  • Bo Bunny It is Written
  • Hero Arts Blips
  • Manila card stock
  • Tattered Flowers die (Sizzix)
  • Coffee filter paper
  • Gold leaves ribbon trim
  • Jewel stickers
  • Yarns
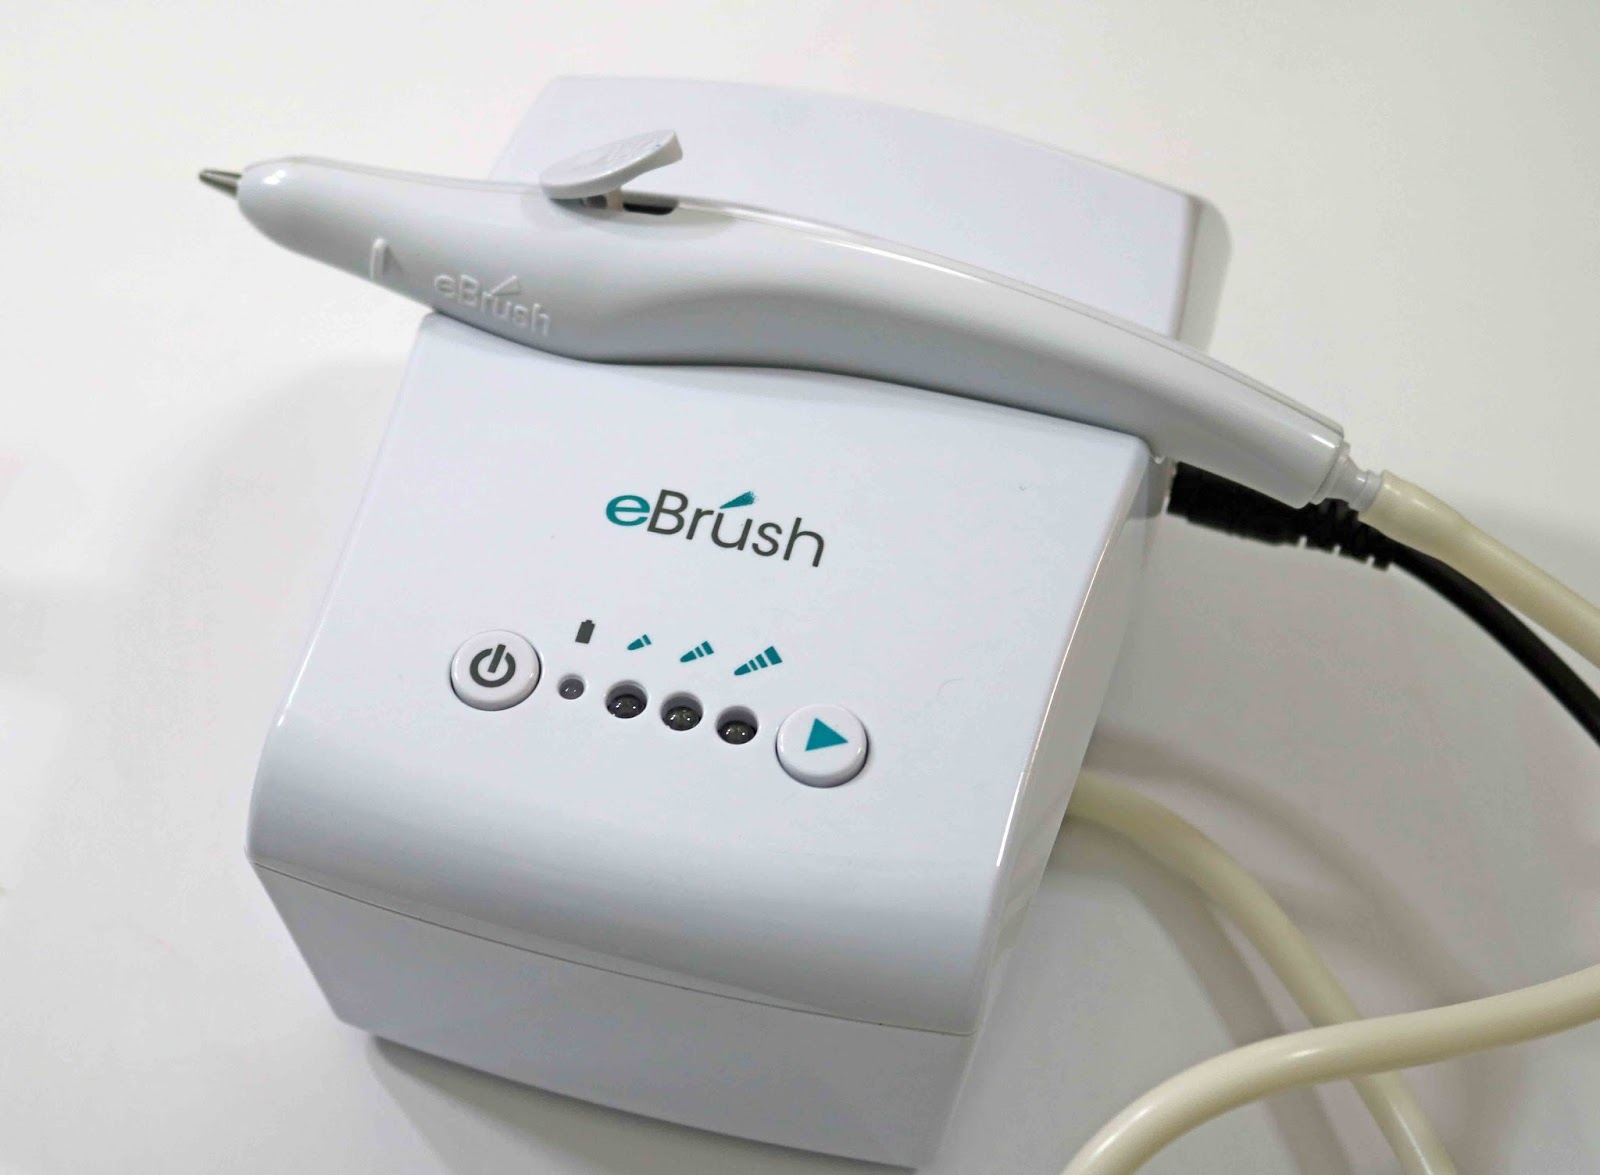
And here is a picture of my sweet tool!  Is that not just amazing... how small it is and totally easy to use.  And you can use all of the most common markers on the market, so there are just no limitations with this fabulous tool!


Thanks for stopping by, and have a great week!  See you next time with more fun and hopefully a slew full of inspiration.  


Monday, February 8, 2016

A Faierie Sweet Valentine's Day Card and Matching Tag

Hello everyone!  It's Monday again, and I have another Altered Pages project for you.  I am still in card making mode, so today, I want to share another Valentine's Day card plus matching tag.  This month, we are proud to have Faerie Song Art Stamps as our sponsor.  Their stamps are deeply etched red rubber, and the selection of faeries is out of this world (no pun intended). 


Cut a 12x12 piece of blueish green card stock in half, then use your 
ScorPal scoring board to score in half for a 6x6 folded card.


Fussy cut around one of the Kaisercraft Botanical Odyssey Papers to fit the front of the card, ink edges with Leather Mixed Media Salazar Inkx using the Ranger Blending Tool and adhere it with Double Side Tape Mini.


Die cut scalloped heart shape from pink polka dot paper and a solid heart from the blue print paper with the Scallop Heart die.  Adhere the two hearts together with Double Side Tape Mini and use a Pigma Micron Pen to make a faux stitching line around the top heart.

Fussy cut a heart from the Heart of my Heart collage sheet and ink edges with Leather Mixed Media Salazar Inkx using the Ranger Blending Tool.  Adhere a piece of chipboard beneath it for added strength and Adhesive Dimensionals to raise it up off the card front.  This always gives nice dimension.


Stamp Elly from Faerie Song Art Stamps onto a piece of acrylic paper with black Stazon midi ink pad.  Color image with Gelatos and a water brush.  Do the same onto a piece of scrap white paper, leaving enough room around the image to cut out a tag shape.


Fussy cut image and edge with black Faber-Castell Big Brush Pen.    Adhere to card with Adhesive Dimensionals, as shown.

Make a double loop bow using the Sheer Ribbon and adhere to card front, as shown.  Stamp sentiment onto scrap of white card stock with Pink Neon Ink Pad and adhere to card front, as shown.


Stamp Elly from Faerie Song Art Stamps onto a piece of scrap white paper with black Stazon midi ink pad, leaving enough room around the image to cut out a tag shape. Color image as before.

For the tag, use the Nesting Frames 2 die to cut one large shape from the blueish green card stock and the next size down from the white sheet with the image stamped onto it.  I love this die because it is so versatile. It can be used a a pretty label, a rectangle if you cut both ends off, or a beautiful tag if you cut one end off, as I have shown.


Cut the bottom portion of both pieces off to form a straight bottom on the tag.  Adhere both together, punch a hole in the top center of the tag with a craft punch.  String Baker's Twine through the hole and attach to your gift.


Add a variety of Dew Drops for added magic.  


Altered Pages Supplies:

Scallop Heart die
Nesting Frames 2 die
Heart of my Heart collage sheet
Kaisercraft Botanical Odyssey Paper Pad
Acrylic Blocks
Waterbrushes
Gelatos
Faber-Castell Big Brush Pen
ScorPal scoring board
Mixed Media Salazar Inkx (Leather)
Ranger Blending Tool
Double Side Tape Mini
Adhesive Dimensionals
Pigma Micron Pen
black Stazon midi ink pad
Baker's Twine Multi Colors
Ribbon, Sheer
Electric Pink Neon Ink Pad
Dew Drops

Other supplies used:

Strathmore acrylic paper
Blueish green card stock
Scrap white paper


Did you know that Altered Pages has a huge selection of collage images that are perfect for Valentine's Day?  And each sheet contains so many different images that will help you create the perfect cards.


I hope you enjoyed my card and tag project today.  I also want to extend my appreciation to our sponsor this month, Faerie Song Art Stamps, for sending us these adorable faerie stamps to play with.  Be sure to stop by their website to see the magical selection of faeries available.  And please visit the Altered Pages blog regularly for daily inspiration from the fantabulous design team.  


Thanks for stopping by, and have a wonderful and very creative week!


Barbara