Showing posts with label altered box. Show all posts

Friday, January 19, 2018

Altered Valentine's Heart Box with ColourArte

Hi everyone!  I hope you all are enjoying a warm home and a place to craft.  Today, I have another video tutorial to share with you.  I bought this cheap little wooden box from my local craft store, and I love altering these things.  I thought it would be fun  to make it more elegant and perhaps look more like it is holding some precious gem or special trinkets, or maybe even a love letter from days gone by.  What would you keep in yours?

Anyway, I'm going to show you how to make a molded focal image with plaster and use German Dresden scrap borders to add elegant textural elements to the box.  Then I will show you the beautiful ColourArte Vivid Ultra Metallics I used to add color, shimmer and shine to the surface.

Here is my video tutorial.


CLICK HERE TO SUBSCRIBE TO MY CHANNEL

Here is a complete list of the supplies I used for my box.

Colourarte Supplies Used:
Vivid Ultra Metallics
True Metals Dragon Gold
Siam White
Ginger Flower
Royal Orchid

Other Supplies Used:
Wooden Heart Box
Faster Plaster (or Activa Permastone)
Prima IOD Trifles Mold
German Dresden Scrap
Brea Reese Texture Pebbles (Momenta)
Brea Reese Texture Sand (Momenta)
Liquitex white gesso
Decoart gloss varnish
Dual tip glue pen (Paper Studio)
Aleene's fast grab tacky glue
Baroque Art Patina Gilder's Paste
Grumtine (Grumbacher)

I hope you enjoyed my project today, and that I've inspired you to alter a heart shaped box, or any items you may already have on hand.  The techniques are the same, and the results are so amazing when you finish.  

Click on the link to purchase ColourArte products and to check out all the inspirational videos and blog tutorials by the other talented designers on the team.  

Thanks so much for stopping by, and have a warm, crafty day!!!

Barbara


Thursday, April 21, 2016

Altered Art: Hidden Drawer Book Box

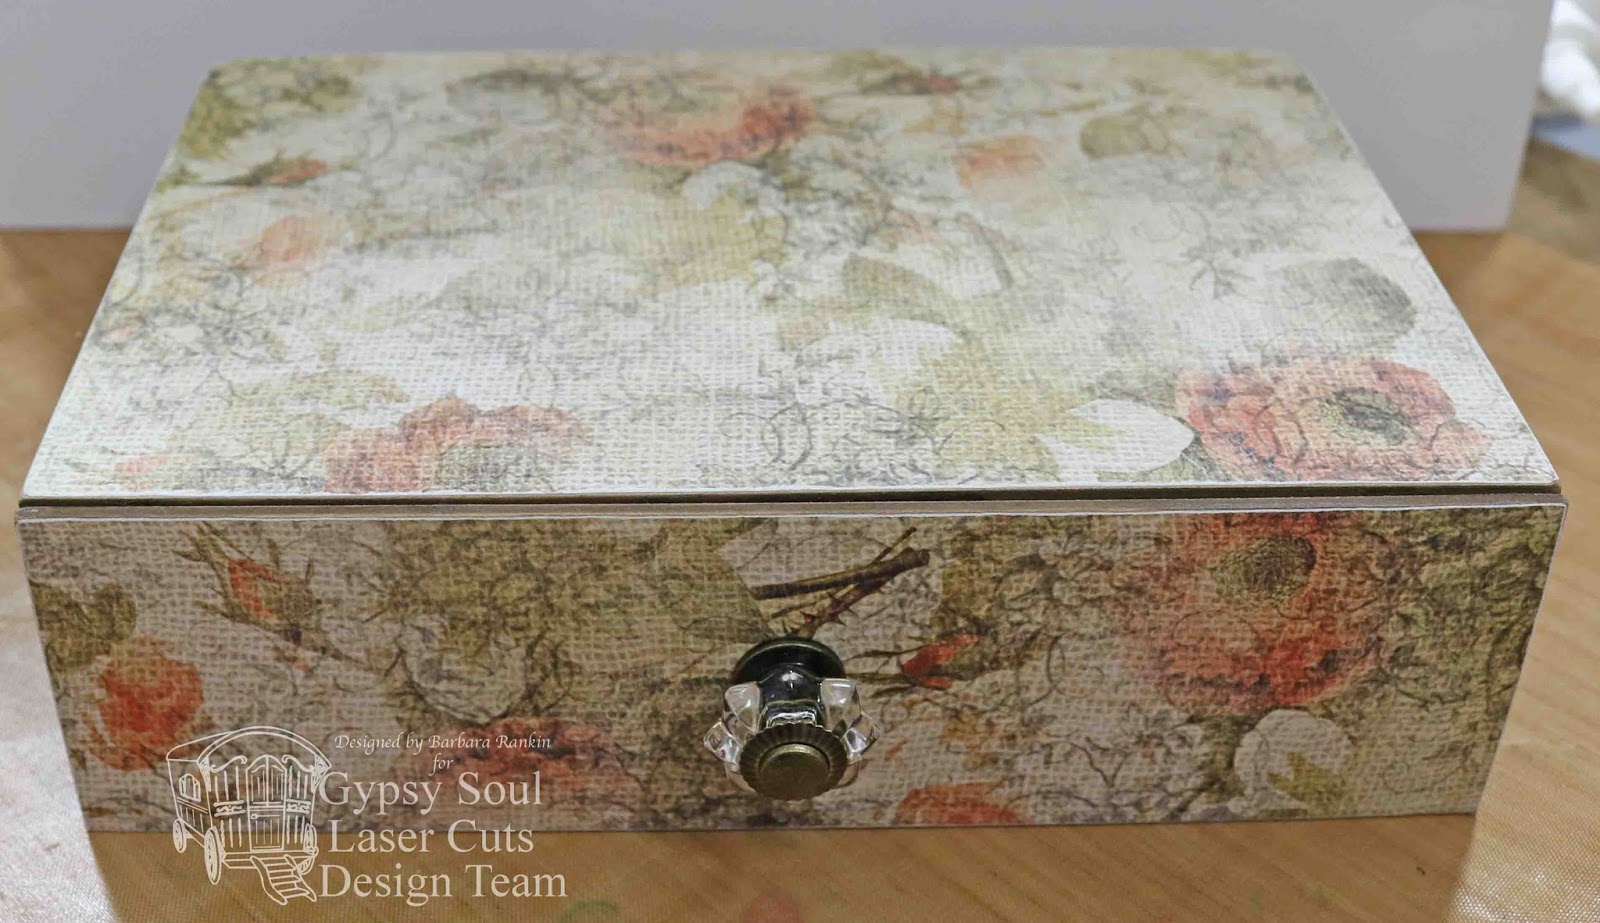
Hi everyone!  It's Thursday again, and it is my turn to share another fun project with you using the fab laser cut chipboard from Gypsy Soul Laser Cuts.  I am a huge fan of books and boxes, and what better way to satisfy that need than with a Hidden Drawer Book Box.  Just think of the things you could stash inside this beauty... paper, pencils, love notes, ephemera, or how about a mini album made to fit?  What other ideas do you have?  I would love to hear them.


Lay out the pieces for the box that holds the drawer.


Lay out the pieces that form the drawer.


Cover the inside of the drawer pieces with the script paper.  Use a craft knife to cut out the openings for the connector pieces.  Be sure they are free from any excess paper or glue to ensure a good fit when putting the pieces together.  I used tiny metal files to remove any residue that was left in them.


Adhere script paper to the inside pieces of the box and the inside of the drawer front. I then glued the box together, but you could glue the box together first and then cover the inside.


(TIP:  Use a sanding block or emery boards to sand excess paper off of any edges where it may still show).

Adhere the box together and cover the outside with the flower paper.  Again, trim any excess paper and sand the edges for a more finished look.


Center a hole in both the front of the drawer, and the drawer front piece.


Add the drawer knob though the holes in both pieces.  The drawer is now ready to use.  Add Gold Krylon pen around all edges.


Color two hinges with the Gold Krylon pen.


Fold and adhere each hinge to back side of box.


Slide drawer into box.  Now start the embellishing.


Paint the Deco Lattice Panel 2 with chalk ink that matches colors in the paper.  Center and adhere to top of box.


Paint Fashionista with chalk ink to match the green in the paper.  Adhere to the left side of the panel.


Paint fern fronds in a similar but darker green chalk paint to match the papers, and arrange in the lower bottom right corner of the box top.  Add flowers, cut up pieces of intricate doilies, snippets of lace, and glass glitter.


Lastly, I decided to add a decorative escutcheon under the drawer pull using a stackable label that I colored with the gold Krylon pen.   Center and punch a hole in it, and add it beneath the drawer pull, as shown.


Here are a few views from different angles.


Supplies Used:

Hidden Drawer Book Box
Deco Lattice Panel 2
Fashionistas: 1930s
Fern Fronds
Cardstock Doilies - Intricate (coming soon)
Hinges Shape Set
Stackable Labels Shape Set
Drawer knob
Print scrapbook paper
Chalk paints
Glass glitter
Flower embellishments
Lace

So, have you thought about how you would use this pretty little box?  There certainly are a lot of choices, and it is only limited by your imagination.

Thanks for stopping by, and have a wonderful, creative weekend!!

Barbara

Thursday, January 7, 2016

Stationery Box with Gypsy Soul Laser Cuts

Hello everyone!  I am so excited about the new products offered by Gypsy Soul Laser Cuts, and this is one of them.  It is called a Split Front Box, and it is fabulous.  It is a good size, 9"x7", made of strong chipboard, and would be perfect for storing your craft materials, housing a beautiful mini album, or even for gift giving.  The choice is yours.


There are basically two parts to this box.  The first part if the box itself.  I like to lay the chipboard out the way it will be glued together.  
I chose a pretty collection of scrapbook papers from Prima to cover the box.  I measured each section, cut the papers to fit, making sure not to cover the dove tails on the box, and ran each piece through my Xyron machine.  You could also use any glue to adhere the papers.
Turn the pieces over and cover the outside of the box in the same manner.  However, do not cover the outside bottom of the box yet.
Glue the box together.  I like to use a fast grabbing tacky glue for this purpose.  
One thing I forgot to do when measuring my paper to cover the outside of the box.  As you can see in the photo below, I did not measure the paper to cover the dovetail joins for the outside of the box.  I recommend measuring and cutting your outside paper after you cover the inside and glue the box together. 
If you forget, as I did, that is okay.  You can add border strips, ribbon, paper, etc., or even paint the edges.  There are so many options to take advantage of, so don't fret.   Do not cover the bottom of the box yet.  
The second part of the box is the two top halves.  Again, I laid it out as it will be glued together, and this time, I only measured my paper for the inside. Again, leave the dovetails free of paper so they will fit securely together.  
Glue the top pieces together.  They should look like this.
Lay the two top pieces over the top of the box and carefully turn the box upside down.
To make a hinge for the top pieces, cut two strips of card stock or Tyvek to 6-5/8" long by 2" wide.  I prefer using Tyvek because it is pretty much indestructible, and simply will not tear.   (Save those priority mail envelopes you get in the mail.)  Fold strips in half and use a white glue to adhere them along the bottom edge of the box, as shown.  
Now we can cover the outside of the box.  This time, we will measure each side so we can cover the dovetail joins.  When covering the short sides of the box tops, wrap extra card stock around to the bottom, over the Tyvek hinges, for added support.  

Another option would be to use metal hinges to hinge the top to the bottom.  It's so versatile and easy to make it your own.
After covering the outside of the box top, I used a sanding block to sand and distress all of the edges.  I like how the white edge shows and gives that worn look.
Next, I added some off-white paint to those edges that I forgot to cover with paper.  I tried to make it look similar to the distressed paper edges.
Here is a picture of the top of the box covered with paper.
And here is how the box looks when the two top halves are open.
And a view of the bottom of the box.  Cut your papers to add the best decorative elements from them.
But don't stop there.  Let's add some chipboard elements to give it dimension and added pizazz!

After adding some of the matching 3x4 journal cards and tags from the paper collection (right side), I added a card stock doily, flowers, and a butterfly.  I also adhered the "Treasured" banner below the journal cards.

On the left side, I added " Memories" , a label with a pearl jewelry piece, and two dragonflies with swirly pearls gem stickers.  I left the chipboard in its natural state.  I love how it matches the colors in the paper.

For the sides, I cut pieces of chainlink and adhered to each side, as shown.  A dragonfly was added to one side. 
A butterfly was added to this side.
Here are some pictures of the sides of the box.


Gypsy Soul Laser Cuts Supplies used:

Other Supplies used:

Prima Stationer's Desk paper collection
Prima Stationer's Desk 3x4 journal cards & tags
Xyron adhesive


Aleene's Fast Grab Tacky Glue
Flowers and various embellishments from my stash

This is such a lovely box, and the best part is that you can make it to your very own taste.  What will you keep in your box, love letters, ephemera, receipts, note paper, stationery?  The possibilities are endless.  

I hope you enjoyed my project today and are inspired to make one for yourself or a special friend.  Be sure to visit the blog for daily inspiration, and the shop to see all of the latest and greatest laser cut chipboard around.

Thanks so much for stopping by, and have a creative week!

Barbara

Thursday, December 4, 2014

Altered Box with Walnut Hollow and Sin City Stamps - Day 5: Unruly Paper Arts 12 Days of Christmas Link Up Party

Hello, and welcome to my first Sin City Stamps post for December.  This month, we are proud to have Walnut Hollow as our sponsor.


I am also linking this project up with the Unruly Paper Arts 12 Days of Christmas Link Up Party.

I began my project with their rustic wood ledge.  It is quite rough, but instead of sanding it, I covered it with a good, thick coat of white gesso.  I wanted to maintain the texture without getting splinters.
Next, I covered the front and sides of the box with the green gold texture paint.  This paint is very thick and needed to be applied with a palette knife.  After spreading a medium thick coat, I dabbed the paint with the side of my knife to obtain this cool texture.
Mist entire box with Turquoise Shimmer Mist, then Primary Yellow, dabbing some of the excess mist as you go.  Let dry.
Apply Patina Gilder's Paste to high spots with your best tool, your finger.
Mist entire box again with Heirloom Gold Perfect Pearls mist.  Let dry.  Can you see the pretty gold flecks?
Apply German Silver Gilder's Paste to the high spots, leaving some of the Patina showing.  Now I am really loving it.
Drill  a hole in the center of the wooden snowflake large enough for the clock hand shaft to go through easily.  I also stamped snowflakes from Penguins on Ice set with Versamark ink and silver embossing powder.
Paint the wooden snowflake with the orange yellow metal color paint.  Let dry.  Use a baby wipe or damp paper towel and gently remove the orange yellow paint from on top of the embossed snowflakes to reveal the silver embossing.
Adhere two Clock Die Cuts together for extra thickness.
Heat emboss the clock die with Versamark ink and silver embossing powder.  Two coats of embossing powder were needed to get a smooth, metal look.

Adhere clock face to front of wooden snowflake.  
Paint the metal pendulum with the orange yellow metal color paint.  Let dry.  The photo shows just the hanger painted to show you the difference.
Measure and paint two ¼" wooden dowels with the orange yellow metal paint and adhere to lower half of box along the sides.

Put clock parts together and adhere wooden snowflake clock onto box at the top, just above the two dowels.  Adhere glittered snowflake to pendulum, and three rusty metal snowflakes to inside box.
Adhere reindeer ornament and holly sprig to bottom of box.
Select four matching scroll die cut pieces from the Clock Die Cuts, cover with Versamark ink, and heat emboss with a rust embossing powder.  The photo shows the one on the left "rusted".
Adhere to the sides of the box in the center.
Another look from the front and side!  I really love how this turned out.
 

Supplies:

Sin City Stamps:  Penguins on Ice rubber stamp set; Clock Die Cuts; Clock Die Cut
Walnut Hollow Rustic Wood Ledge
Other:  white gesso, Green Gold Texture Fierro Gold paint (DecoArt); Versamark ink pad; wooden laser cut snowflake (Hobby Lobby); Primary Yellow and Turquoise Shimmer Mister (DecoArt Media); Patina Gilder's Paste (Baroque Arts); Heirloom Gold Perfect Pearls Mist (Ranger); Orange Yellow Precious Metal Color (Viva); Clock with Pendulum parts, rusty metal snowflakes, Christmas ornaments

I hope you enjoyed my project today.  I know it was long, but mixed media usually is.  In any case, I hope you are inspired to make your own clock, whether for Christmas, or as a gift specific to someone you know.

Thanks for stopping by, and be sure to visit Sin City Stamps and the team for all your stamping inspiration, and gift giving, products.

 Have a super wonderful weekend!

Barbara