Thursday, November 22, 2012

Blog Hop - Save the Date


Just a quick reminder that tomorrow, and through the weekend, we will be having a fabulous blog hop, featuring All Things Altered for Winter.  I know you will want to visit with us a bit, participate in the giveaways, and just have lots of fun and hopefully gain some creative inspiration.  So please join us this weekend and forget all your troubles.

I also want to remind you that The Robin's Nest is having a spectacular sale going on this weekend as well.  You can visit their online store by clicking on the logo at the top of my sidebar, or by clicking right here.

Happy Holidays!

Barbara

Sunday, November 18, 2012

Fall Magnetic Memo Board with The Robin's Nest

Hello again, and welcome back to my blog.

I have a special Fall project I made, and I am very excited to show it to you.  I am always trying to remember things I need to do, especially during the holiday season.  I make lists only to lose or misplace them.  So, what better way to keep track of my "to do's" than to have a pretty memo board hanging where I can readily see it.   All of my notes are in one place and easily removed and replaced with a new note.  You could also use it to hang a few of your favorite holiday photos, too.  So, without further adieu, here is my Fall magnetic memo board using some of the Black Forest collection papers and embellishments.  They are so pretty and speak Fall to me with the dusty greens and the glittery copper accents.  I am afraid pictures simply do not show their true beauty.


Supply list:
Getaway Dew Drops
Fall Foliage Dew Drops
Large Clear Dew Drops
Victorian Clippies
Butterfly Clippies
metal sign or metal flashing
chain for hanging
glimmer glaze paint
3D crystal lacquer
Helmar 450 glue
Sheet magnet (TIP:  I used a magnetic business card I received in the mail)

I started with a metal sign board I got from my local craft store for 80% off.  You can usually find these with seasonal prints already painted on them.  It does not matter, though, because you are going to cover it with some beautiful Robin's Nest papers.

After removing the hanging chain, I covered the sign with the Family-Glitter Getaway Double-Sided Cardstock using my Helmar 450 glue.  I trimmed the excess paper, then sanded and inked the edges with a rust color ink.  Adding some copper glitter to the edges enhanced the tiny glitter elements in this gorgeous paper.  

I covered one of the oval Chipboard Shapes with Getaway Glitter Stripe paper, edged with rust ink and copper glitter, then adhered to the base with pop dots.  Black glitter alphabet stickers to spell "Memo" were centered on the oval shape, and Fall Foliage Dew Drops were placed decoratively along two sides.


I fussy cut the leaves from the Family-Glitter Getaway Double-Sided Cardstock, edged with gold pen, and painted with a glimmer glaze paint.  Because Robin's Nest papers are so sturdy and keep their shape, even after being painted, I was able to shape and manipulate the leaves to look more three-dimensional and adhere them beneath the "Memo" oval piece.  I love the way these leaves turned out.  They almost look like metal.

I also cut the border strips from the Family-Glitter Getaway Double-Sided Cardstock , edged with gold pen and painted with a glimmer glaze paint.  I glued the strips down on the ends only, leaving the center free.  Then I removed the prongs and added decorative brads to each end of the strips with Helmar 450 glue.  I clipped the Regency RN Paper Clips to the strip so that more notes could be added at any time.  One of the fleur de lis was red, so I covered it with more of that copper glitter I had on hand.  I think it turned out pretty nicely.  I also made two additional magnets by simply gluing a strip of magnet to a Victorian Clippies, and another one to a Butterfly Clippies.


I had so much fun making these magnets to use on the board.  I am partial to rosettes, so I used the Glitter Coffee Creme Swirl Paper to make my rosette, and matched colors by spraying a caramel colored mist over the paper.  I was so pleased with the way it matched the prints in this beautiful paper. Then I added those beautiful dew drops to enhance the center.  Doesn't it look wonderful?  In the picture below, I used a sticker from the Travel Sticker sheet , adhered it to a piece of magnet, and glued a clear, slightly iridescent, flat marble from the craft store on top.


Below is an image I punched from the  German Edlewiess Paper, adhered to the center of a bottle cap, and attached a piece of magnet to the bottom.  I used 3D Crystal Lacquer to the surface.  I used a second circular sticker from the Travel Sticker sheet to make the next magnet shown, glued it to a magnet, and adhered clear teardrop dew drops around a Large Clear Dew Drops.


Here is another close-up of those magnets, and one more I made by punching an oval shape from a scrap of Family-Glitter Getaway Double-Sided Cardstock, adhered the fleur de lis rub-on image from the Family Rub-On sheet, and adhered it to another piece of magnet.  I also coated this piece with a thick layer of 3D Crystal Lacquer.


Oh my goodness, I had so much fun making this project.  The magnet pieces are so addictive, and I just love this paper collection.  And here is a little tip from me:  Each one of these magnets can also be used as embellishments for any of your other projects, i.e., cards, mini albums, page layouts, altered books, etc.  Just glue them to a piece of chipboard for stability and dimension, and you have tons of beautiful little bits of art to add to your projects.

I hope you will stop by The Robin's Nest and check out their collections, and see what is new in the shop.  And beginning today through November 26, you can get 25% off of your purchases during their Black Friday Special this week.  I also hope you have been inspired to make your own memo board with lots of magnets and/or embellishments for other projects.  Thanks so much for stopping by, and I want to wish everyone a very Happy Thanksgiving!

Barbara 

Saturday, November 10, 2012

Announcing The Robin's Nest Home for the Holidays Blog Hop Winner


I want to thank everyone for joining us on November 3rd for the Home for the Holidays blog hop with both design teams from The Robin's Nest and  Helmar Adhesives.  And now, the moment has come to announce my blog winner of The Robin's Nest $10 gift certificate to use in their online store.

And the winner is ...

Brenda Burfiend

Congratulations, Brenda.  Here is what Brenda had to say:

"oh my, words can't even describe my feelings right now. I am in awe in what you created. This is so incredible. I love how you turned it into even more by adding your booklet. This is wonderful.
I'm a new follower now also"


And thanks so much for becoming a follower of my blog.  I hope you will come back often.  To claim your prize, please send your e-mail to Rachel O'Crowley at robinsnestscrap@gmail.com so that we can get that out to you.

Thanks, everyone, and have a wonderful week.

Barbara

Autumn Pop-Up Card For The Robin's Nest Design Team Application


Hello everyone, and welcome back to my blog.  Today, I am trying out for The Robin's Nest Design Team.  I absolutely love The Robin's Nest products, and I have enjoyed working with them so very much.  I would be so honored to have the pleasure of working with them for another term.  


I made this great little pop-up card for Autumn.  This is my favorite time of year, and I wanted to express that in my card using these luscious autumn colored papers from The Robin's Nest.  I absolutely love how this card turned out. Aren't those pinecones beautiful?  I keep looking at them and still, I cannot believe they are made from paper and a Sizzix die. 


The base (outer) card is made with this gorgeous Family-Glitter Getaway Stripe Double-Sided Cardstock.  I  used the Brown Glitter card stock for the pinecones and some olive green paper for the pine needles, which I distressed a bit with brown ink.  I also added a bit of copper glitter to the pinecones.  I glued this arrangement over a scrap piece of die cut chipboard covered with the reverse side of Family-Glitter Getaway Stripe Double-Sided Cardstock, edging with gold ink.  For added glitz, I "sprinkled" some of these beautiful Getaway Dew Drops around the front.  Let's face it, nothing is complete without adding some pretty dew drops about.  

Finished Pop-Up Inside Card


I used a Sizzix die to make this card.  Although pop-up cards are not really as difficult as they look, they always surprise and amaze the recipient.  Below, I have made a simple diagram of a pop-up with straight lines for your use.  The sky is the limit, whether or not you use a die or a ruler and a craft knife.  The same goes for rosettes.  A strip of paper, accordion folded, glued into a circle, and you have yourself a rosette, as you will see later in this post.  Dies just make the job a little faster, but not necessary.


Outer Card (left) Inner Card w/pop-up (right)
First, die cut or manually cut the outer card using Family-Glitter Getaway Stripe Double-Sided Cardstock.  The outer card measures 4-1/4" x 11", folded in half to form a  4-1/4" x 5-1/2" card.

Next, you can either use the die to cut the inner card using Brown Glitter card stock, or follow my diagram below for a simple straight line pop-up.  You may need to trim a sliver off of each short edge of the inner card so that it will fit nicely inside the outer card.  


View of inner card from side angle
I cut a second piece from Glitter Copper Butterflies card stock to adhere over the center pop-up.  Alternatively, you can simply punch a 2-1/4" circle instead.  Then I punched a 2" scalloped circle from the reverse side of Family-Glitter Getaway Stripe Double-Sided Cardstock and used the botanical from the Family Rub On.  The Robin's Nest rub-ons go on like butter, and are not only versatile, but very easy to use.  I also inked the edges with gold ink and adhered both pieces to the central pop-up piece.


Central pieces cut out and added to pop-up center

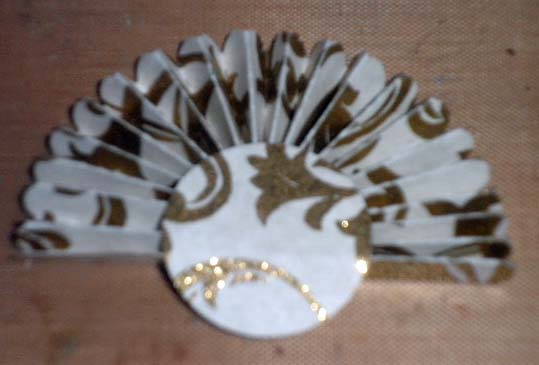
Die cut a Glitter Coffee Creme Swirl Cardstock rosette, but only adhere it as a half circle rather than a full circle behind the central pop-up piece, as shown in the picture below.  You can also make the rosette by cutting a strip of this gorgeous paper into a 1" x 10" piece and accordion folding it every 1/4".  If you want the scalloped edge, you can trim one edge with decorative scissors before accordion folding it.  

Half rosette
Add glue to the front of the circle (on the right side of the paper) to adhere it behind the circular area of the pop-up, as shown.  (NOTE: The circle is not decorative in this case, but necessary to hold the rosette together).


Close-up of half rosette adhered behind pop up
I punched leaves from Distressed Honeycomb cardstock and added distress ink colors to each of the leaves to give them a variety of Fall colors.  After attaching a piece of wire to the reverse side of each leaf with a small piece of washi tape, I was able to insert the wires where I wanted them behind the rosette, enabling easy adjustment of their placement. 


Reverse of leaf showing wire attached with washi tape

Below is a close-up of the pop-up with the leaves attached.


Close-up of finished pop up

Another picture of the card from the side.


Angle view of card
I stamped my Autumn sentiment on the reverse side of the Family-Glitter Getaway Stripe Double-Sided Cardstock, continuing the shape from the front to the inside.  I also edged this with gold ink.  The sentiment is a bit hard to read in the photo, so this is what it says:  


"Every leaf speaks
bliss to me
fluttering from
the autumn tree."
                  -Emily Bronte

Close-up of stamped sentiment
Below, I have made a diagram of a simple pop-up insert for any card.  

The Robin's Nest Products Used:

Family-Glitter Getaway Stripe Double-Sided Cardstock


Glitter Coffee Creme Swirl Cardstock
Glitter Copper Butterflies


Distressed Honeycomb cardstock
Brown Glitter card stock

Getaway Dew Drops


Family Rub On

I hope you have enjoyed my card project this week and that you will be inspired to visit The Robin's Nest online store, as well as their blog, The Chattering Robins, for more inspiration and to check out their new and wonderful product line. 

Until next time, have a wonderful week, and happy crafting!

Barbara

Sunday, November 4, 2012

A Robin's Nest Red Flowers Birthday Card

Hello everyone, and welcome back.  I hope you got a chance to visit the ROBIN'S NEST/HELMAR HOME FOR THE HOLIDAYS BLOG HOP this weekend, and just in case you did not, CLICK HERE to start hopping.  There is lots of inspiration, lots of prizes being given from each blog, and there is still time to enter to win.  Prize winners will be announced on 11 November.

Now, for my first Design Team Project this month, I want to share this really cute card I made using The Robin's Nest papers and embellishments.  I needed a birthday card for a friend, and I was so thrilled when I came up with this one.  

First, cut black card stock to 4-1/4" x 11" and fold it in half to make a card measuring 4-1/4" x 5-1/2".  Trim Robin's Nest Glitter Letters paper to 3-3/4" x 5" and punch two long sides with a corner and edger punch set.  I sponged Red Brick Distress Ink around the edges, then made a small slit in the paper, inside the letter "h",  before adhering to black card.  


A happy accident occurred when I used the portion of the Glitter Letters paper that contained a large "h", and since I wanted to make a "happy birthday" card, I used the "h" that was preprinted on the paper as the first letter of the sentiment.   I computer generated the rest of the words "appy birthday" onto another scrap of Robin's Nest Glitter Numbers paper, die cut the words using a small label die, and inserted the label into the tiny slit I made previously, just inside the "h", to finish off the sentiment.  How clever is that?  Sometimes I surprise myself.


I cut the top off of the apple die cut to make a vase.  I used my fingers to curve the apple to give it some dimension before adhering it to the card with foam dots.  


I die cut a branch from a scrap of the black card stock.  I made the red flowers by cutting the scalloped circles in half.  Next, fold the half circle in half, and in half again.  Pinch the bottom very tightly, giving it a bit of a twist,  and add a tacky or quick grab glue, like Helmar 450, and adhere to three of the branches.  These branches are very thin, so I left the piece on a craft mat until it dried.


When dry, I was able to trim up any excess red flower stems that extended past the black branches.  Now I was able to adhere the entire flower branch to the card, inside the vase, adding glue at various points along the flower stem.


Now, don't forget to finish off the inside, too.  To tie it all together, I like to use some of my paper scraps that I usually have left over to use inside the card.  Here, I used the coordinating Red Fat Plaid  paper for the inside.  It matches the Glitter Letters card stock perfectly, but is smooth and has no lettering. This trick is especially helpful when you have a black or very dark card stock as a base.  Whether you are stamping or handwriting your sentiment inside your card, adding lighter colored paper, even if it is printed, will make your task a lot easier.  I like to leave the inside blank until I know what sentiment I want to put inside, which always depends on the recipient.


(NOTE:  For this particular card, I used the section of paper containing the "h", to use for my "happy birthday" sentiment.  Choose various sections of this paper with particular letters to suit your theme.  It's fun and can be addictive while using the letters to come up with some great sayings.  For instance, I see a "b" for birthday, "a" for autumn, "g" for give thanks, "c" for Christmas, "f" for family or fun, "e" for expecting, "d" for daughter or dog, etc.  I could go on and on.  See what I mean, it's addictive.)

Can you see this as a Christmas card?  Just change the base card color and branches to a dark green, and those pretty little red flowers will look like Christmas roses.  Add some dew drops, and you will be all set.


Robin's Nest products used:


Glitter Letters card stock


Red Flowers
Apple die cuts
Thanks so much for stopping by, and  I hope you enjoyed my card project this week.  I will be back with another project right here on Monday, the 19th of November.  In the meantime, I hope you will check out The Robin's Nest online store to see what's new and exciting, and please visit the Chattering Robin's blog regularly for a constant source of inspiration. 

Have a very happy week!


Barbara

Friday, November 2, 2012

The Robin's Nest/Helmar Home for the Holidays Blog Hop


Hello everyone, and welcome to this special Home for the Holidays blog hop featuring The Robin's Nest and Helmar products.   I am so excited to be a part of this wonderful group of designers from both design teams, and I hope you find lots of inspiration here for your holiday crafting.  Be sure to visit each blog, leave a comment, become a follower, and you will automatically be entered to win a prize from each blog, as well as from  The Robin's Nest blog, The Chattering Robins, and Helmar.   So get some coffee, pull up a chair, and enjoy the hop.

When I think of going home for the holidays, I think of warm gatherings with my family, steamy windows, great home cooking, and lots of love.  So, in keeping with this theme, I found this paper mache box that I wanted to turn into a box with a hinged lid.


So, I first had to remove the excess paper mache from around the bottom piece.  I made some hash marks along the piece I wanted to remove.   See picture below.


Then, I covered the bottom of the boxwith Winter Retreat Glitter Swirl with Snowflakes Cardstock  and Calamity Jane Diagonal Glittered Cardstock for the roof.  This paper is absolutely gorgeous, and it reminds me of aged copper that has that beautiful blue green patina.  Here is what the finished box looks like.


If you look closely, you can see Santa in front of the fireplace.


I corrugated the Winter Retreat Glitter Swirl with Snowflakes Cardstock and used the reverse side to cover the chimney and the front eave.  I used the Helmar 450 Quick Dry Adhesive to glue the corrugated paper so that it would not flatten the corrugations.   This is a fantastic glue that sets and dries quickly.  It holds strongly and also dries clear and is acid free.  I also used the Helmar Gem Adhesive to apply the dew drops.  This was also a fantastic glue for this purpose.

Front Roof, Corrugated Chimney, German Scrap & Dew Drops
I used some resin window pieces, but had to make my own door using part of one of my window resin pieces.  I added German scrap along the roof line, and I painted not only the windows, but also the German scrap with acrylic paints.

This little box could be used as a recipe card holder, but I chose to make a mini album to keep inside.  


Here are a few pictures of the book and some of the inside pages.

Front Cover
Inside cover and Vellum Envelope with snowflake embossing
Page 1 with punched strip to hold tag
Dymo Labels painted to look like copper
Inside Back Cover, wooden tree ornament
 Here are a couple of tags I made to insert into the vellum envelopes.  I used Robins Egg Blue Glitter paper and folded it in half.  You can then write notes, recipes, traditions to remember, funny or memorable things, pictures, you name it.  In the picture below, I used one of the gold journal tags, cut it out, folded it in half around the tag, and only glued the ends so that I could insert these tiny little tags beneath the journal tags.  Just more room to keep memorabilia.
Vellum envelope tag with tags.
 This tag is also folded in half and I used a snowflake rubon in the corner.  It is waiting for more memorable things to be saved on it.
Folded tag with snowflake rubon
Robin's Nest Products Used:

Calamity Jane Diagonal Glittered Cardstock
Winter Retreat Glitter Swirl with Snowflakes Cardstock
Glitter Reindeer Stripe
Robin's Egg Blue Glitter Cardstock
Snowflake Rub On 
Hillside Mini Dew Drops 
Cherry Chocolate Dew Drops
I hope you are enjoying the blog hop.  Don't forget to leave comment and become a follower to be entered to win one of the fantastic prizes.  And be sure to visit The Robin's Nest online store for more fabulous products.  Thanks so much for visiting today, and enjoy your weekend.

Barbara