Showing posts with label The Robin's Nest papers. Show all posts

Monday, February 4, 2013

Heartfelt and Love Cards


Hello everyone.  Welcome back to my blog, and my first monthly post for The Robin's Nest.  Before I get to the project, though, I want to tell you about a fabulous sale going on this month.  All tear shaped dew drops are 20% off this month.  There are not only new shapes, but new sizes and colors, too!  So head on over to the the store and stock up now.  We are also teaming up with Mod Podge this month, so I will be using their Mod Podge One-Step Crackle Medium in my project today.  This product is awesome and I hope you will also visit their website to check out their line of products as well.

Since Valentine's Day is just around the corner, I thought it would be appropriate to make a couple of Valentine's cards.


1.  Cut a piece of 10" x 6-1/2" Ivory card stock.  Fold in half to make 5" x 6-1/2" card.
2.  Cut Viva La France card stock 5" x 6-1/2".  Add distress ink colors to glittered portions of paper.  Punch decorative corners and adhere to front of ivory card.
3.  Adhere Princess Glittered card stock to thin chipboard.  Die cut heart shape, as shown.


4.  Following directions on bottle, apply thin layer of Mod Podge One-Step Crackle Medium to heart shape.  Let dry.


5.  Die cut scalloped heart shape from reverse side of Viva La France card stock  Dab scalloped edges with picket fence distress stain.

Distress stain dabbed around edge
6.  Distress white edges with brushed corduroy distress stain.

Brown distress ink sponged to edges

I think this technique makes the edges look a bit like tortoise shell.  What do you think?

Close-up of inked edges

7.  Add same distress ink colors used on the glittered portions of the Viva La France card stock to the crackled heart shape to bring out the crackle, adhere to scalloped heart.


8.  Die cut/emboss scroll tag using reverse of Viva La France card stock.
9.  Stamp "Heartfelt" in center of tag using pink pigment ink and pastel pink embossing powder.


10.  Add pink and orange pigment ink to embossed areas of tag.


11.  Attach scroll tag to heart with foam dots.
12.  Add three sets of three tear drops to heart shape, as shown, simulating tiny heart shapes.


Below is a close-up of the card front.  I think it shows off the beautiful tear shaped dew drops a bit better.


My second card is a bit simpler, but just as pretty, I think.


1.  1.  Cut a piece of 10" x 6-1/2" Ivory card stock.  Fold in half to make 5" x 6-1/2" card.  Ink edges with distress ink.
2.  Cut background shape from Valentine card stock using Silhouette Valentine frame image.  Adhere to ivory card.
3.  Die cut scalloped heart shape from reverse side of Princess Glittered card stock.  Distress edges with distress ink.
4.  Die cut classic heart shape from Valentine card stock and emboss with Quickutz embossing folder.  Adhere to scalloped heart shape.

Close-up of embossed heart and dew drops
5.  Die cut Spellinders fantastic flourish die on reverse side of Princess Glittered card stock.  Distress edges with distress ink.  Adhere to bottom of heart shape, leaving top portion unattached.
6.  Die cut image of vintage couple dancing from black card stock using Silhouette machine.  Adhere image, as shown, slightly beneath flourish.

Close-up of vintage image beneath flourish


7.  Add Pink letter glitter stickers to form word "LOVE" near bottom of card, as shown.  Attach three sets of pale pink tear-shaped dew drops to each corner of card, as shown.


Below is a close-up of the card front.  Again, I think this picture shows off the tear-shaped dew drops a bit better, as well as the embossing on the heart shape.  


Supplies Used:

The Robin's Nest Princess Glittered card stock
The Robin's Nest Viva La France card stock
The Robin's Nest Valentine card stock
The Robin's Nest red tear shaped dew drops
The Robin's Nest Pink glitter stickers
Mod Podge One-Step Crackle Medium
10" x 6-1/2" Ivory card stock (folded to make 5" x 6-1/2" card)
Spellbinders Classic Heart Nestabilities die
Spellbinders Classic Scallop Heart Nestabilities die
Spellbinders Fantastic Flourish Two D-Lites die
Cuttlebug Plus Fanciful Labels embossing folder
Silhouette image-vintage couple dancing
Quickutz embossing folder - Diamonds & Dots
Fiskars decorative corner punch
Distress Ink (Brushed Corduroy, Spiced Marmalade, Picked Raspberry, Old Paper)
Distress Stain (Picket Fence)
Pigment ink (orange, pink)
Pink Pastel embossing powder

I sure hope you enjoyed my cards and will be so inspired by The Robin's Nest beautiful papers and embellishments that you will stop on over to The Robin's Nest online store to stock up on those fabulous tear shaped dew drops and gorgeous, high quality papers and embellishments.  I also want to encourage you to visit The Chattering Robin's blog for more inspiration from the wonderfully talented design team.  Oh, and just a quick reminder to enter their monthly design challenge for a chance to win a $20 gift certificate in their online store.  How fun is that?

Until next time, I hope everyone has a wonderful, crafty week, and thanks so much for stopping by!

Barbara


Monday, December 31, 2012

Winter Blue Snowflakes Card

Happy New Year everyone, and welcome back to another wonderful year full of creative inspiration with The Robin's Nest.  I hope your holiday was absolutely fabulous, and I trust that life is slowing down a bit for you after the hustle and bustle of the holidays.

Now, for some exciting news.  The Robin's Nest has put together some fantastic card kits and tag kits, and they are on sale the entire month of January.   Just use the code:  cardkitpromo for a 20% savings.  We are also teaming up with Heartfelt Creations this month.  So, my first card for this year is a beautiful wintery blue card made using products from both the Baby Boy card kit and the Winter tag kit.  I  also made some really pretty snowflakes using the the Tattered Blossoms Pre-Cut stamp set and matching dies from Heartfelt Creations.

Robin's Nest Products Used:

Baby Boy Card Kit which includes the following:
     Irredescent Blue Glitter Blue Swirl on Blue cardstock
     Rubber Duckies Glitter Cardstock
     Dew Drops
     Envelopes
     Embossed Panel cards
Winter Tag Kit
Jean Cardstock
Fairy Dust Dew Drops
Glitter Blue Journaling

Other Products used:
Heartfelt Creations Tattered Blossoms die
Spellbinders lacy rectangular die
Distress inks (Seedless Preserves & Stormy Sky)
White Detail embossing powder
White pigment ink

I am always looking for different, and sometimes unconventional, ways to make cards.  This is a single panel card (i.e., not folded in half) that has been inserted into the envelope.  The envelope is an integral part of the card, and not just something used to mail it.   I love dimension, and this card has it.


First, fold the envelope flap to the inside and glue down.


Cover the envelope, front and back, as shown, using the Irredescent Blue Glitter Blue Swirl on Blue cardstock from the card kit.  I inked the paper with Seedless Preserves distress ink, which made the glittery flourishes pop.  The excess triangle piece was used on the flap.


Ink the edges of one of the embossed panel cards from the kit using Seedless Preserves and a bit of Stormy Sky distress ink.  Stamp the smallest Heartfelt Creations Tattered Blossom stamp around the edges using Seedless Preserves.


Use a Spellbinders lacy rectangular die to cut the Jean Cardstock, ink edges with white pigment ink, and emboss with white embossing powder.  I allowed some of the blue to show through for a more shabby chic (or frosty) look.  Adhere to center of embossed panel.

Adhere "Winter" sticker to matching chipboard shape, ink edges with white pigment ink, and emboss with white embossing powder.  Glue to center of Jean Cardstock piece.

Panel card insert
Attach oval "snowflakes" sticker to matching chipboard shape, ink edges with white pigment ink, and emboss with white embossing powder.  Punch holes on opposite sides of sticker and thread snowflake ribbon around envelope holder, gluing sticker off center.

Envelope front without card inserted

Using the the three smallest sizes of the Heartfelt Creations Tattered Blossoms dies, cut one of each, and one extra of the smallest from the Rubber Duckies Glitter Cardstock.


I wanted to use these for snowflakes, and no one likes yellow snow, so I inked each one with white pigment ink and embossed with white embossing powder.  (NOTE:  Any color cardstock could be used for this part).  I added a bit of Seedless Preserves distress ink to each one and re-heated, which gave a bit of a purple look to the snowflakes.  The two smaller snowflakes were attached to the card, as shown, and the other two were attached to the envelope holder.  Silver dew drops from the Fairy Dust Dew Drops collection were glued to the centers.

Reverse side of envelope
As I said, this card does not fold in half.  It is a single panel, and the sentiment would be added to the reverse side.  This is where the Robin's Nest glittered journal cards come in handy.  As you can see, I used the journal card on the reverse of my card to add either my handwritten or stamped sentiment.   I prefer to leave the sentiment off of my cards until I am ready to send.  That way, I can use it for whatever occasion arises.   If you wanted to mail this, it would have to be put into a larger envelope.  However, this is a wonderful card for presenting in person.  It is quite substantial feeling, and is sure to please any recipient.

Fussy-cut journal card and attach to reverse of panel card


Well, I hope you have enjoyed my project today and will stop by The Robin's Nest online store to see all of the new products and kits they have added, and check out their new line of card and tag kits on sale this month.  What a great opportunity to stock up on those most-wanted papers and embellishments.  Also, check their blog regularly to see what the new design team creates for you.  I also encourage you to visit  Heartfelt Creations to view their products, as well.  

Thanks for stopping by, and have a wonderful New Year!

Barbara

Sunday, December 2, 2012

Altered Christmas Gift Card Tin

Hello everyone.  Welcome back to my blog, and my new design team project for The Robin's Nest.  Today, I have a fairly easy project for you, in light of the busy holiday season and the "need for speed".     We all know someone whom we just do not have the slightest idea what to give them, so what better way to present a gift card than to give them a beautifully hand-decorated tin made by you, especially for them.

Supplies used:

Family-Glitter Getaway cardstock double sided
Getaway Glitter Leaves on linen cardstock
Coffee Glitter Swirl on Creme cardstock
Brown Glitter Cardstock
Red Glitter on Red Cardstock
Cherry Chocolate Dew Drops
Fall Ribbon


ON THE COVER:

I first removed the lid from the bottom, then cut pieces of Coffee Glitter Swirl on Creme cardstock to size (2-1/4" x 3-3/8") to cover the top and bottom of the tin,  rounded the corners, and colored with red and brown distress inks.  I cut a 1/2" wide long strip of  Coffee Glitter Swirl on Creme cardstock, colored with brown distress ink, and adhered around the bottom of the tin.


I punched small trees from scraps of Family-Glitter Getaway cardstock double sided and painted with a gold glimmer glaze.  I punched the holly leaves from scraps of green card stock and also painted with a gold glimmer glaze, then dry embossed veins into the leaves to help sculpt them.  The tiny reindeer was punched with Brown Glitter Cardstock.  I used Cherry Chocolate Dew Drops for the holly berries.


INSIDE THE TIN:

I covered the inside using the Red Glitter on Red Cardstock.  NOTE:  You can spread a thin line of matching color acrylic paint around the circumference of the tin top and bottom before adhering your cardstock.  This will disguise any paper layer not cut to exact measurements.  See photo below.

Thin line of red acrylic paint around inside edge
To make the stand-up for the gift card, simply cut a piece of Getaway Glitter Leaves on linen cardstock to 3-3/8" x 5-1/2", then score at 5/8", 2-3/8", and 5".  You may need to round the corners to allow it to fit properly inside the tin.  See photo below.

Gift card insert
Place a piece of double sided adhesive at the 5" score line area and attach.  You will have an angled piece to showcase your gift card.  See photo below.

Reverse side of gift card insert showing where to place adhesive
Finished gift card insert
I punched small branches from Brown Glitter Cardstock and mini ornaments from Getaway Glitter Leaves on linen cardstock, added some red distress ink and glimmer glaze to each, and used the bottom of my foam brush to sculpt them.  See photo below.


I glued the branches to the inside of the lid, then attached the ornaments with foam dots for dimension, draping the Fall Ribbon through the ornaments.  I also used a gold pen to color the topper on each ornament.

Inside tin with gift card insert

Inside tin with gift card presentation
I hope you like my project for a pretty way to present your gift cards this Christmas, or change up the papers and embellishments to use for any time of year.  Thanks so much for stopping by, and please be sure to visit The Robin's Nest online store to see all of their new and wonderful products.  I would also encourage you to stop by the Chattering Robins blog  for more creative inspiration from the rest of the design team.  They always have something wonderful to share.

Happy holly days!

Barbara

Sunday, November 18, 2012

Fall Magnetic Memo Board with The Robin's Nest

Hello again, and welcome back to my blog.

I have a special Fall project I made, and I am very excited to show it to you.  I am always trying to remember things I need to do, especially during the holiday season.  I make lists only to lose or misplace them.  So, what better way to keep track of my "to do's" than to have a pretty memo board hanging where I can readily see it.   All of my notes are in one place and easily removed and replaced with a new note.  You could also use it to hang a few of your favorite holiday photos, too.  So, without further adieu, here is my Fall magnetic memo board using some of the Black Forest collection papers and embellishments.  They are so pretty and speak Fall to me with the dusty greens and the glittery copper accents.  I am afraid pictures simply do not show their true beauty.


Supply list:
Getaway Dew Drops
Fall Foliage Dew Drops
Large Clear Dew Drops
Victorian Clippies
Butterfly Clippies
metal sign or metal flashing
chain for hanging
glimmer glaze paint
3D crystal lacquer
Helmar 450 glue
Sheet magnet (TIP:  I used a magnetic business card I received in the mail)

I started with a metal sign board I got from my local craft store for 80% off.  You can usually find these with seasonal prints already painted on them.  It does not matter, though, because you are going to cover it with some beautiful Robin's Nest papers.

After removing the hanging chain, I covered the sign with the Family-Glitter Getaway Double-Sided Cardstock using my Helmar 450 glue.  I trimmed the excess paper, then sanded and inked the edges with a rust color ink.  Adding some copper glitter to the edges enhanced the tiny glitter elements in this gorgeous paper.  

I covered one of the oval Chipboard Shapes with Getaway Glitter Stripe paper, edged with rust ink and copper glitter, then adhered to the base with pop dots.  Black glitter alphabet stickers to spell "Memo" were centered on the oval shape, and Fall Foliage Dew Drops were placed decoratively along two sides.


I fussy cut the leaves from the Family-Glitter Getaway Double-Sided Cardstock, edged with gold pen, and painted with a glimmer glaze paint.  Because Robin's Nest papers are so sturdy and keep their shape, even after being painted, I was able to shape and manipulate the leaves to look more three-dimensional and adhere them beneath the "Memo" oval piece.  I love the way these leaves turned out.  They almost look like metal.

I also cut the border strips from the Family-Glitter Getaway Double-Sided Cardstock , edged with gold pen and painted with a glimmer glaze paint.  I glued the strips down on the ends only, leaving the center free.  Then I removed the prongs and added decorative brads to each end of the strips with Helmar 450 glue.  I clipped the Regency RN Paper Clips to the strip so that more notes could be added at any time.  One of the fleur de lis was red, so I covered it with more of that copper glitter I had on hand.  I think it turned out pretty nicely.  I also made two additional magnets by simply gluing a strip of magnet to a Victorian Clippies, and another one to a Butterfly Clippies.


I had so much fun making these magnets to use on the board.  I am partial to rosettes, so I used the Glitter Coffee Creme Swirl Paper to make my rosette, and matched colors by spraying a caramel colored mist over the paper.  I was so pleased with the way it matched the prints in this beautiful paper. Then I added those beautiful dew drops to enhance the center.  Doesn't it look wonderful?  In the picture below, I used a sticker from the Travel Sticker sheet , adhered it to a piece of magnet, and glued a clear, slightly iridescent, flat marble from the craft store on top.


Below is an image I punched from the  German Edlewiess Paper, adhered to the center of a bottle cap, and attached a piece of magnet to the bottom.  I used 3D Crystal Lacquer to the surface.  I used a second circular sticker from the Travel Sticker sheet to make the next magnet shown, glued it to a magnet, and adhered clear teardrop dew drops around a Large Clear Dew Drops.


Here is another close-up of those magnets, and one more I made by punching an oval shape from a scrap of Family-Glitter Getaway Double-Sided Cardstock, adhered the fleur de lis rub-on image from the Family Rub-On sheet, and adhered it to another piece of magnet.  I also coated this piece with a thick layer of 3D Crystal Lacquer.


Oh my goodness, I had so much fun making this project.  The magnet pieces are so addictive, and I just love this paper collection.  And here is a little tip from me:  Each one of these magnets can also be used as embellishments for any of your other projects, i.e., cards, mini albums, page layouts, altered books, etc.  Just glue them to a piece of chipboard for stability and dimension, and you have tons of beautiful little bits of art to add to your projects.

I hope you will stop by The Robin's Nest and check out their collections, and see what is new in the shop.  And beginning today through November 26, you can get 25% off of your purchases during their Black Friday Special this week.  I also hope you have been inspired to make your own memo board with lots of magnets and/or embellishments for other projects.  Thanks so much for stopping by, and I want to wish everyone a very Happy Thanksgiving!

Barbara 

Saturday, November 10, 2012

Autumn Pop-Up Card For The Robin's Nest Design Team Application


Hello everyone, and welcome back to my blog.  Today, I am trying out for The Robin's Nest Design Team.  I absolutely love The Robin's Nest products, and I have enjoyed working with them so very much.  I would be so honored to have the pleasure of working with them for another term.  


I made this great little pop-up card for Autumn.  This is my favorite time of year, and I wanted to express that in my card using these luscious autumn colored papers from The Robin's Nest.  I absolutely love how this card turned out. Aren't those pinecones beautiful?  I keep looking at them and still, I cannot believe they are made from paper and a Sizzix die. 


The base (outer) card is made with this gorgeous Family-Glitter Getaway Stripe Double-Sided Cardstock.  I  used the Brown Glitter card stock for the pinecones and some olive green paper for the pine needles, which I distressed a bit with brown ink.  I also added a bit of copper glitter to the pinecones.  I glued this arrangement over a scrap piece of die cut chipboard covered with the reverse side of Family-Glitter Getaway Stripe Double-Sided Cardstock, edging with gold ink.  For added glitz, I "sprinkled" some of these beautiful Getaway Dew Drops around the front.  Let's face it, nothing is complete without adding some pretty dew drops about.  

Finished Pop-Up Inside Card


I used a Sizzix die to make this card.  Although pop-up cards are not really as difficult as they look, they always surprise and amaze the recipient.  Below, I have made a simple diagram of a pop-up with straight lines for your use.  The sky is the limit, whether or not you use a die or a ruler and a craft knife.  The same goes for rosettes.  A strip of paper, accordion folded, glued into a circle, and you have yourself a rosette, as you will see later in this post.  Dies just make the job a little faster, but not necessary.


Outer Card (left) Inner Card w/pop-up (right)
First, die cut or manually cut the outer card using Family-Glitter Getaway Stripe Double-Sided Cardstock.  The outer card measures 4-1/4" x 11", folded in half to form a  4-1/4" x 5-1/2" card.

Next, you can either use the die to cut the inner card using Brown Glitter card stock, or follow my diagram below for a simple straight line pop-up.  You may need to trim a sliver off of each short edge of the inner card so that it will fit nicely inside the outer card.  


View of inner card from side angle
I cut a second piece from Glitter Copper Butterflies card stock to adhere over the center pop-up.  Alternatively, you can simply punch a 2-1/4" circle instead.  Then I punched a 2" scalloped circle from the reverse side of Family-Glitter Getaway Stripe Double-Sided Cardstock and used the botanical from the Family Rub On.  The Robin's Nest rub-ons go on like butter, and are not only versatile, but very easy to use.  I also inked the edges with gold ink and adhered both pieces to the central pop-up piece.


Central pieces cut out and added to pop-up center

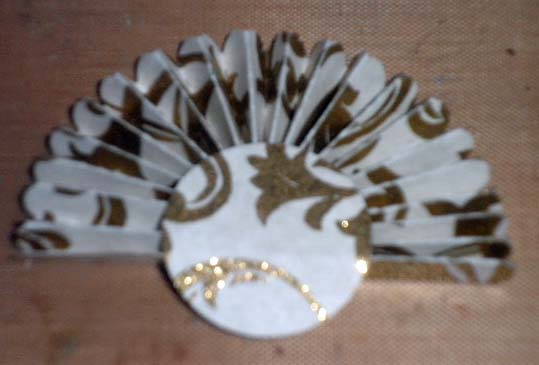
Die cut a Glitter Coffee Creme Swirl Cardstock rosette, but only adhere it as a half circle rather than a full circle behind the central pop-up piece, as shown in the picture below.  You can also make the rosette by cutting a strip of this gorgeous paper into a 1" x 10" piece and accordion folding it every 1/4".  If you want the scalloped edge, you can trim one edge with decorative scissors before accordion folding it.  

Half rosette
Add glue to the front of the circle (on the right side of the paper) to adhere it behind the circular area of the pop-up, as shown.  (NOTE: The circle is not decorative in this case, but necessary to hold the rosette together).


Close-up of half rosette adhered behind pop up
I punched leaves from Distressed Honeycomb cardstock and added distress ink colors to each of the leaves to give them a variety of Fall colors.  After attaching a piece of wire to the reverse side of each leaf with a small piece of washi tape, I was able to insert the wires where I wanted them behind the rosette, enabling easy adjustment of their placement. 


Reverse of leaf showing wire attached with washi tape

Below is a close-up of the pop-up with the leaves attached.


Close-up of finished pop up

Another picture of the card from the side.


Angle view of card
I stamped my Autumn sentiment on the reverse side of the Family-Glitter Getaway Stripe Double-Sided Cardstock, continuing the shape from the front to the inside.  I also edged this with gold ink.  The sentiment is a bit hard to read in the photo, so this is what it says:  


"Every leaf speaks
bliss to me
fluttering from
the autumn tree."
                  -Emily Bronte

Close-up of stamped sentiment
Below, I have made a diagram of a simple pop-up insert for any card.  

The Robin's Nest Products Used:

Family-Glitter Getaway Stripe Double-Sided Cardstock


Glitter Coffee Creme Swirl Cardstock
Glitter Copper Butterflies


Distressed Honeycomb cardstock
Brown Glitter card stock

Getaway Dew Drops


Family Rub On

I hope you have enjoyed my card project this week and that you will be inspired to visit The Robin's Nest online store, as well as their blog, The Chattering Robins, for more inspiration and to check out their new and wonderful product line. 

Until next time, have a wonderful week, and happy crafting!

Barbara