
Welcome to Day 30 of the 31 Days of Halloween Blog Hop. As you know by now, I am participating in this month-long blog hop with some extremely talented artists. The complete list of Wicked Bloggers (that's what we are called) are in my side bar. There are lots of prizes in the daily scavenger hunt, and a Grand Prize worth over $300.
Today, I want to share my witch's hat that I am also entering into The Robin's Nest Witch Hat Contest. All that was required was to use 50% or more of their products. Apologies in advance. There are lots of photos in this post.
Oh look, there's Skully again. I guess he got tired of sitting on top of the apothecary jar. Looks like he's hitching a ride on that witch's hat!

There are lots of patterns and templates for making your own witch hat, but I chose to start with this paper maché hat I found at my local craft store. I wanted it to be sturdy, and I think this will do it.

Next, I chose this beautiful Stencil Green/Plum paper for my hat. I took a 12x12 piece of it, gently folding in half both directions to find center, and made a cut in both directions.
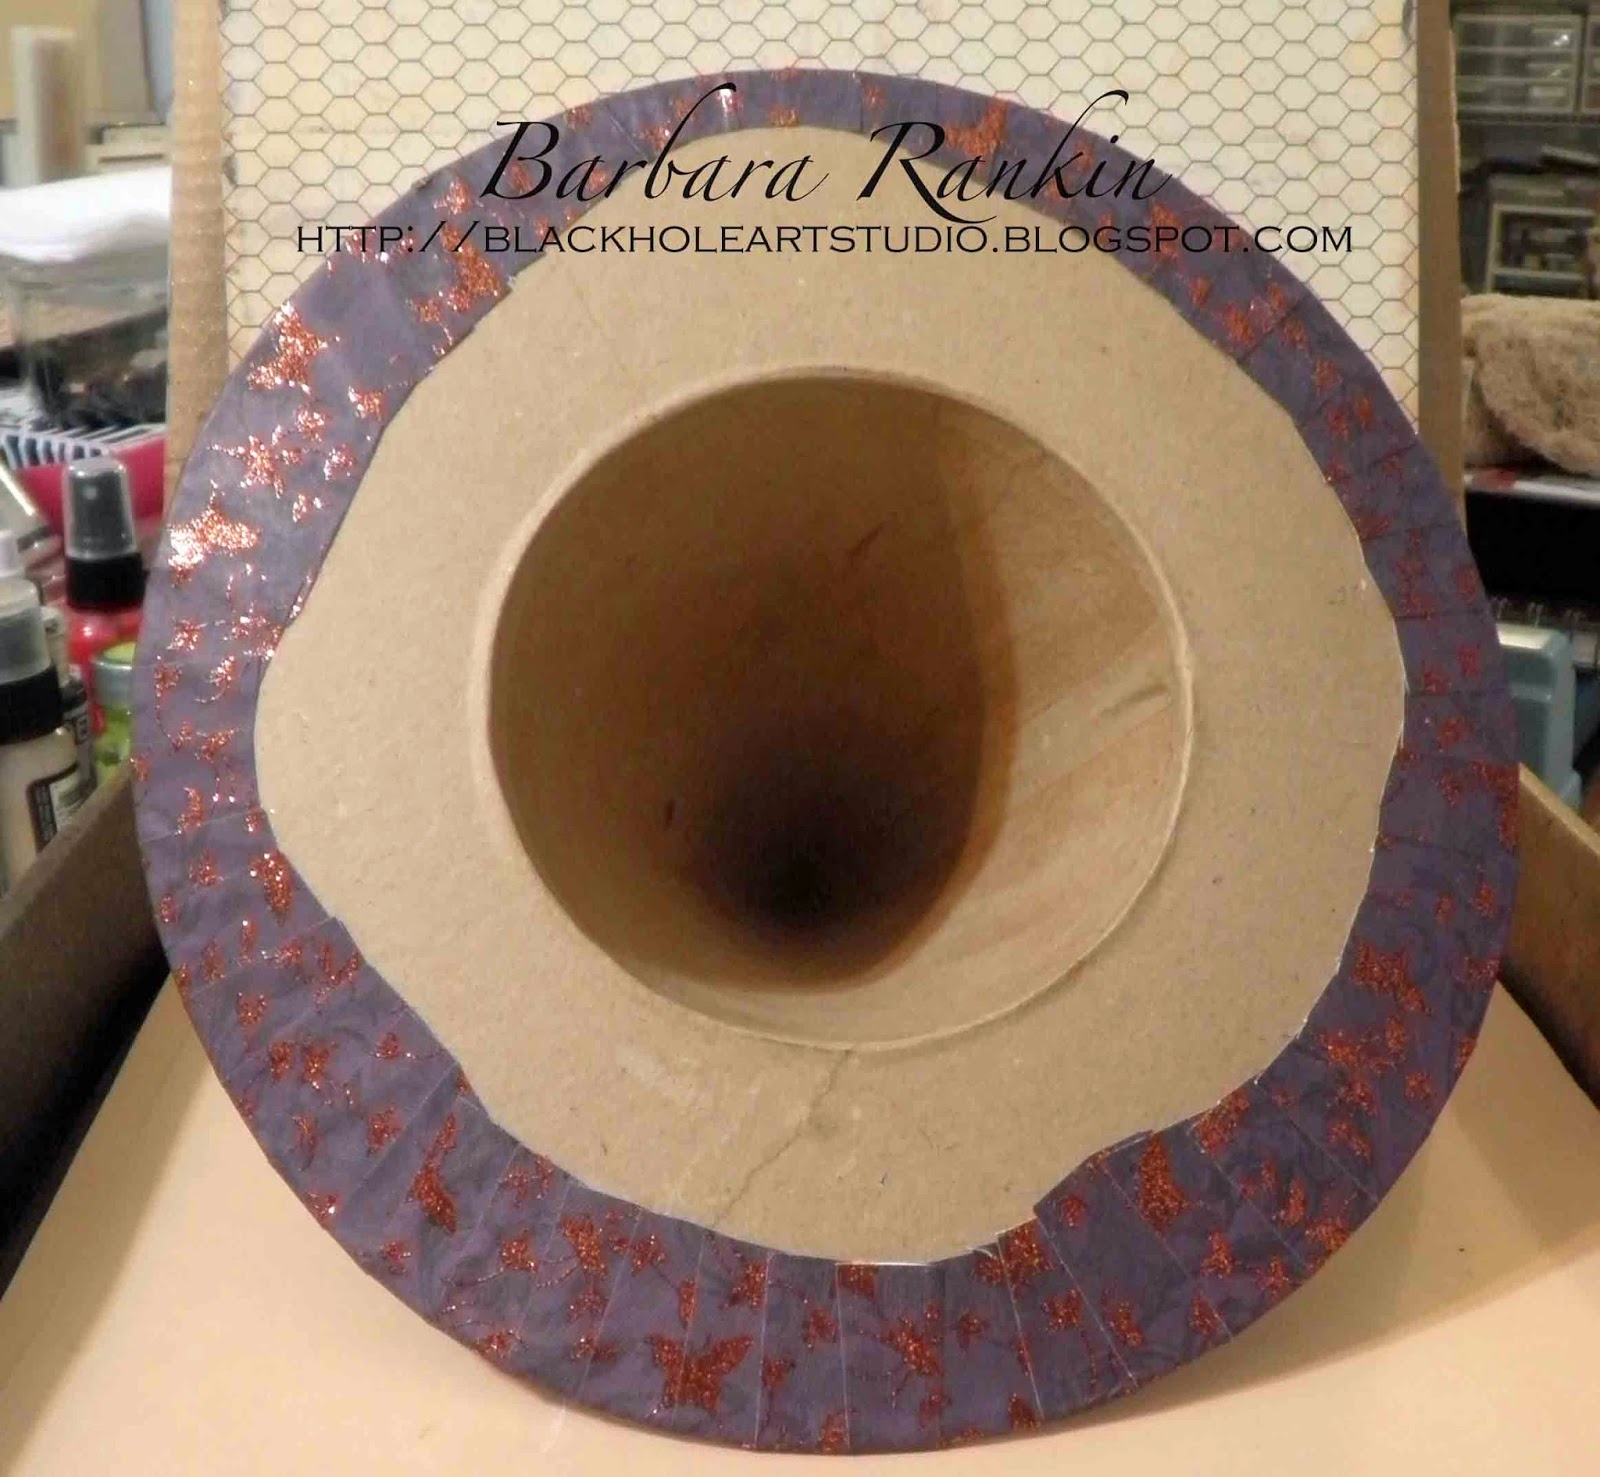
 I pushed the center of the hat through the opening, adjusting my cuts as needed to get the paper to lay flat on the brim.

I adhered the paper to the brim with PPA bookbinding glue, smoothing the paper with my fingers and a bone folder. As you can see, I had to make some more snips in the paper to get it to lay flat against the brim.

I trimmed the paper around the outer edge of the brim, leaving approximately 1" - 2", snipping every 1/2" or so around the circumference. I turned the edges of over and adhered to the underside of the brim to make a neat edge.
To cover the cone shaped top, first measure the circumference (16") and the height (8").
 |
| Height = 8" |
 |
| Circumference = 16" |
Begin adhering each triangle to the cone shaped top, overlapping, if necessary.
 Luckily, 16" divides easily into four 4" strips, 8" long. Make yourself a couple of templates from computer printer paper. First, fold the paper in half along the 8-1/2" side. Mark 2" out from the center fold and make a pencil mark. Use a ruler to draw a line from the 2" mark up to the top of the fold. When you open it up, you will have a triangle. Do this twice to have two templates. Now you can get all four triangles from one piece of 12x12 paper.

Cut the four triangles out from your paper, as shown, turning the template point up, then point down, to get the most from your sheet.

Trace around the brim of the hat and cut out another piece of the Stencil Green/Plum paper. Adhere to the underside of the brim with the PPA glue. Cut slits in the center towards the brim.


Paint the inside of the hat with black gesso. I used the same sponge brush that I used for the PPA glue.

I applied a coat of Copper Gilder's Paste around the edge of the brim to hide the white edges of the paper after being cut.

I used Dusty Concord distress stain to disguise the cut white edges where I had joined the four triangles on the top of the hat. It matched perfectly when it dried.
I next tried to adhere black netting that held produce to the bottom section of the hat.
I next tried to adhere black netting that held produce to the bottom section of the hat.


Shape flowers with large ball stylus and glue petal layers together.


Use dies to cut six bats from the black glitter chipboard. Cut a length of wire and sandwich the wire between two bats. You will make three bats total.
 Die cut a couple of bare trees and twigs from the gold glitter chipboard. Use the Orange Zest StazOn to give it a more copper color.
Die cut two spiders to adhere together, and enough of the fence edge from black glitter chipboard to go around the hat.
Arrange and adhere the embellishments as shown in the photos below.

 And a bit of a closer look at my flower bouquet.
 A look at the back. There are spiders crawling all over this hat!
 And here are those bats flying around like gnats on something with a stench. Ewwww again!
 And here is a better look at those spiky flowers.
 I used the twigs instead of leaves between my flowers.


Die cut two spiders to adhere together, and enough of the fence edge from black glitter chipboard to go around the hat.
Arrange and adhere the embellishments as shown in the photos below.
Uh oh, what's that? Is that spider creeping up on skull? Ewwwwww!
Supplies:
The Robin's Nest: Gold with Gold Glitter Cardstock; Brick Glitter Cardstock; Very Black Glitter Chipboard; Gold Glitter Chipboard; Goldenberry Dew Drops;
Heartfelt Creations: HCPC3500-Open Vintage Floret PreCut stamp set and matching dies;
IMAGINE Crafts/Tsukineko: Orange Zest and Spiced Chai StazOn midi ink pad;
Sizzix/Tim Holtz dies: Mini Bat & Skull Set; Mini Branch & Leaf Set; Mini Spider & 31; On the Fence; Branch Tree (Bigz);
1", 1-3/8", 2" daisy punches (Paper Studio)
Dylusions ink spray: Fresh Lime
Tattered Angels Coral Glimmer Mist
Stickles Glitter Glue: Champagne
Copper Gilder's Paste (Baroque Art)
24g Black Artistic Wire
Creepy Cloth (Michaels)
Plastic Skeleton (Dollar Tree)
Green glitter spider stickers (Recollections)
USArtQuest PPA (Perfect Paper Adhesive)
Black Gesso; black produce netting
Whew, that was a doozy. I hope you are still hanging in there with me and that you enjoyed my project today. I have to say, I had an awfully fun time making this hat, and I hope I have inspired you to try making one for yourself.
I hope you are still enjoying the hop, and tomorrow is the last day. I will be sad to see it go, but will take a few days to rest after this fun-filled, but busy, month.
Thanks for stopping by, and as always, have wonderful week.
Barbara Rankin
Gorgeous, Barbara! You've done such an amazing job with this! Covering that hat with DP was no easy task and it turned out perfectly! Love all your fabulous embellies. Those flowers are gorgeous and what a cool "happy accident" with the netting. I can tell you had fun. I had fun seeing the process. xxD
ReplyDeleteYou are on a roll! This hat has so many elements that are fantastc: the stencil effect, those FLOWERS, the cloth, the tree....let me take a breath! In summary (lol) Fabtastic amazingly gorgeous hat!!
ReplyDeleteawesome 3-D project!
ReplyDeleteThank you for the fantastic tutorail, and including your happy accident.
ReplyDeleteI will check out the hat link too.
Stunningly gorgeous - witches would curse for this hat!
Awesome Witches hat décor. Love all the details. Thanks for sharing the how to.
ReplyDeleteLove your witch hat! Thanks so much for the great tutorial! Awesome how your texture came out, it really looks great!
ReplyDeleteThanks again for sharing!~kim
thank you for all the details. Really really love this piece looks like a cake with all the flowers popping off wonderful job
ReplyDeleteAwesome creation, beautiful flowers. Thanks for sharing the how to.
ReplyDeleteLove your witch's hat today! Those flowers are just incredible.
ReplyDeleteWonderful project! Love all the step by step photos. I may have to try making one of these for next years hop :)
ReplyDeleteOH MY GHOUL, I love it! What a spooktacular witch hat! I love all the embellishments and each detail is a treat!
ReplyDeleteStunning!! Love every bit of your hat from the paper to the netting bit to the gorgeous flowers! !
ReplyDeleteI adore every step! Great one!
ReplyDeleteThis turned out truly amazing! I can't believe all those steps you took us through! Your dedication is impressive!
ReplyDelete