Sunday, February 1, 2015

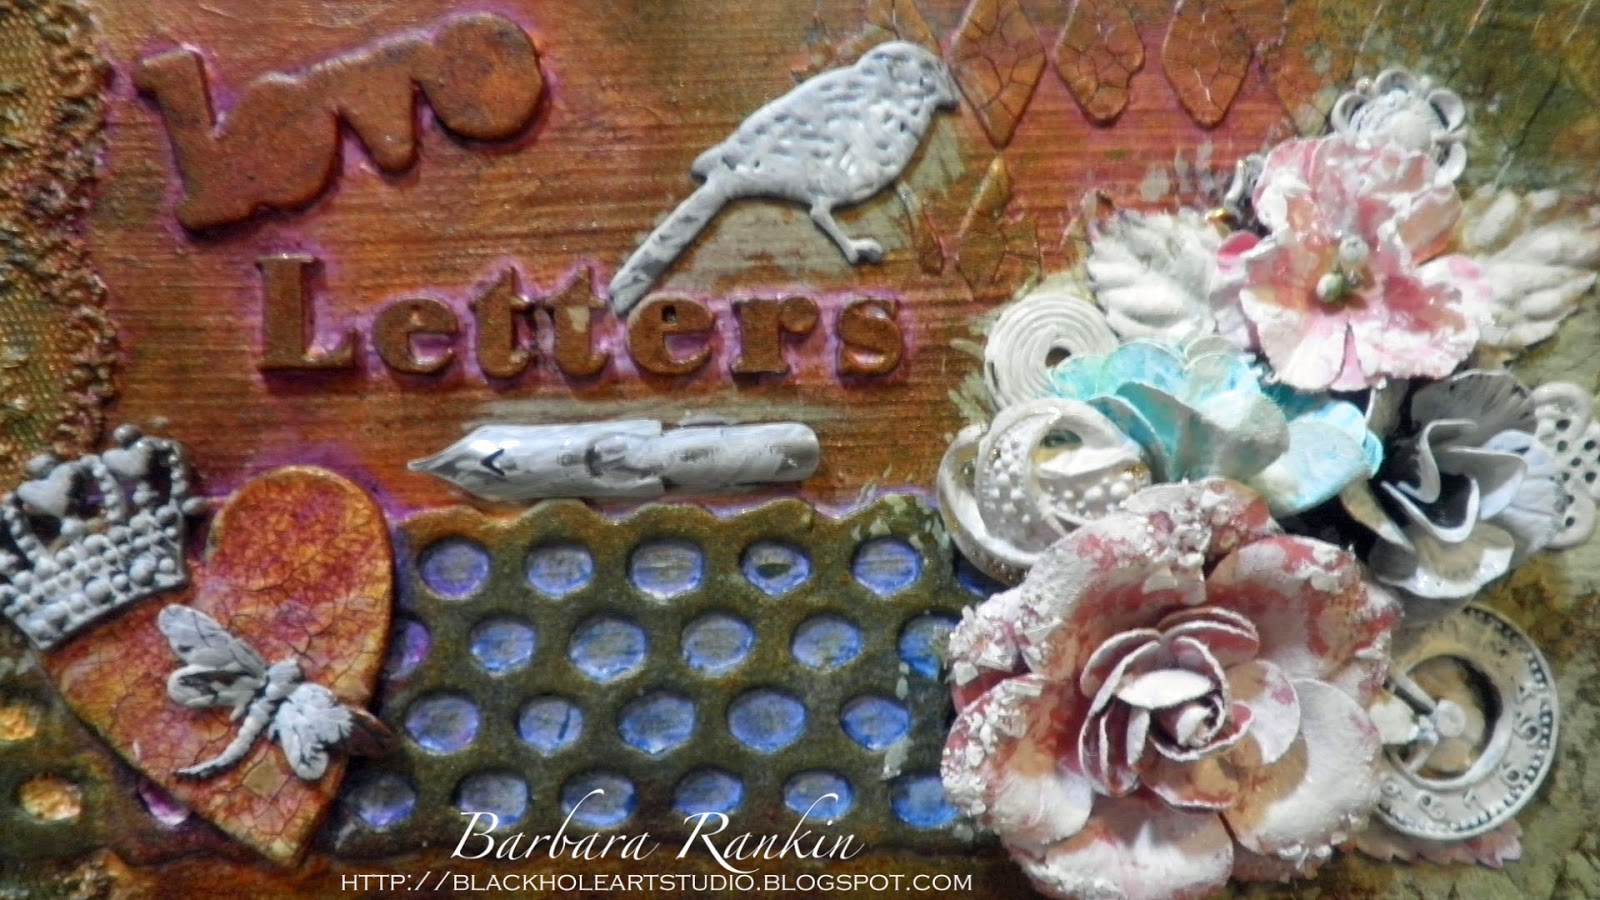
ColourArte Design Team Application-Love Letters Keepsake Box


Hello everyone.  Today, I have the great pleasure of trying out for a fabulous company, ColourArte.  This company sells Twinkling H20's Watercolors, Silks Acrylic Glazes, Radiant Gels Dimensional Paints, Radiant Rains, and Primary Elements Artist Pigments.  While I have been using Twinkling H20's and Radiant Rains for years, the newer (to me) Silks and Primary Elements are so beautiful, I think they may be my favorites.  Of course, each product has a use, depending on how you wish to use them and the look your are trying to achieve.

Since Valentine's Day is just around the corner, I decided to alter a box to hold love letters.


Side Front
Side Back
I started with an empty Cricut cartridge box.
I painted the outside of the box with Utrecht white gesso.  It is very thick and only one coat covered all of the writing very nicely.

I added a scrap piece of lace to the still wet gesso and allowed everything to dry.
While that is drying, gather chipboard, die cuts, ephemera, metal bits and charms, and anything you plan on using on the top of your box.
Use a spatula to spread the crackle paste through the stencil and allow to dry.  Continue adding the stenciled crackle paste along the back of the box, as well.  Do not use a heat gun to speed drying time for this step.  (See Fig. 1 below).
Allow the paste to air dry to form the crackles.
Adhere chipboard pieces and alphabet letters to box, as shown.
Use a ruler to help keep letters straight.
Cover entire box with another coat of white gesso.  Add a medium thick coat of crackle paste to the chipboard heart and allow to air dry.  Then adhere over honeycomb chipboard.
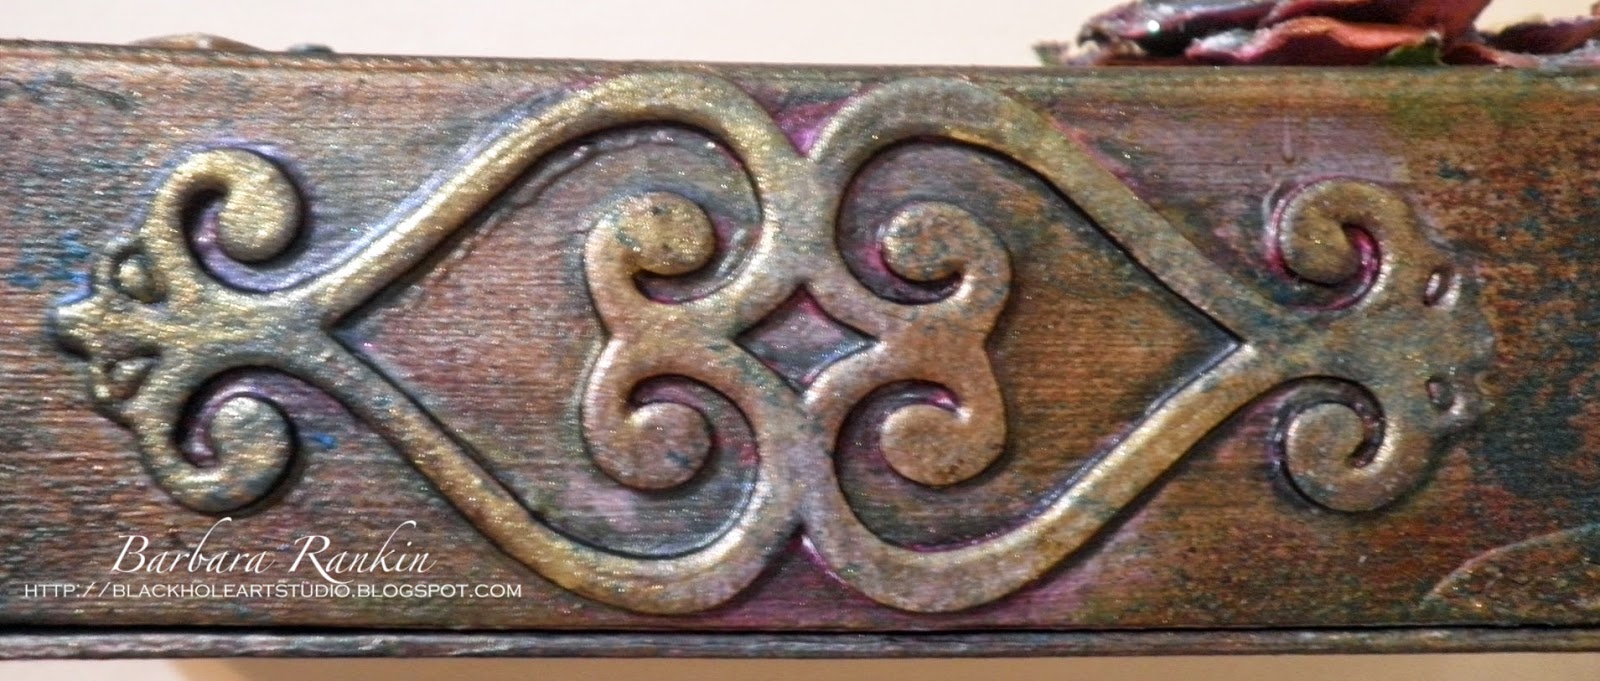
Randomly add streaks of crackle paste along the two side edges (See Fig. 2 below), as well as along the front edge on either side of the chipboard ornamental.

Add Burnt Umber Primary Elements to white gesso and mix together on your craft sheet.
Paint inside edges of box, as shown.  Allow to dry.
Adhere print paper to inside of box, leaving scant borders all around each section of the box.  One 12"x12" sheet of paper will cover the inside.  
Now comes the real fun ... coloring!!!  I began adding colors using the Silks Acrylic Glazes, beginning with Pomegranate, Ginger Peach, Yellow Rose, Olive Vine, and Bolivian Blue.  
I wanted my box to look quite old, so I needed to darken the colors.  I made a spray mist by adding Burnt Umber Primary Elements to a mini mister bottle.  I have no formula, just add small amounts  of the Primary Elements until you like the color.  A very little goes a long way.  Spray over the box and dab off some of the excess with a paper towel or baby wipe.
 
Also add this mist along the front and side edges.
Now get those embellishments out and start adding them to the top of your box.  I have used chipboard die cuts, fabric flowers, metal charms, buttons, and various embellishments. Once you like the arrangement, glue everything down to the box and allow to dry.  (NOTE:  I removed the Special Memories tag to be added at the very last, but this is where I will place it.)
Add a light wash of white gesso over these pieces and allow to dry.
Brush more of the Silks Acrylic Glazes in Pomegranate, Ginger Peach, Yellow Rose, Olive Vine, and Bolivian Blue.  The goal is to unify these additions while maintaing a bit of contrast. Since the colors are so beautiful, I wanted to share as much of the beauty as possible by including some closeups of the individual sections.

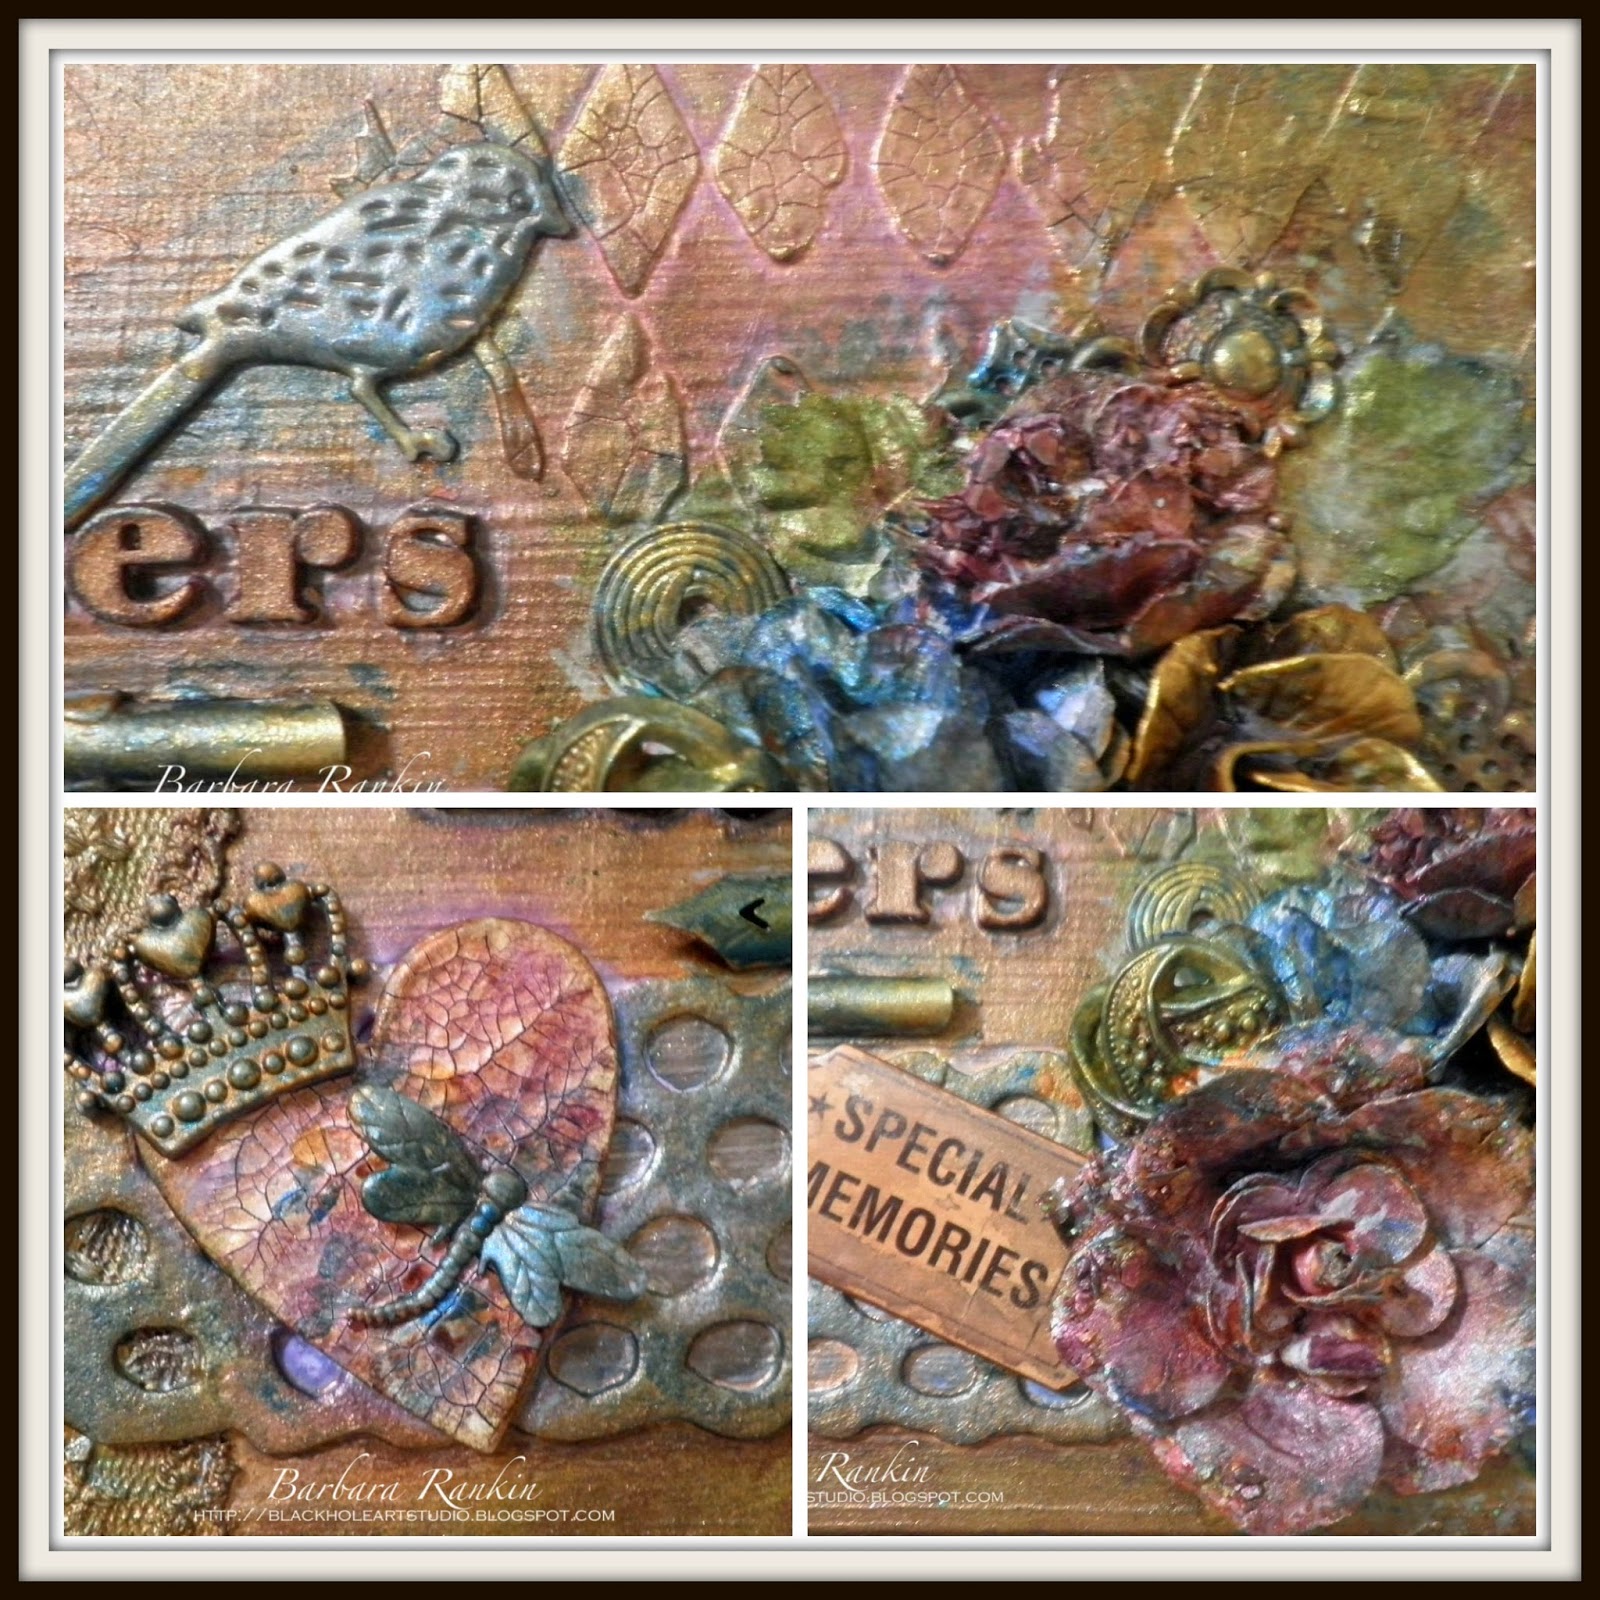
To add some additional highlights to a few embellishments, I used a tiny round paint brush, dipped into water, then picked up a scant amount of Sunflower Primary Elements to make this gilded color.
I added tiny touches of this luscious, golden color to the chipboard ornament on the front of the box. I absolutely love the color variations.
A few closeups of the sides, where I also added some of this golden color.
Fig. 1
Fig. 2
I then added blobs of that golden color to my metal flower, simply by brushing the excess off of my brush onto the edges of the metal.  Isn't it gorgeous?


Supplies used:

ColourArte products: Silks Acrylic Glaze: Pomegranate, Ginger Peach, Yellow Rose, Olive Vine, Bolivian Blue;  Primary Elements Artists Pigments:  Burnt Umber, Sunflower

Cricut cartridge box (empty)
Utrecht white gesso
Cuttlebug 2x6 die sets:  (Poppies & Honeycomb) (Ornamental)
Cuttlebug 2x2 Butterfly Combo cut and emboss set
DecoArt Media Crackle Paste
Tim Holtz Harlequin stencil
Metal charms and embellishments, chipboard, buttons, metal clips, vintage paper ticket, mini mister, Prima flowers and leaves

I hope you enjoyed my repurposed box project today, and that I have inspired you to try some of these luscious and beautiful ColourArte products.  You won't be disappointed!

Thanks for stopping by, and have a wonderful, creative week!

Barbara

House of Cards February 2015 Challenge - Love

Hello everyone, and welcome back to a new monthly challenge here at House of Cards.  I so enjoy seeing all the creations each month, not only from the design team, but also from you, the challenge participants.

This month's challenge is ...

                                            FEBRUARY 2015
                                  Word Cue Challenge

I love the vintage, and even shabby chic style, and I thought it would be fitting for my LOVE card.  I think this would make a wonderful Valentine's Day card, don't you?


Die cut Stampin'Up heart with red card stock.  Swipe Tarnished Brass DS over heart (see finished photo above).  Swipe Picket Fence DS over corrugated kraft heart.
Mist kraft heart with Dylusions Calypso Teal and Polished Jade.  Mist with water to disperse colors.  Wipe off excess and dry.  Swipe Tarnished Brass DS over corrugations.  Allow to dry, then apply DecoArt Media Crackle Paint along edges.  You can see the paint picking up some of the teal color beneath as it dries.
Add a light coat of the Bolivian Blue Silks acrylic glaze over the crackle paint.  Below you can see where I added it to the lower section only.
And here, you can see the crackle paint covered entirely.  Isn't it beautiful, the way it adds such a nice shimmer to the crackles.  
Blend Antique Linen DI over Love Bingo card, blending towards center, then edge with Vintage Photo DI.
Die cut the ornate frame from eggshell watercolor card stock, and the smaller frame from the Prima script paper, using the Regal Frame die set.
Die cut two butterflies with the Nature and Texture Blocks die, using doubled piece of script paper.  Glue together and color with  Stormy Sky DI, then edge with Vintage Photo DI.
Now, let's put it all together.  First, make a base card measuring 6" x 6" from light aqua card stock.  I like to use my Xyron 850 to apply the adhesive to each of my pieces.
Heavily distress the edges of the 6x6 print paper, edge with Vintage Photo DS.  Adhere to card front.  Adhere both Regal frame pieces to center, fussy cut a journal tag from the Prima paper pad and adhere on the right, beneath the Love Bingo card.  Add the two heart shapes, as shown, with the fern die cut and a scrap of lace.
Add the colored-to-match ribbon bow with a few mini roses and a metal filigree embellishment.
Turn the butterfly wings upward and attach each along the bodies only.  Add a line of the Opal pearl pen down the center to form their bodies.

Supplies used:

Spellbinders S4-446-Regal Frame die set
Tattered Lace fern die
Stampin'Up Embosslits Scalloped Heart of Hearts die
Eggshell, light aqua, and red card stock
Prima Madeline collection 6"x6" paper pad
Love Bingo Card (Kaisercraft Miss Match collection)
Xyron 850
Off white seam binding
Kraft corrugated heart die cut (Recollections)
Dylusions ink sprays:  Calypso Teal, Polished Jade
Distress Inks (DI) and Distress Stains (DS):  Vintage Photo, Antique Linen, Tarnished Brass
Bolivian Blue Silks Acrylic Glaze
DecoArt Media Crackle Paint
Opal Pearl Pen (VivaDecor)
Metal filigree embellishments
Mini roses (Hobby Lobby)

I am also entering this in the Craft Hoarders Anonymous Blog January Challenge.  I have used paint, lace and ribbon,  die cutting and mixed media, chipboard, flowers and ephemera to meet the challenge.

I am also entering this card in the Mixed Media Card Challenge #8 - Love.  

I hope I have inspired you to play along with us and to get some great cards made using LOVE for your challenge theme.    I can't wait to see your creations.

Come back each Monday this month for more inspiration from the DT.  We hope you will join us and share your beautiful creations.  Click HERE to be taken to the original challenge post to link up!  Please check the House Rules HERE before linking up.  

Thanks for stopping by, and have a wonderful, creative week!

Barbara xoxo

Thursday, January 29, 2015

A Vintage Valentine Card with Altered Pages and Deco Art Media

Hello everyone!  I have a special Altered Pages post for you today. The Altered Pages design team continues to enjoy our sponsored DecoArt products this month, and I even found some uses for them on my Valentine's Day card.  So, you card makers out there, don't be afraid to delve into the fabulous world of mixed media, because I am about to show you a fraction of what you can do with DecoArt Media products.  Of course, my card would be nothing without the help of Altered Pages products, too!


I used an aqua 4-/4" x 5-1/2" card for my base, and adhered a print paper slightly smaller to the front. I also distressed the paper with Scattered Straw to help it match the image.

I resized and printed out two of the image from the Always in Love collage sheet.  I adhered the whole image to a piece of thick chipboard and trimmed to size.  I edge the piece with Patina Green antiquing cream.  But wait, there's more.  
I added Interference Gold fluid acrylic along the edges, and it gave this beautiful shimmer effect.  I think it really gave it just the right vintage feel I was going for.
I roughly cut out the heart portion of the second image and added a thinner piece of chipboard beneath it.  I began adhering the German Pennant Point Gold border around it, beginning at the bottom of the heart.  This allowed me to get that perfect point at the bottom of the heart.
I continued around the opposite side, again beginning at the bottom and finishing off at the top of the heart.  I used 3D Crystal Lacquer to adhere the border.  It works really well and sticks fast. 
I wanted to distress the brassy finish of the gold border, so I added Patina Green antiquing cream with a cotton swab.  
I adhered the cut out heart image with foam dots.  Ahhhh, now that's more like it!  I love how the colors are all coming together.  
Finally, I added a piece of Dyeable Seam Binding that I inked with some aqua color,  and attached a bead charm to the bow with a Lightbulb Safety Pin.  

Altered Pages Supplies:
Always in Love collage sheet
Glitz Design print paper from All Dolled Up Muse Kit
German Pennant Point Gold border
Dyeable Seam Binding
Lightbulb Safety Pins
3D Crystal Lacquer
DecoArt Media: matte medium, Patina Green antiquing cream, Interference Gold fluid acrylic
Other supplies:  Aqua card stock, chipboard, charm, Scattered Straw distress ink
Oh, and don't forget that Altered Pages will have a giveaway of DecoArt Products and a very useful Brayer from AlteredPages.   (total value $35.00)  They ask that you share our blog posts on YOUR social media pages/sites to be eligible.    Comment there and let us know where you posted!   Facebook, twitter, Pinterest, Linkedin, google+ !"

I hope you enjoyed my project today, and thanks for stopping by.

Have a wonderful weekend!

Barbara

Monday, January 26, 2015

Mixed Media Book Art with DecoArt - Part 2

Welcome back to Part 2 of my mixed media art book with Altered Pages and DecoArt, our January sponsor.  Today, I am going to show you how to make the book pages, also known a signatures, for inside the book.  I will even begin to decorate them for you, hopefully to inspire and get your creative juices flowing. 

But first, I want to show you how to put the two bookscovers together.  Unfortunately, my computer went down before I could finish my last post, so I had to stop short of really finishing the covers.  If you missed it and would like to see how I altered them, you can click here for the tutorial.


Here are the fairy quotes I found online, which I computer-generated and fussy cut to use on my pages.

"Where there is Joy, Laughter and Colour, Fairies will be found!"

"A rustle in the wind reminds us a fairy is near."

"Garden fairies come at dawn, bless the flowers, then they're gone."


Altered Pages Supplies:
Color ATC Red, 1724 Collage Backgrounds Green, Mailbox, Fairy Dreams collage sheets
Graphic 45 Steampunk Spells paper pad
Muse Dragonfly stamp set
Faber-Castell Gelatos
Fire Red Glitter
Serviette Papers
Dyeable Seam Binding
5x7 Canvas Art Boards
Tags and Postcards
Glitz Design journaling sticker
Glitz What-Nots Embellishment Collection
Black StazOn ink
UltraFine Mist Sprayer

DecoArt Media acrylic paints, mists, and mediums

Other supplies:  book cloth, paper punches, awl or paper piercing tool, dies, metal embellishments, gem swirls stickers


Be sure to stop by the Altered Pages blog to enter the giveaway of DecoArt Products and a very useful Brayer from AlteredPages.   (total value $35.00)  Just share our blog posts on YOUR social media pages/sites to be eligible.    Comment there and let them know where you posted!   Facebook, twitter, Pinterest, Linkedin, google+ !"


I hope you enjoyed my project today.  It is a work in progress, and I will continue sharing pages as I go along. 


Thanks for stopping by, and have a wonderful week!


Barbara

Saturday, January 24, 2015

Meet the New Sin City Stamps Design Team

Yep, it's that time again.  A new six month term and a new, well, almost new, design team.  I am thrilled to announce that I am still working with Sin City Stamps as a design team member, along with some fabulous new artists.  I hope you will stop by the blog and check them out.  You are just going to love the creativity from each of them.
And while you are at it, I hope you will visit the shop and check out the new stamps and stencils that await you!  Here are a few to entice you!
Terri Sproul's Number and Symbol Set

Fun Backgrounds by Pam Bray
Words and Labels By Pam Bray
Terri Sproul's Alphabet Set

And don't forget the fabulous selection of stencils that Sin City Stamps carries.  Stencils are big right now, and here is your chance to get some of the latest designs.

Aren't they fabulous?  And there are so many more, too many to show here.  So hop on over to the store and see all the new designs.  And be sure to visit the blog to enjoy what the new team has in store for you.  

Have a wonderful weekend, and stay crafty, my friends!

Barbara

Thursday, January 15, 2015

Art Journal with Sin City Stamps

Hey there, fellow stampers!  Today I am going to share my last post with Sin City Stamps for this term. But, the good news is, I am not going anywhere.  I am continuing my tenure with the design team for another term.  I guess they just cannot get rid of me!

I am going to work in my art journal again, and I want to share a few techniques with you that I have learned along the way.  I can only share this teaser with you.  However, for a complete step-by step tutorial, please visit the Sin City Stamps blog.


Here are a few closeups around the pages.


Supplies:

Sin City Stamps:  Wildlife stamp set; Terri Sproul's Leaves stamp set; Sin City Wings stamp set; Chicken Wire Stencil;
Cottonwood Press Canvas Notebook
StazOn ink pads: Black, Blue Hawaii, Gothic Purple, Emerald City, Spiced Chai, Claret, Orange Zest
DecoArt Modeling Paste; Matte Medium; Crackle Paste; Misters:  Yellow Green, Turquoise, Orange, White; Burnt Umber; Titanium White Antiquing Cream
Golden Retarder
Charcoal pencil, blending stump

I hope you enjoyed looking at my project today, and don't forget to check out the Sin City Stamps online store for new stamp sets and stencils.  They have quite a nice variety for your mixed media projects.

Thanks for stopping by, and have a wonderful weekend!

Barbara

Wednesday, January 14, 2015

Southern Belle Vintage Card

Hi everyone!  I have a card I want to share today that I am going to enter into a few challenges this month.  I used the new Prima Cigar Box Secrets paper collection, and this beautiful lady stamp from Postmodern Design that I found in my stamp collection but never used.  I also used my brand new Prima doily die to set off my pretty lady.

I fussy cut the lady, but cut off the tiny stamped image of her string for untying her corset, so I added a tiny piece of thread by poking one end into her corset, and cutting a tiny slit in her hand to hold the other end.
close up of tie string in her hands

I am entering this in the Sweet 'n Sassy Something New challenge.
http://sweetnsassystamps.blogspot.com/2015/01/january-2015-release-day-blog-hop.html

I am also entering this in the Simon Says It's a Guy Thing challenge.
http://www.simonsaysstampblog.com/wednesdaychallenge/

Thanks for stopping by, and have a great week!

Barbara