Thursday, March 10, 2016

Mixed Media: Time Machine Mini House Shadowbox 2

Hey everyone!  So glad you stopped by.  Today, I want to share my fourth and last Gypsy Soul Laser Cuts Mini House Shadowbox in this series.   Now I have a complete set to display in my studio and inspire me.  This shadowbox I will call my Time Machine.  I am enamored with clocks and time pieces, probably because I never seem to have enough time.  I also used the fabulous products from the DecoArt Media line.

To see my previous mini shadowbox posts, please click hereclick here, and click here.


So let's get stared.  It is a good idea to lay your pieces out so you can see exactly how to glue them together.


Paint the box and all the chipboard pieces with DecoArt Media Carbon Black Fluid Acrylic paint.  I may not use all of these pieces, but in any case, they will be ready for the next project.


Each piece was painted with the Lumiere 3D metallic paints.  I tried to mix up the color combinations so the gears would show up better in side the box.  (See photo of finished project above).

Cover the roof with Finnabair graphite texture paste.


Spread DecoArt Media white crakle paint over the back and sides of the box; let dry.  This product gives the ver best crackle effect.


Sponge DecoArt Media violet and orange shimmer mist over the crackle paint; let dry.


Sponge Frayed Burlap distress ink over the crackled area to tone down the colors for a more vintage feel.


Cut a piece of corrugated cardboard to fit inside the box.  Tear away some of the covering to reveal the corrugations.


Paint the piece with DecoArt Media Carbon Black fluid acrylic, and spread a small amount of DecoArt black molding paste in open spaces.


Mist cardboard with DecoArt Media turquoise and white shimmer misters.

Paint a thin (approximately 1/8") wooden dowel black and snip into varying lengths.  Glue dowel pieces to back of gears that you want to raise; let dry.


Glue gears in place onto cardboard backing, layering them with the dowel pieces as needed to lift them up.


Continue adding gears and watch parts until you like the result.  


Here are a few views from the sides, showing the dimension and how it was layered.


I also used watch parts for added interest.  Below is a watch part that was layered on top of the chipboard gear with a brad.  Look at the photos above to see more of the tiny watch parts added.


When all these pieces were glued in and dry, you can pick up the entire backing piece and slip it inside the box.  I did not even have to glue it in because it was a snug fit.

Paint wings with DecoArt Media Carbon Black fluid acrylic paint, then spray with DecoArt Media white  and turquoise shimmer mister on both sides; let dry.  Then spray with Heirloom Gold shimmer mist; let dry.  Sponge a bit more turquoise shimmer mist over wings to bring back more of the blue color.


Cut the wings apart and glue to the back side of the box, along with the skeleton clock face,  pocket watch, a metal clock face, and clock hands.  All pieces were layered with a brad placed through the middle and glued down over the wings.


The turn key was glued to the center of the clock, as shown.


I adhered the Tim Holtz Industrious sticker strips along the roof line on the back.  


A propeller was coated with a thick coating of the Lumiere 3D metallic paint, leaving ridges for added texture, as shown.  A small piece of dowel was glued to the back.


More sticker strips were added along the edges and the roofline.  Then the propeller was glued into the "V" section of the roof top, as shown.  Metal hex nuts were glued to the bottom for feet, and small watch parts were glued inside the hex nut opening.


And here are some closeups of various views and sections of the house.


And here are all four mini house shadowboxes in this series.  Each one has a different meaning for me, and will continue to inspire me in my day to day crafting. 


Gypsy Soul Laser Cuts Supplies:

Mini House Shadowbox 2
Gears Borders & Corners (Special Order)
Gears Shape Set
Steampunk 2 Shape Set
Clock Hands Shape Set
Propellers

Other Supplies:

DecoArt Media Fluid Acrylic Carbon Black
DecoArt Media white gesso
DecoArt Media black modeling paste
DecoArt Media white crackle paint
DecoArt Media turquoise shimmer mister
DecoArt Media orange shimmer mister
DecoArt Media violet shimmer mister
DecoArt Media white shimmer mister
Finnabair graphite texture paste
Ranger Perfect Pearls heirloom gold mist
Jacquard Lumiere 3D bright copper dimensional metallic paint
Jacquard Lumiere 3D steel dimensional metallic paint
Jacquard Lumiere 3D warm gold dimensional metallic paint
Jacquard Lumiere 3D brass dimensional metallic paint
Tim Holtz Industrious Stickers
1/8" wooden dowel
Watch parts
Brads

I hope you have enjoyed my series of mini house shadowboxes from Gypsy Soul Laser Cuts, and that I perhaps have inspired you to make your very own inspirational "village" to help keep those juices flowing.   Thanks for following me along on this journey.  So what will you make of your shadowbox treasures?

Thanks for stopping by, and have a wonderful weekend!

Barbara

Saturday, March 5, 2016

March 2016 Craft Hoarders Anonymous Monthly Blog Hop

Welcome to the March Craft Hoarders Anonymous Blog Hop! You should be coming to my blog from Teresa's blog. After visiting me, hop over to Karen's blog next! To start at the beginning of the hop, and for the full list of Bloggers, go to Gloria's Blog!


March always makes me think of St. Patrick's Day, luck of the Irish, and so on.  It is also National Irish American Heritage Month, so better way to commemorate it than with a 3D Shamrock card.  


I love 3D, and some years ago, I discovered paper tole.   So, what is paper tole? 
    Paper tole, also known as three-dimensional decoupage, is the art of handcrafting three-dimensional pictures from flat prints. This art is created by skillfully cutting, shaping, and assembling pieces of paper layered onto an image until a three-dimensional version of the image emerges.
This technique was right up my alley.  Of course, back in those days, I would stamp, color, and fussy cut an image several times to achieve what can be done quickly and easily today with our die cuts and electronic die cutting machines.  

Below is a picture of the various layers of paper shapes I cut using my Silhouette die cutting machine.  This paper is from Imaginesce.  One sheet is called Sweet Pea from Out on a Whim collection, and the other two prints are Totally Taj and Artistic Kashmir, both from from Exotic East collection.  The date on the paper tab is 2007, now that is some serious hoarding!  


The papers were layered onto the card base, as shown below.  The top two layers were adhered with foam dots to raise it off the card.  I also added gold pearls around the perimeter, as shown.


The shamrock bouquet needed to be shaped by using a large ball stylus and forming the petals over a soft piece of foam.


Then the piece was turned over to push the petals down in the center, as shown.


And here is one of the completed pieces.  Each layer will give beautiful dimension and add so much to your card.


Tiny pieces of foam dots were adhered to the centers of the shamrocks to keep them lifted, only gluing down the end of the stems.  


Each shamrock was adhered over its corresponding petal below it, giving this beautiful layering effect.   


I added Crystal Stickles glitter glue to the petals, and a seam binding bow with a tiny metal lock charm. 


Here is the list of the participating Bloggers. Make sure to hop along and say hello! 

Craft Hoarders Anonymous Blog Hop List:
Gloria Stengel
Debbie Seyer
Pam Bray
Jacquie Southas
Glenda Brooks
Tracey Sabella
Donna Idlet
Wendi Robinson
Teresa Horner
Barbara Rankin (you are here)
Karen Zueger-Brownell
Christy Houser


I hope we have inspired you to join us every month and de-hoard those supplies! 

Have a wonderful and creative weekend, but most of all, have fun!!!

Barbara

Friday, March 4, 2016

Follow Your Heart Art Journal Page Video Tutorial

Hello everyone, and welcome back.  I am excited to share another youtube video tutorial with you today. I am using those wonderful paints from ColourArte, lots of texture, and rich, vibrant colors.  I hope you will take a moment to watch the video, and enjoy the process.  


The video


Art journaling is so much fun and relaxaing. I hope I have inspired you to "Follow Your Heart" in your next project!


As always, thanks so much for stopping by and taking a moment to look.  Have a super wonderful weekend, and stay crafty, my friends!

Barbara

Thursday, March 3, 2016

Mixed Media ATCs - Best Day Ever

--------------------------------------------------------------------------------------------------
I have two posts to share today, so if you would like to see my project for Gypsy Soul Laser Cuts, please click here.  Thanks!

--------------------------------------------------------------------------------------------------

Hello everyone!  So glad to see you again.  Barbara here with my second post for the Craftwell blog.  I am having so much fun with this very versatile little machine.  If you have not used an airbrush before, you just don't know what you are missing.  I am here to tell you that it is so easy and so enjoyable!  I am also using products from our sponsor, Teresa Collins.
I made three Altered Trading Cards (ATCs) with, believe it or not, St. Patrick's Day in mind, hence, the green background and tiny shamrocks to tie my ATC set together.


Supplies:


Teresa Collins Project Dies
Ivory card stock
Shamrock craft punch
Charcoal Pencils
Stripes stencil
Texture Paste
Pearlescent dimensional paint
Copper tube beads

Cut three pieces of card stock to ATC size (2-1/2" x 3-1/2").  Spread texture paste through stripes stencil and let dry.  Round corners.


Color background with a variety of green marker colors.  Continue adding colors until you like the result.  I used arm grey to tone down the brightness of the color a bit.


Die cut the honeycomb, butterfly, star in circle, key, numbers, and Best Day Ever using the Teresa Collins dies.  Color each with markers, as shown.  Tear the honeycomb in half irregularly, adhere to two ATCs.  Use the negative pieces left from the honeycomb and add to the third ATC.  

Add die cuts to each ATC, as shown.  Add shading around the focal image on each one with a charcoal pencil.  

Color a scrap piece of card stock with green markers and punch tiny shamrocks, adhering to the ATCs, as shown. 


Use a pearlescent dimensional paint to add dots on each ATC and along the stenciled stripes.


Thanks for stopping by, and be sure to check the Craftwell blog for more inspiration from the team.


Fairy Garden House

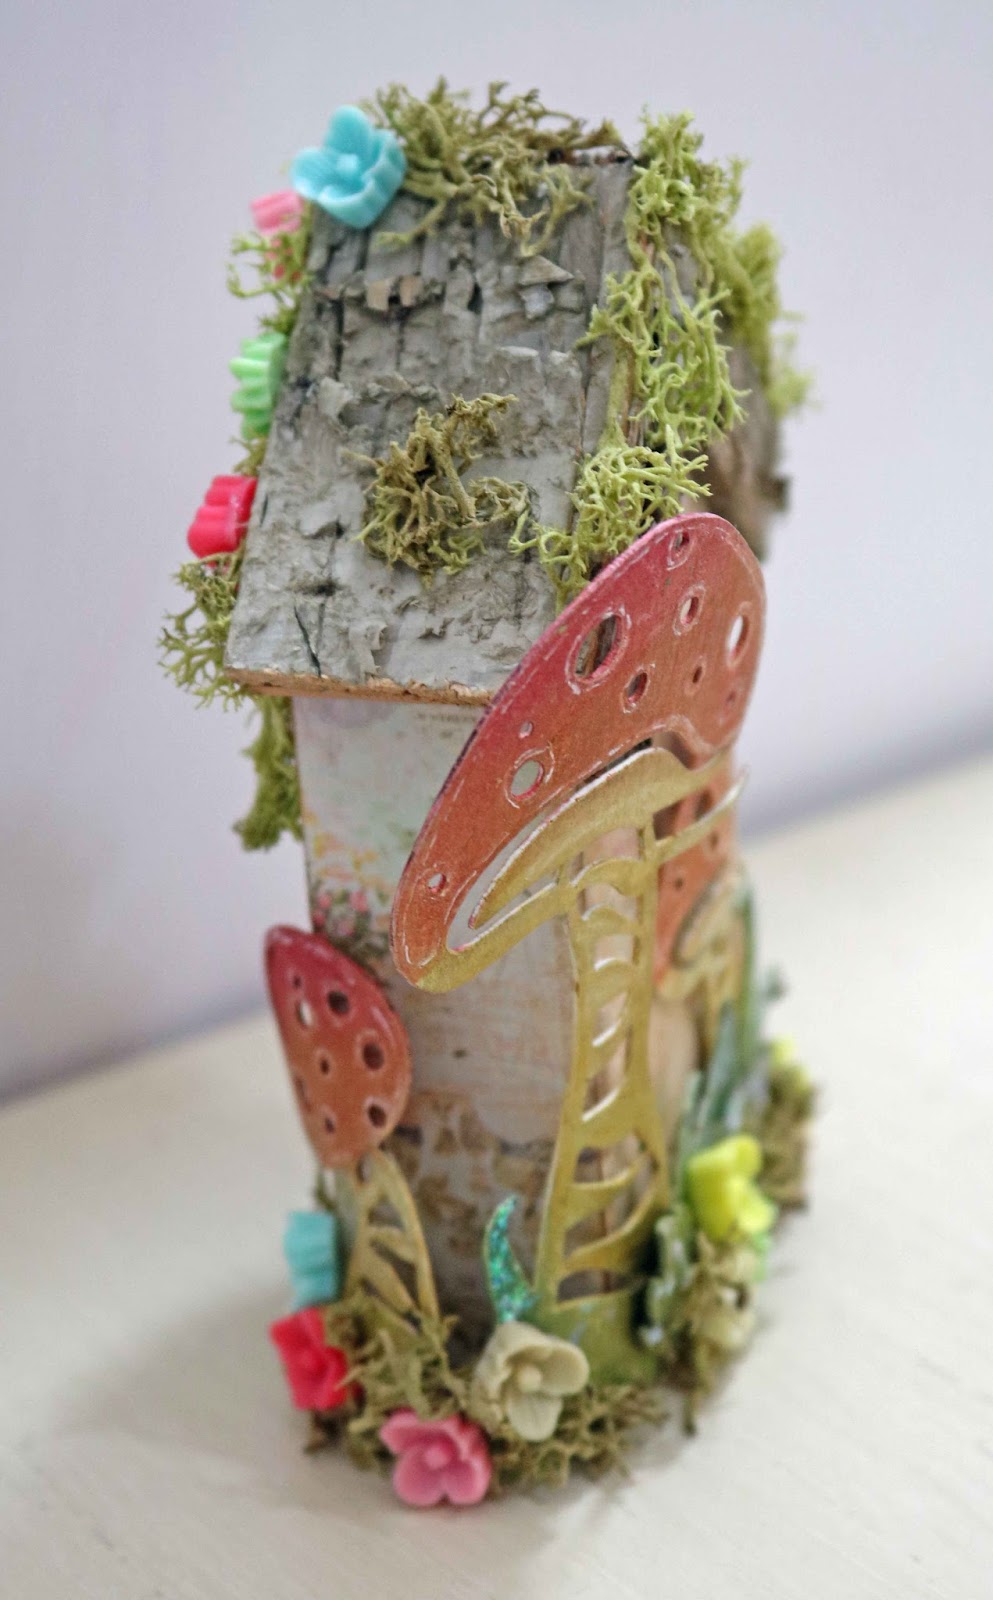
Hey there everyone!  Barbara here with my third in the series of mini house shadow boxes by Gypsy Soul Laser Cuts.  Today's project is a Mushroom Fairy Garden House.  I had so much fun making this one.  I hope you like it.  To see my previous mini house shadow box, please click here.

As always, I start out by laying out my pieces so I can see clearly how to glue them together.


Paint box inside and out with flesh tint acrylic paint, or color that matches your paper.  Then cover box, inside and out, with Prima Fairy Rhymes paper.  The roof was covered with natural birch bark strips.  


I painted the mushrooms with white gesso first, then began the coloring process with Caran'dache NeoColor II water soluble crayons.  I did not color all of these, but I was not sure which ones I would use for my fairy garden until I got started.  I used a white gel pen to do a little pen work on the mushroom heads, an idea I borrowed from my good friend and fellow team mate, Pam Bray.  


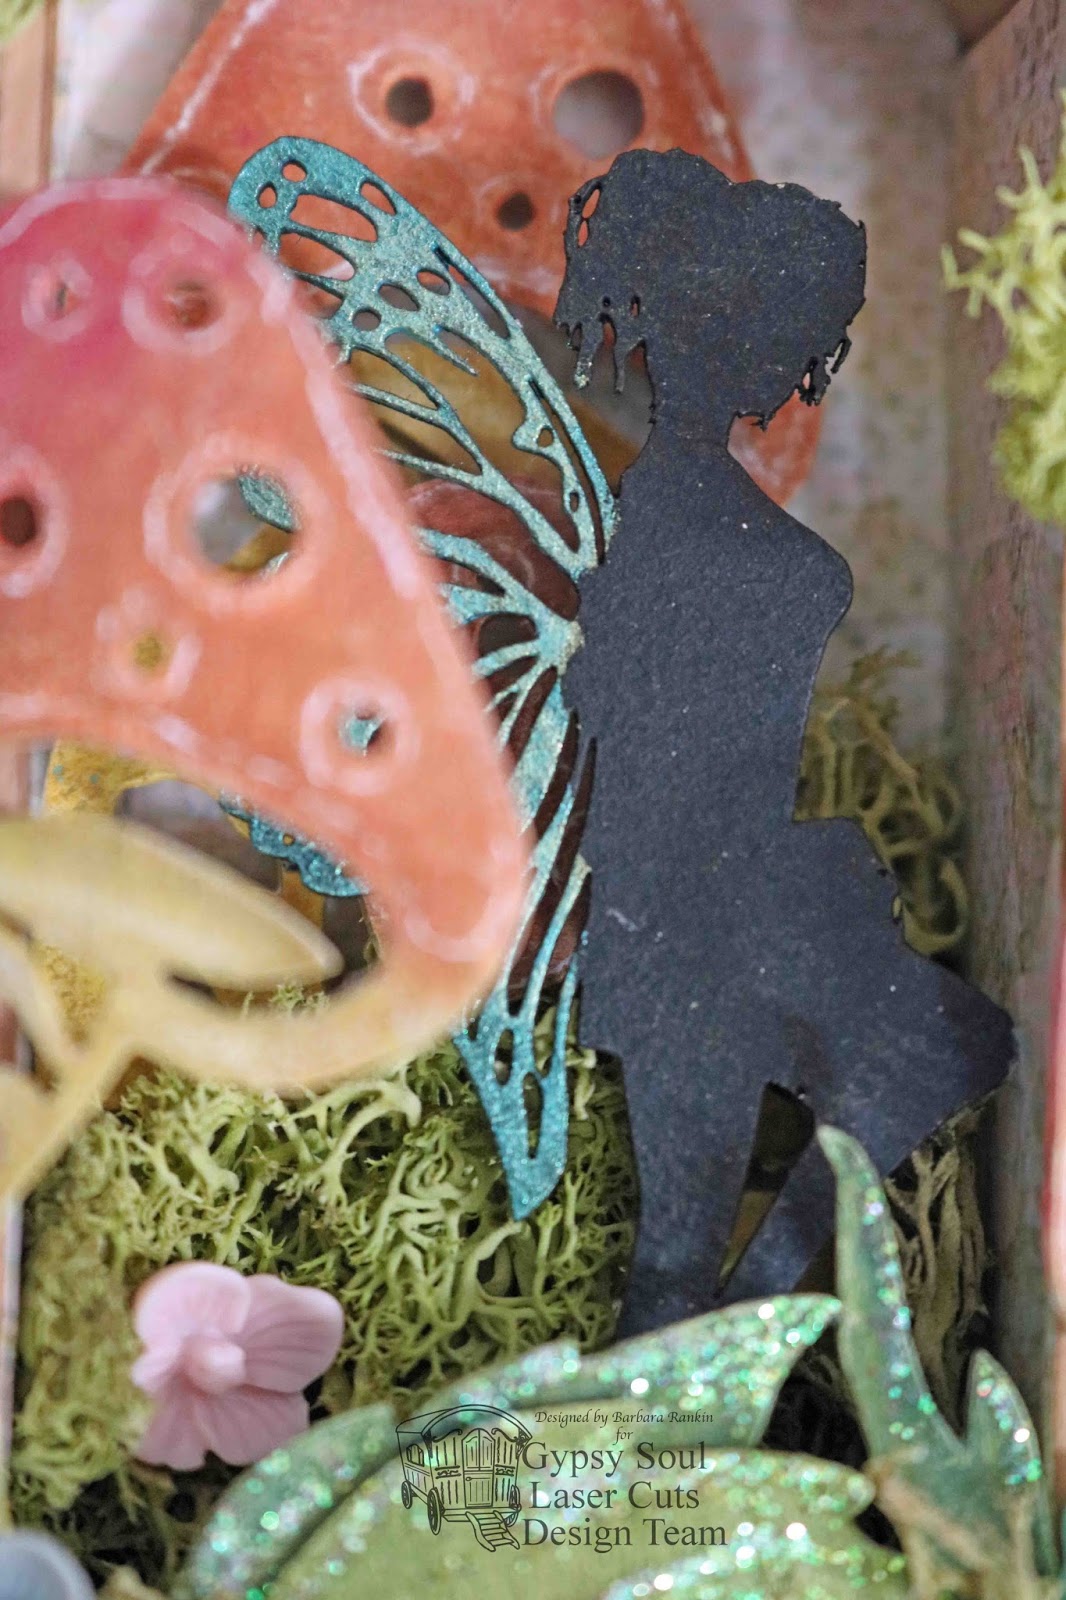
Paint the fairy with black acrylic paint, including the wings.  Then color the wings with Pearl-Ex watercolors in a blue interference color, then add a bit of green interference color, as shown.  The interference colors only show up really well on a black or dark surface.


Using foam dots in varying levels, I adhered the two mushrooms inside the box, as shown.  Reindeer moss was added as garden filler.


Foam dots were placed beneath the fairy to raise her up and glued at her knee and foot.  You can see where the glue is still wet on her foot.  


The largest strip of mushrooms (colored in the photo above) was wrapped around the base of the house and glued to the front and back bottom only.    Use fingers to shape and bend the mushroom base and the mushrooms themselves.  

Tiny resin flowers and bits of reindeer moss were adhered along the base and the roof, as shown.

Crystal glitter glue was added to the leaves for extra magical sparkle.

Here are a few close ups from different view points of my magical fairy garden.


Supplies:

Mini House Shadow Box 4
Mushrooms Shape Set
Garden Fairies Medium (pre-order)

White gesso
Black gesso
Prima Fairy Rhymes paper
Prima resin flowers
Natural birch bark strips
White gel pen
Reindeer moss
Pearl-Ex Interference watercolors
Water brush
Tea Dye distress ink (for edging the paper)
Crystal stickles

I hope you are enjoying my series of mini house shadowboxes from Gypsy Soul Laser Cuts.  I plan on displaying these in my studio for inspiration, and I hope that perhaps I have inspired you in some small way, too.

Thanks for stopping by, and have a crafty week!

Barbara