Hey there, Sin City Stamps fans! How was your 4th of July? I hope everyone had a memorable holiday. As for me, it was quiet, but I did get to create, which always keeps me happy.
Today, I want to share with you my altered ATC (Altered Trading Card) Box. Here is a picture of my finished box.
Supplies:
Sin City Stamps: Art Journaling with Terri Sproul
Dew Drops (Fall) (The Robin's Nest)
Black archival ink
3-D Crystal Lacquer
Distress inks: Evergreen Bough, Spiced Marmalade, Shabby Shutters, Peeled Paint, Picked Raspberry
White Gesso
Woodsies wooden shapes
Paper Artsy Fresco Finish Acrylic Paints: Vintage Lace, French Roast
Ultimate Glue
Flourish gem stickers
Directions:
I bought this bare wooden box at my local craft store. It is supposed to hold playing cards, but ATCs will also fit in the openings.
Remove the tiny brass hinges and box closures. This will make it so much easier to decorate the box. (NOTE: Put the tiny parts somewhere safe until you need them).
Sand, then paint box, inside and out, with a coat or two of white gesso. Sand again, if necessary.
Paint box, inside and out, with Vintage Lace acrylic paint. Dry brush all edges, inside and out, with French Roast acrylic paint. Set aside.
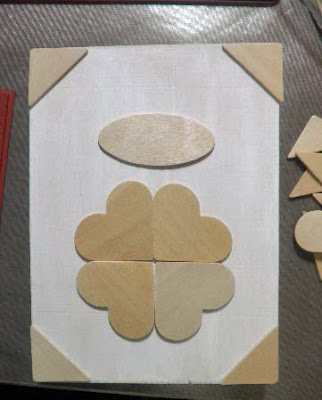
Pick out some woodsies shapes and lay them out on your box in a configuration that is pleasing to you.
Paint the wood shapes with gesso on top and sides. (TIP: Adhere double sided tape to a piece of card stock. Attach your shapes to it and paint them. Not only will you keep the paint off of your fingers, but I found it to be much faster. Also, you can quick dry the paint with your heat gun and the wood shapes will not blow away.)
Re-arrange your wood shapes onto the sticky card stock, the same way you plan to adhere it to your box. Stamp your images onto the shapes. (NOTE: Use an archival ink for this so that it will not run.) If some of the images seem too dark, use a very dry brush (or your finger) and add tiny dabs of gesso over that area.
Add color to your pieces. I sponged on various colors of distress ink.
Use a brush to seal each piece with a light coat of 3D Crystal Lacquer. Since both the distress inks and the 3D Crystal Lacquer are water-based, the lacquer intensified the colors, just like when you use watercolor pencils and a wet paintbrush. Pretty cool, right? (TIP: I like to run a bead of lacquer around the edge of my pieces, then fill in the center, as shown in the photo below.)
Once the lacquer has dried, remove the pieces and edge each one with black archival ink. You can also edge the pieces before adding the lacquer, as shown in the photo. Lay them flat onto a non-stick craft sheet and apply a liberal coat of 3D Crystal Lacquer, set aside to dry. (NOTE: I edged a second bare wooden oval piece (undecorated) with black ink so that I can layer it beneath the ART label and raise it up for interest.)
Now that you have your embellishments made, you can begin adding them to the front of your box. I first added my corner pieces.
Next, I glued down my remaining pieces in the same arrangement as I had laid them out previously.
Add some flourish bling and you are ready to fill it with your favorite ATCs. (See photo of finished box above). Here are a couple of close-ups of the stamped woodsies.
I hope you enjoyed my altered ATC box project. Now that we have the box decorated, we need to add some ATCs. So please check back in a couple of weeks when I show you how to make some ATCs to keep in your box. I would also like to invite you to visit the Sin City Stamps blog for more inspiration from the design team.
In addition, I want to tell you about these two fabulous stamp plates that are now available; Nautical 1 and Nautical 2 are ready for shipping. I love both of these sets and I think they would make great summer page layouts for those beach vacation pictures, as well as making great masculine cards. Or how about a mini album for saving your beach treasures. Check these out in the Sin City Stamps store.

Best of all, you can get 20% off your entire purchase during the month of July. Just use the coupon code: nautical20 . So go stock up now! And with every purchase, you are entered into the Sin City Stamps $1,000 Giveaway. Click here for the official rules.
Barbara


Such a cool project, love those heart and the way you arranged them and that 3D lacquer really makes them pop! Brilliant make!!
ReplyDeleteLOVE the way you've made these wood pieces so interesting. I'm definitely going to try this myself!
ReplyDelete